hokiematt
Posts: 87
Joined: Thu Nov 02, 2017 8:57 pm
Location: Salisbury, NC

Re: Introducing OVMS for RAV4 EV

asavage wrote: Wed May 04, 2022 5:19 pm Ugh. How do you know these things? I can't tell visually, and I've read hundreds of drawings and got paid to do it ;)
I have the benefit of having these connectors sitting on my desk, next to a very good LED magnifier/light :D
asavage
Posts: 348
Joined: Mon Aug 07, 2017 4:55 pm
Location: Oak Harbor, Wash.
Contact: Website

Re: Introducing OVMS for RAV4 EV

I like pictures.

Image
Image
Image
Image
Image
Image
Image
Image
Image
Image

Not professional quality, but a decent prototype. I sure hope it works :)

A few things I could have done better:
  • Female (w/male pins): I wish I could have located my small nippers, as I would have cut off the unused pins on the back of the female connector, which would have eased some of the bulk soldering back there.
  • Female: The epoxy potting really went poorly; I was trying to use up some decade-plus old JB Weld I had rotting in a drawer, and the viscosity was too high to flow properly. As was the viscosity of my next-oldest epoxy as well :(
  • Male: I could have connected the shield of the LAN jack to ground, if I had thought ahead. That's not necessary, but it would have been nice.
  • Male: My Pressmaster 4300-3146 crimper die collection has a lot of dies, but while the 4300-3146 is supposed to work for 10-22 AWG open barrel connectors, I ran into the same issue as last time I tried actually crimping 22 AWG: it just doesn't work. I ordered (and received, too late) the alternate die 4300-3150, which is for 18-26 AWG, to try next time. (TME Electronic Components shipped the die from Poland to my doorstep in three days!, and had the best price and no extra shipping. Recommended.) Instead, I had to solder all the terminals, which really doesn't work well as if you get any solder on the outside of the terminal, it changes its outer dimensions and then doesn't want to insert into the housing. I had to use some specialized tools and a lot of force to assemble the male connector (with female terminals).
Last edited by asavage on Wed May 18, 2022 2:03 am, edited 2 times in total.
Regards,
Al Savage
2014 Rav4 EV, Shoreline Blue Pearl, #2609, first use 04Jun2014, 49k miles (Aug2017), OpenEV-SE 40A. First DU replacement May2018 59k.
2018 Model 3 LR AWD, blue. 9.6kw solar
http://nissandiesel.dyndns.org
asavage
Posts: 348
Joined: Mon Aug 07, 2017 4:55 pm
Location: Oak Harbor, Wash.
Contact: Website

Re: Introducing OVMS for RAV4 EV

Yea! I get to do it better, a second time around, because I did pot the connector before testing -- I do know better, what was I thinking?

First, here's a instrument cluster combo that isn't frequently seen:

Image


Here's the reason: I have the what should be in pins 6 & 16 shifted over to 5 & 15.

Image

When my new nippers arrive, and I've picked up some fresh epoxy, I'll start over. Fun stuff!
Regards,
Al Savage
2014 Rav4 EV, Shoreline Blue Pearl, #2609, first use 04Jun2014, 49k miles (Aug2017), OpenEV-SE 40A. First DU replacement May2018 59k.
2018 Model 3 LR AWD, blue. 9.6kw solar
http://nissandiesel.dyndns.org
hokiematt
Posts: 87
Joined: Thu Nov 02, 2017 8:57 pm
Location: Salisbury, NC

Re: Introducing OVMS for RAV4 EV

Al-

Personal preference here, but you might consider using some small pieces of heat shrink over the leads soldered to the header pins; there's not much clearance between connections and I'd argue that a shrink sleeve (or some Kapton tape) is better protection against a short than mere potting alone.
asavage
Posts: 348
Joined: Mon Aug 07, 2017 4:55 pm
Location: Oak Harbor, Wash.
Contact: Website

Re: Introducing OVMS for RAV4 EV

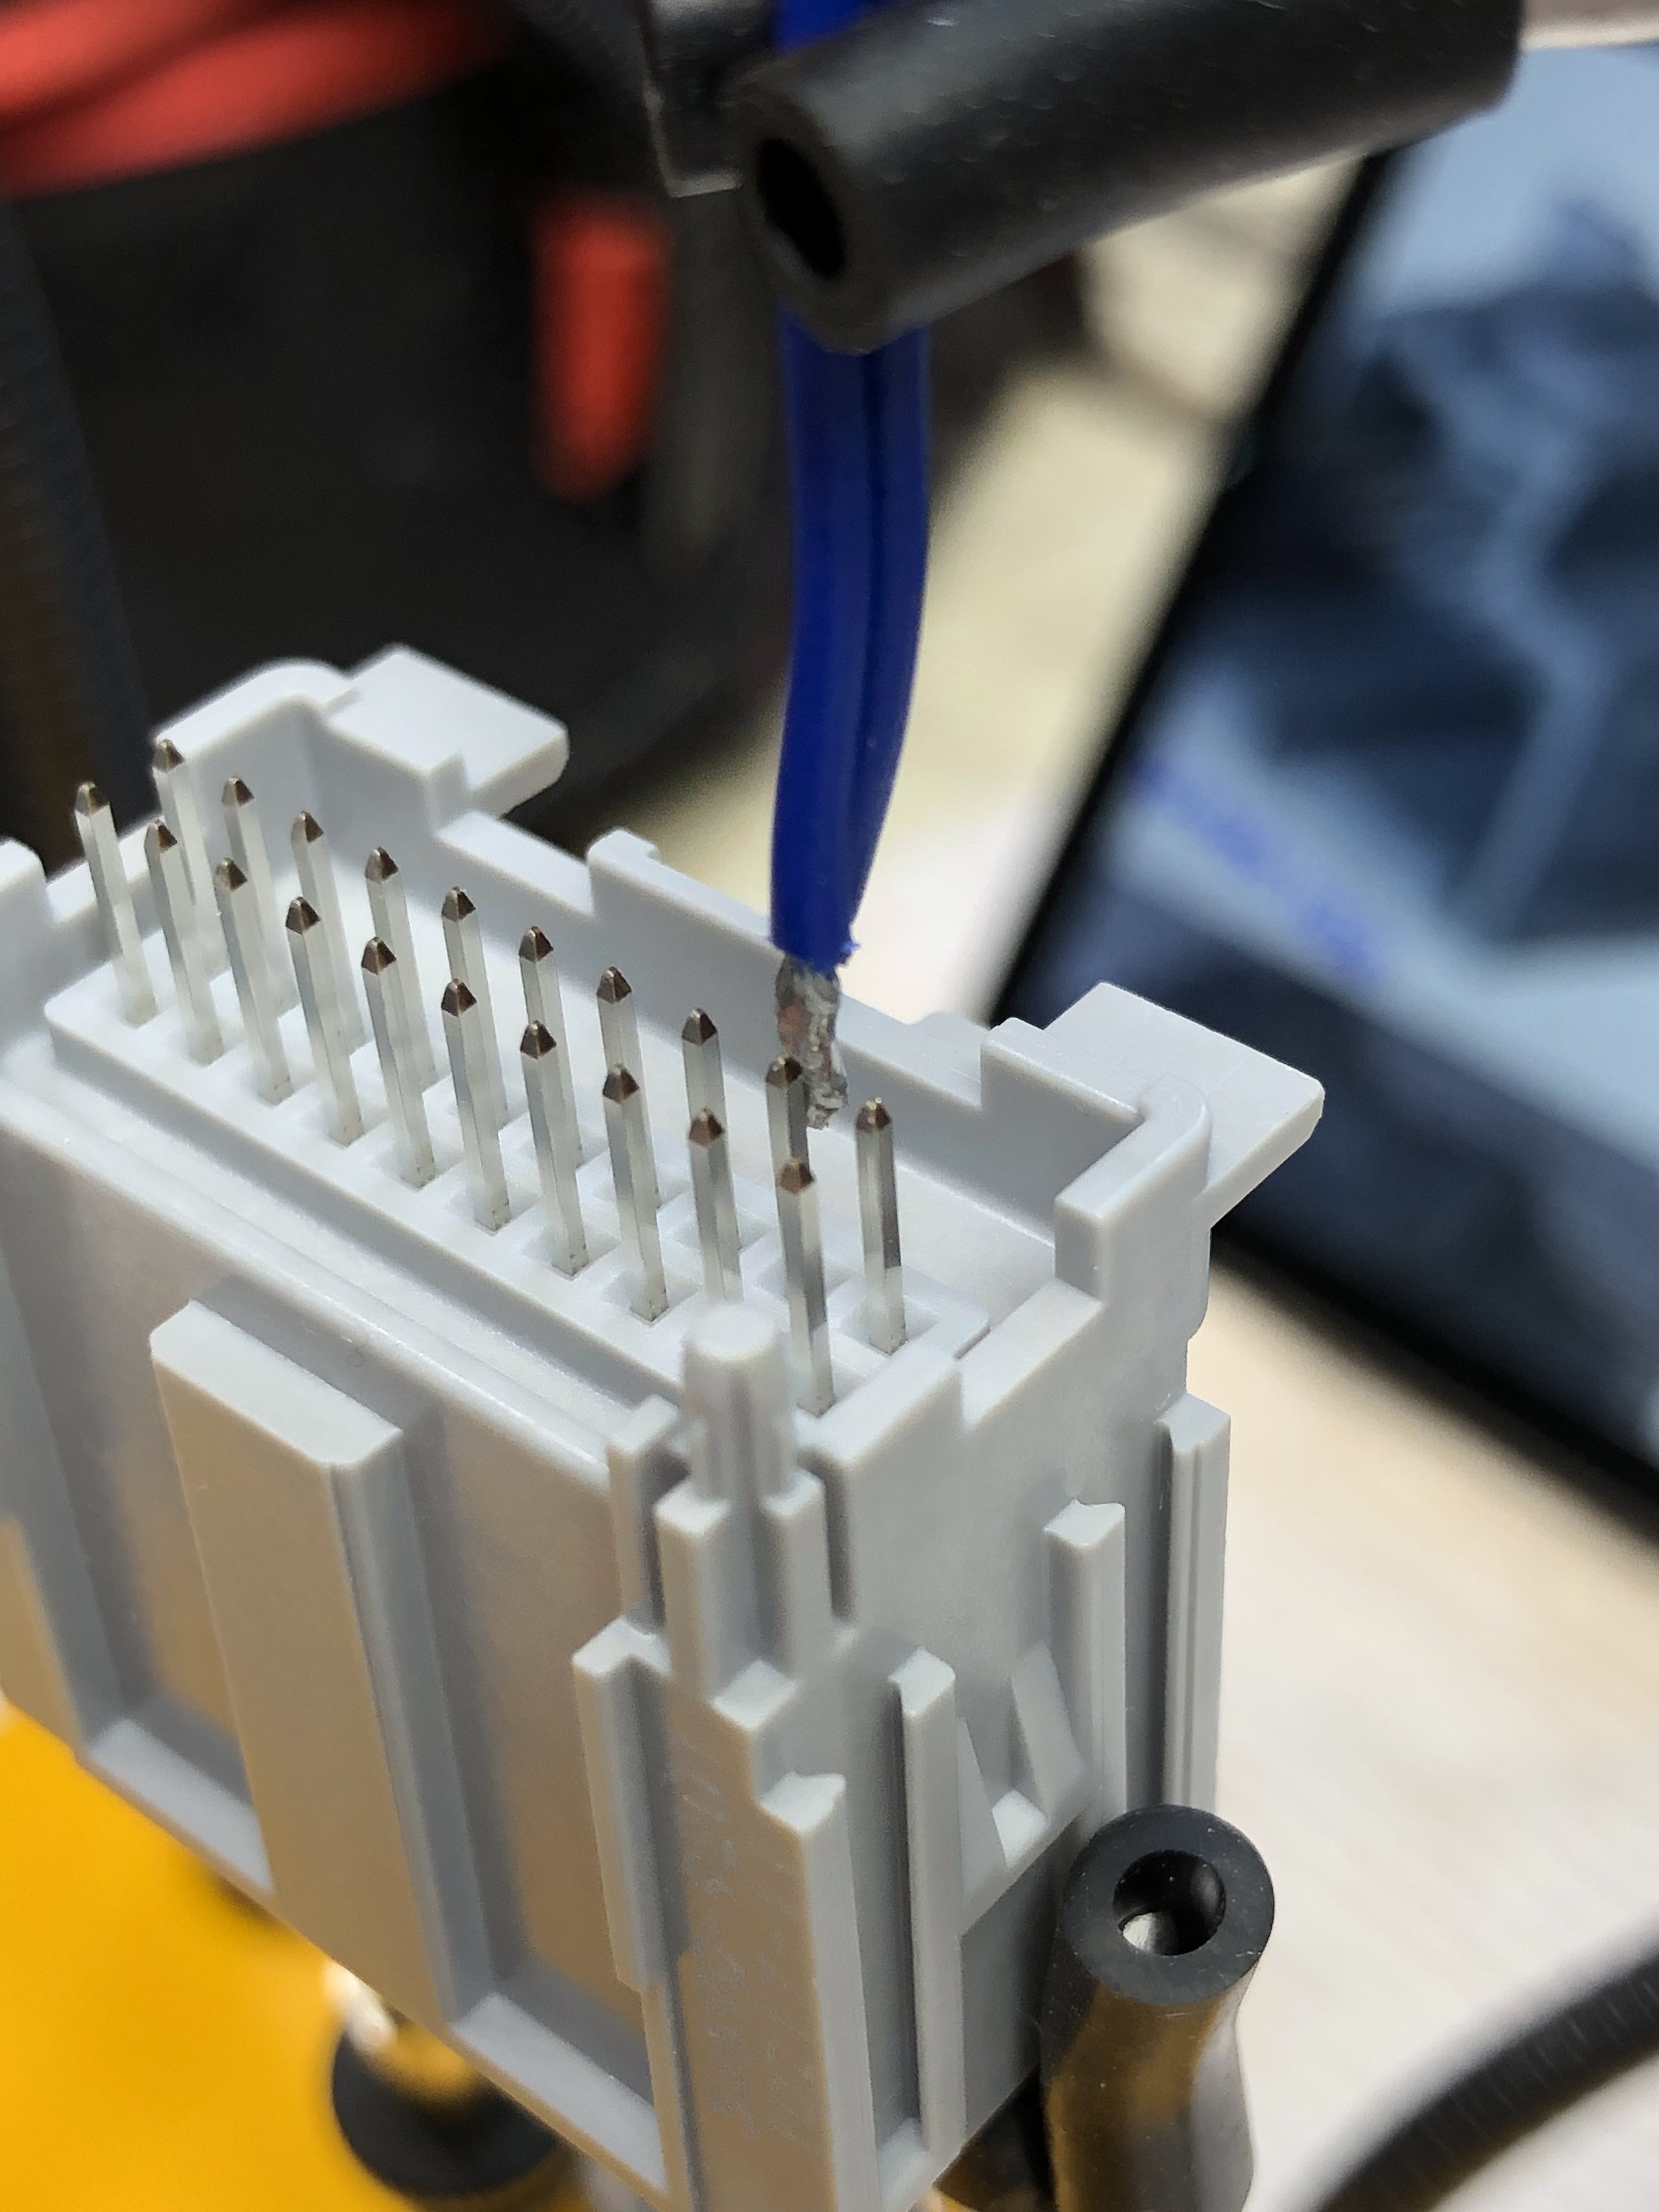
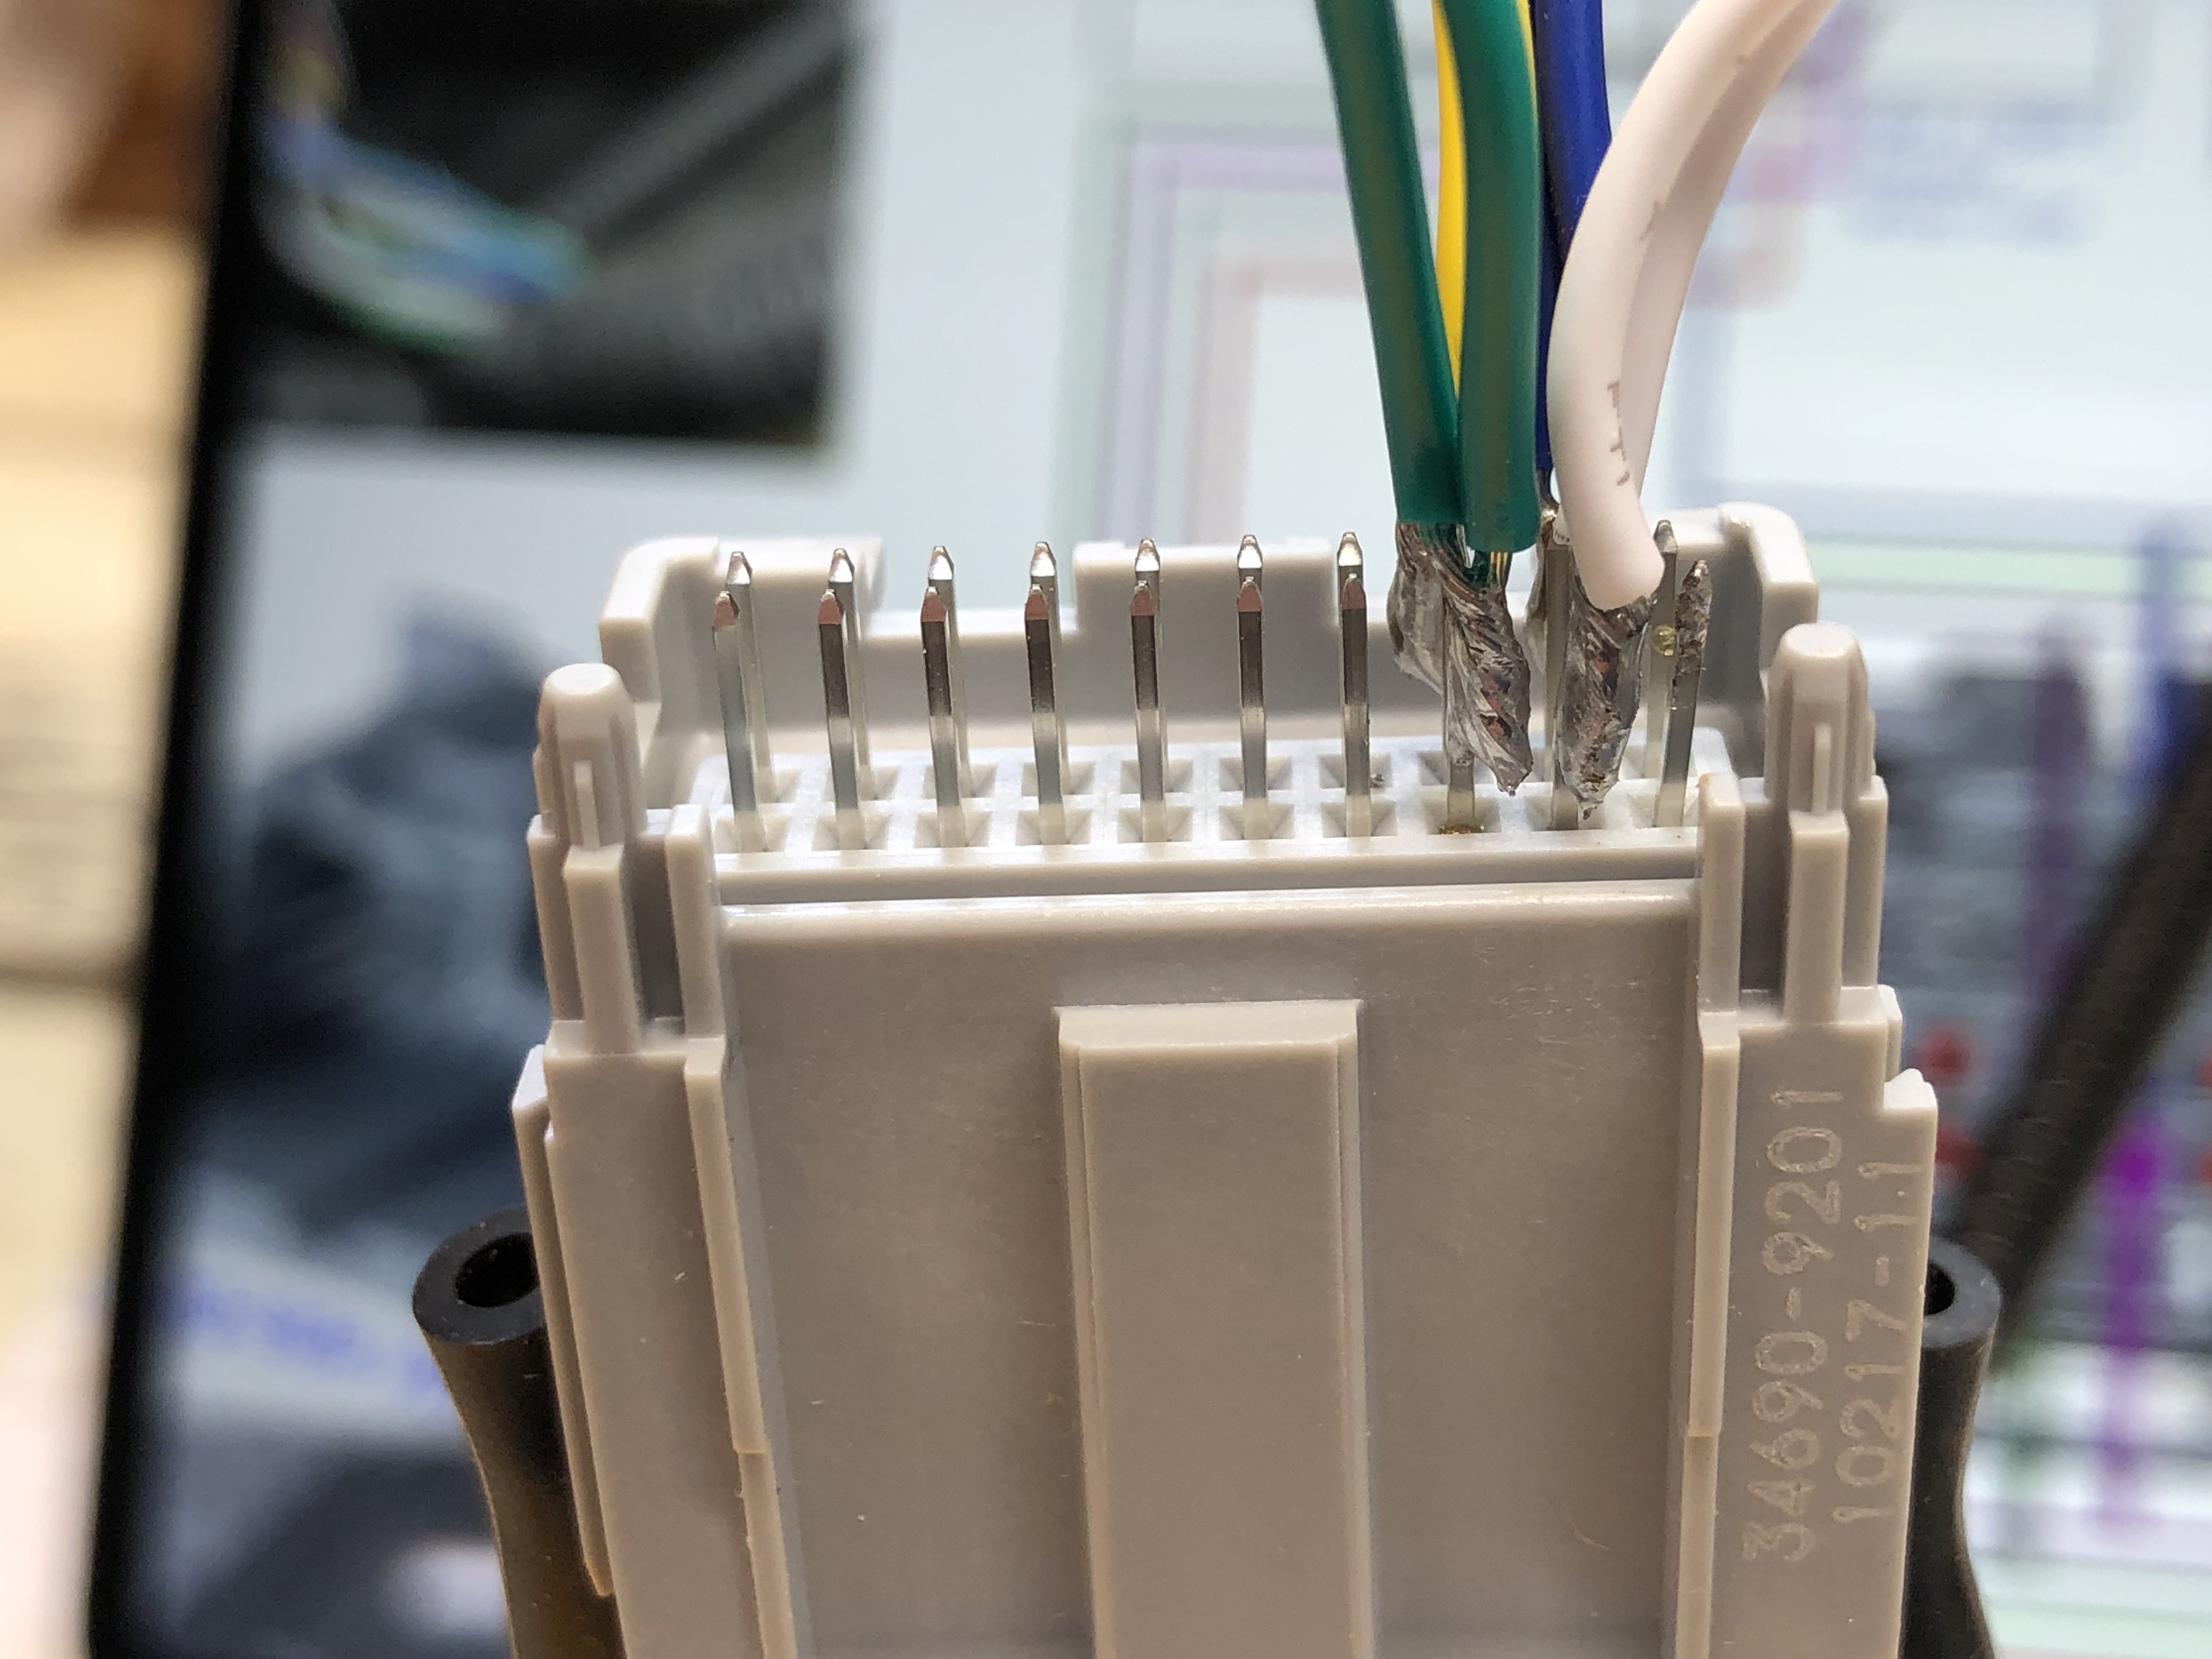
Tough installing heat shrink over two leads, then sliding down onto the pin after soldering. I'd have to use larger heat shrink than would fit well. This is all low voltage stuff, so any gap >.020" is fine, as long as the humidity stays reasonable.

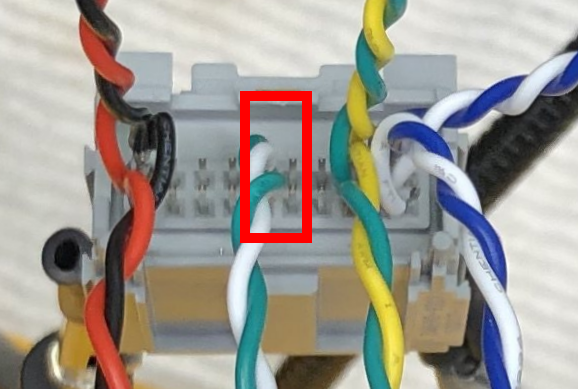
With proper nippers, a pin forest this sparse will be easy-peasy, once I nip off the unused pins. Then, on adjacent pins, I can bend them away from each other. I just could not find my nippers -- I just signed a lease and am moving residence -- and you can't really used gen-purpose side-cutters on this stuff, they're too large.

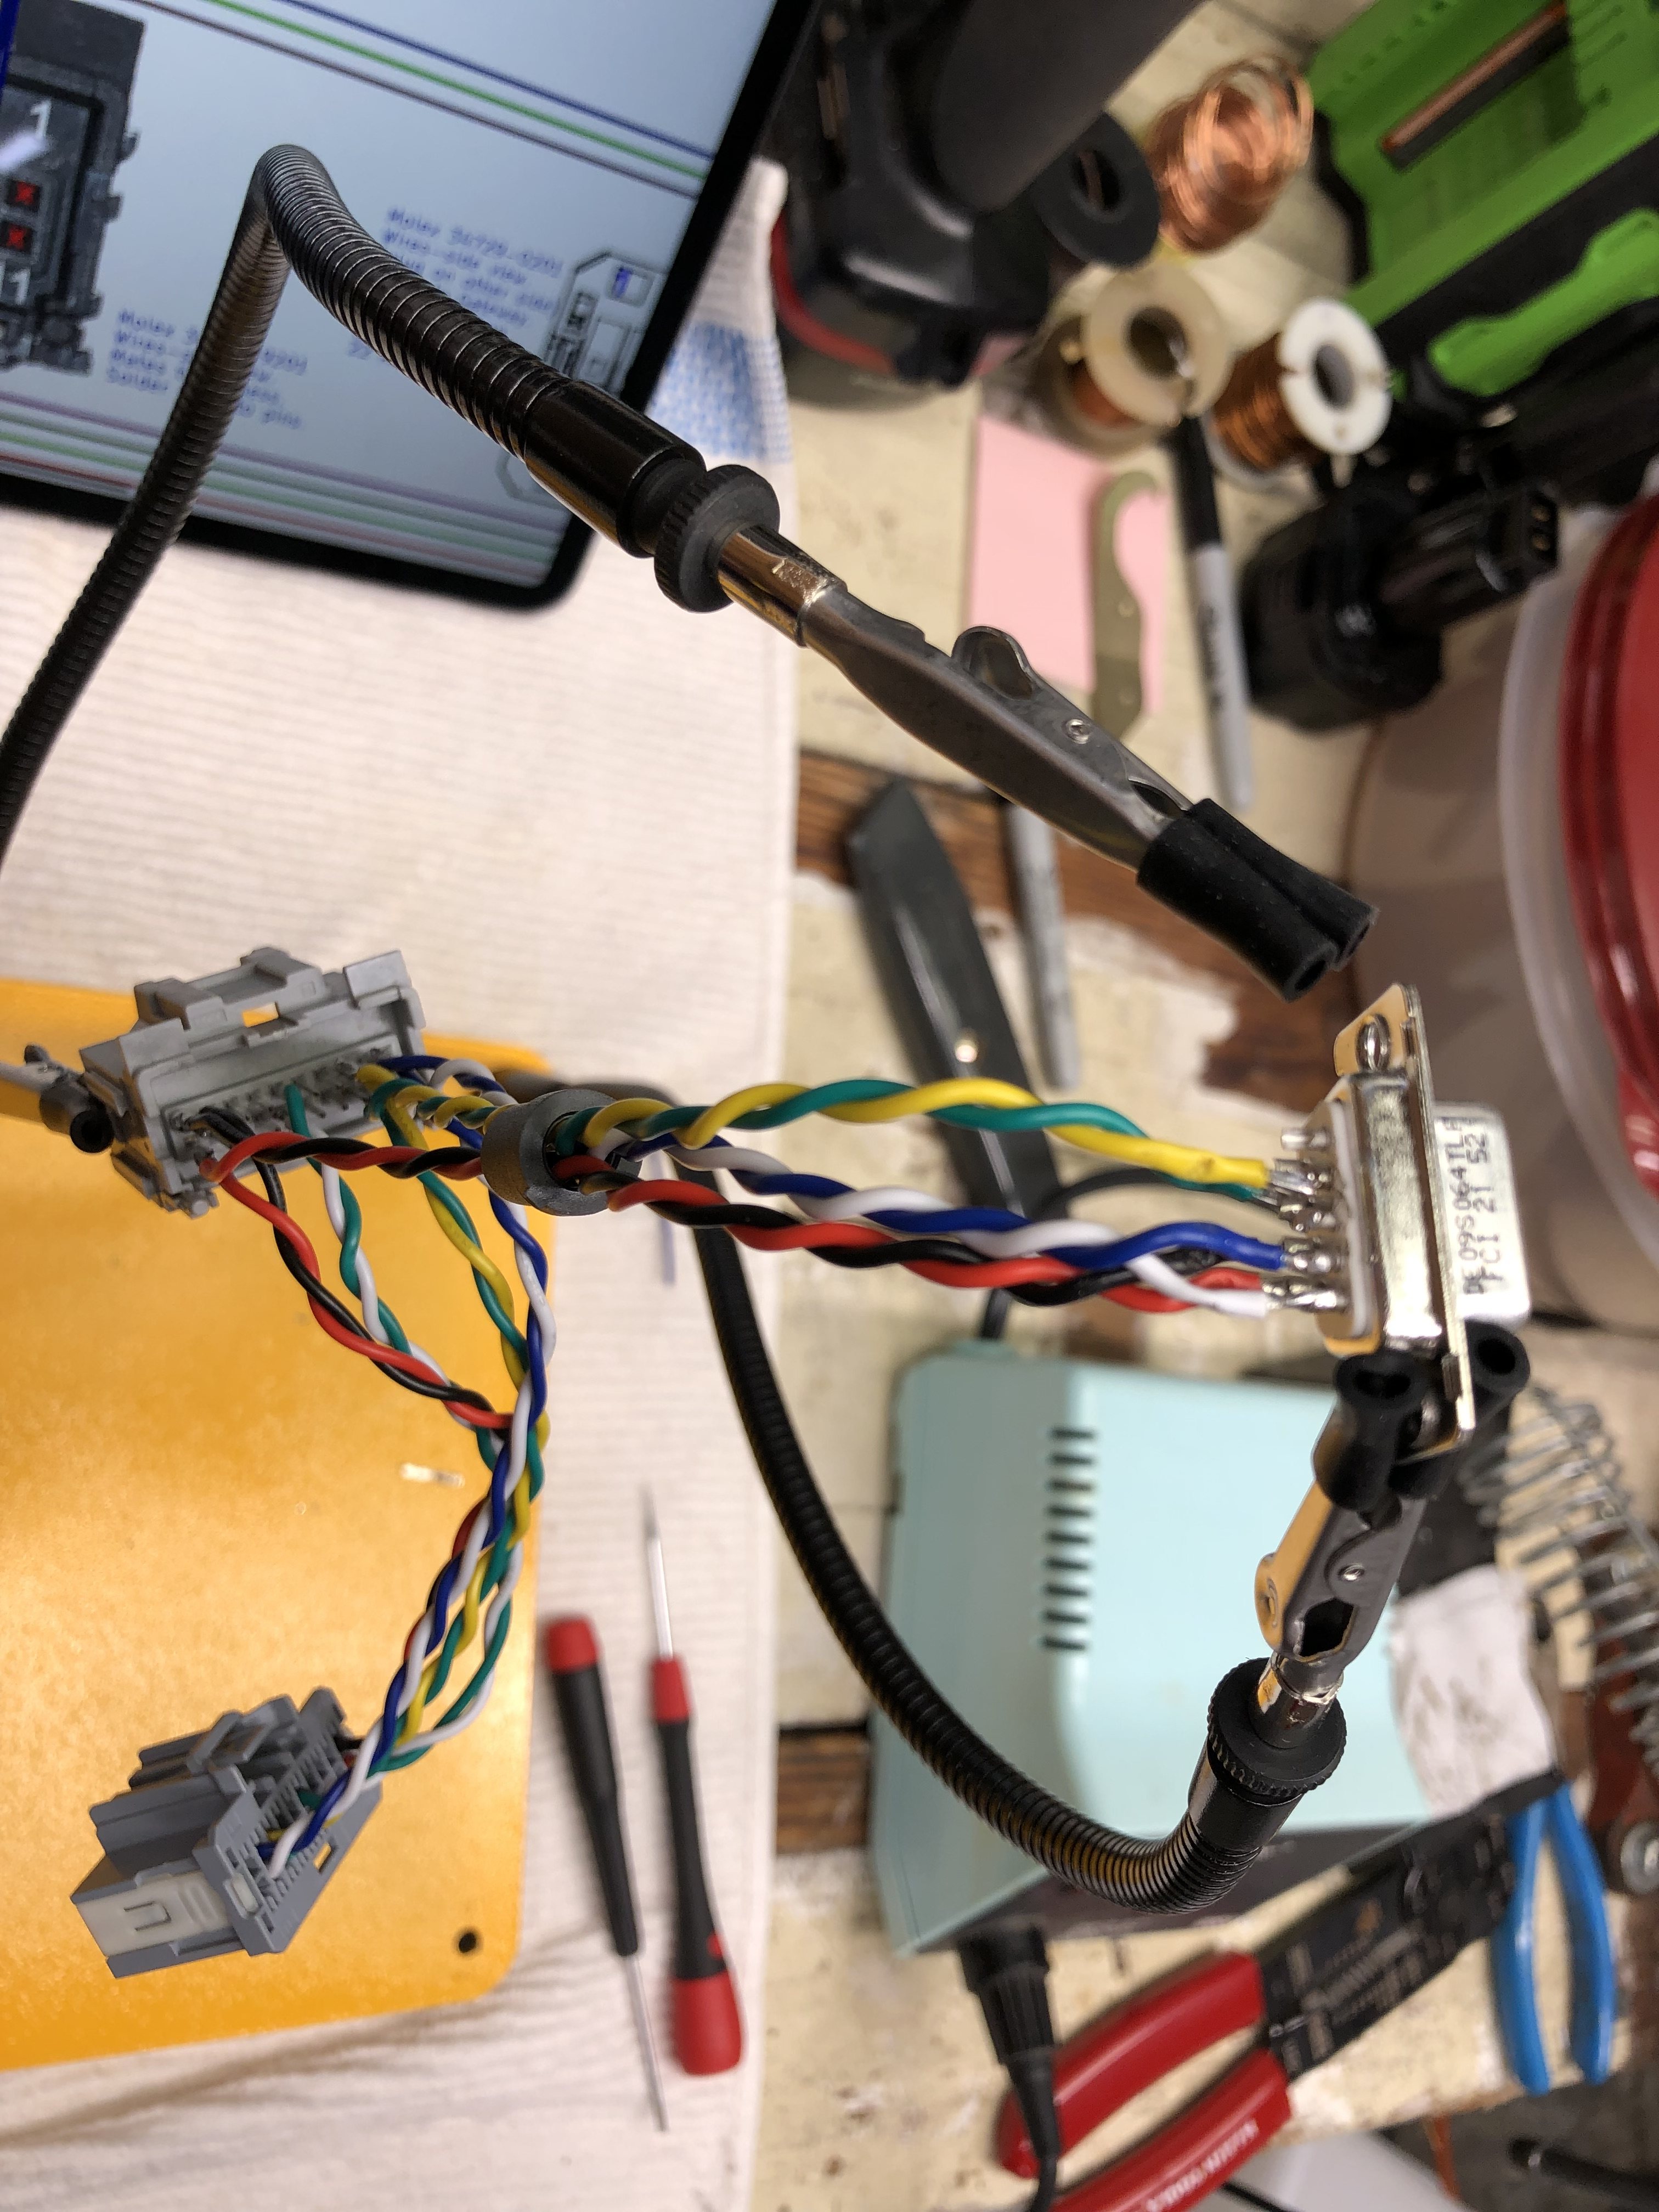
I don't mind epoxy, it's just that the electrical test is supposed to precede the potting, and I got it out of order again. Like soldering terminals and then remembering that I was supposed to feed through a housing first, or install heat shink first, or whatever. Happens to me all the time, esp. with interruptions.

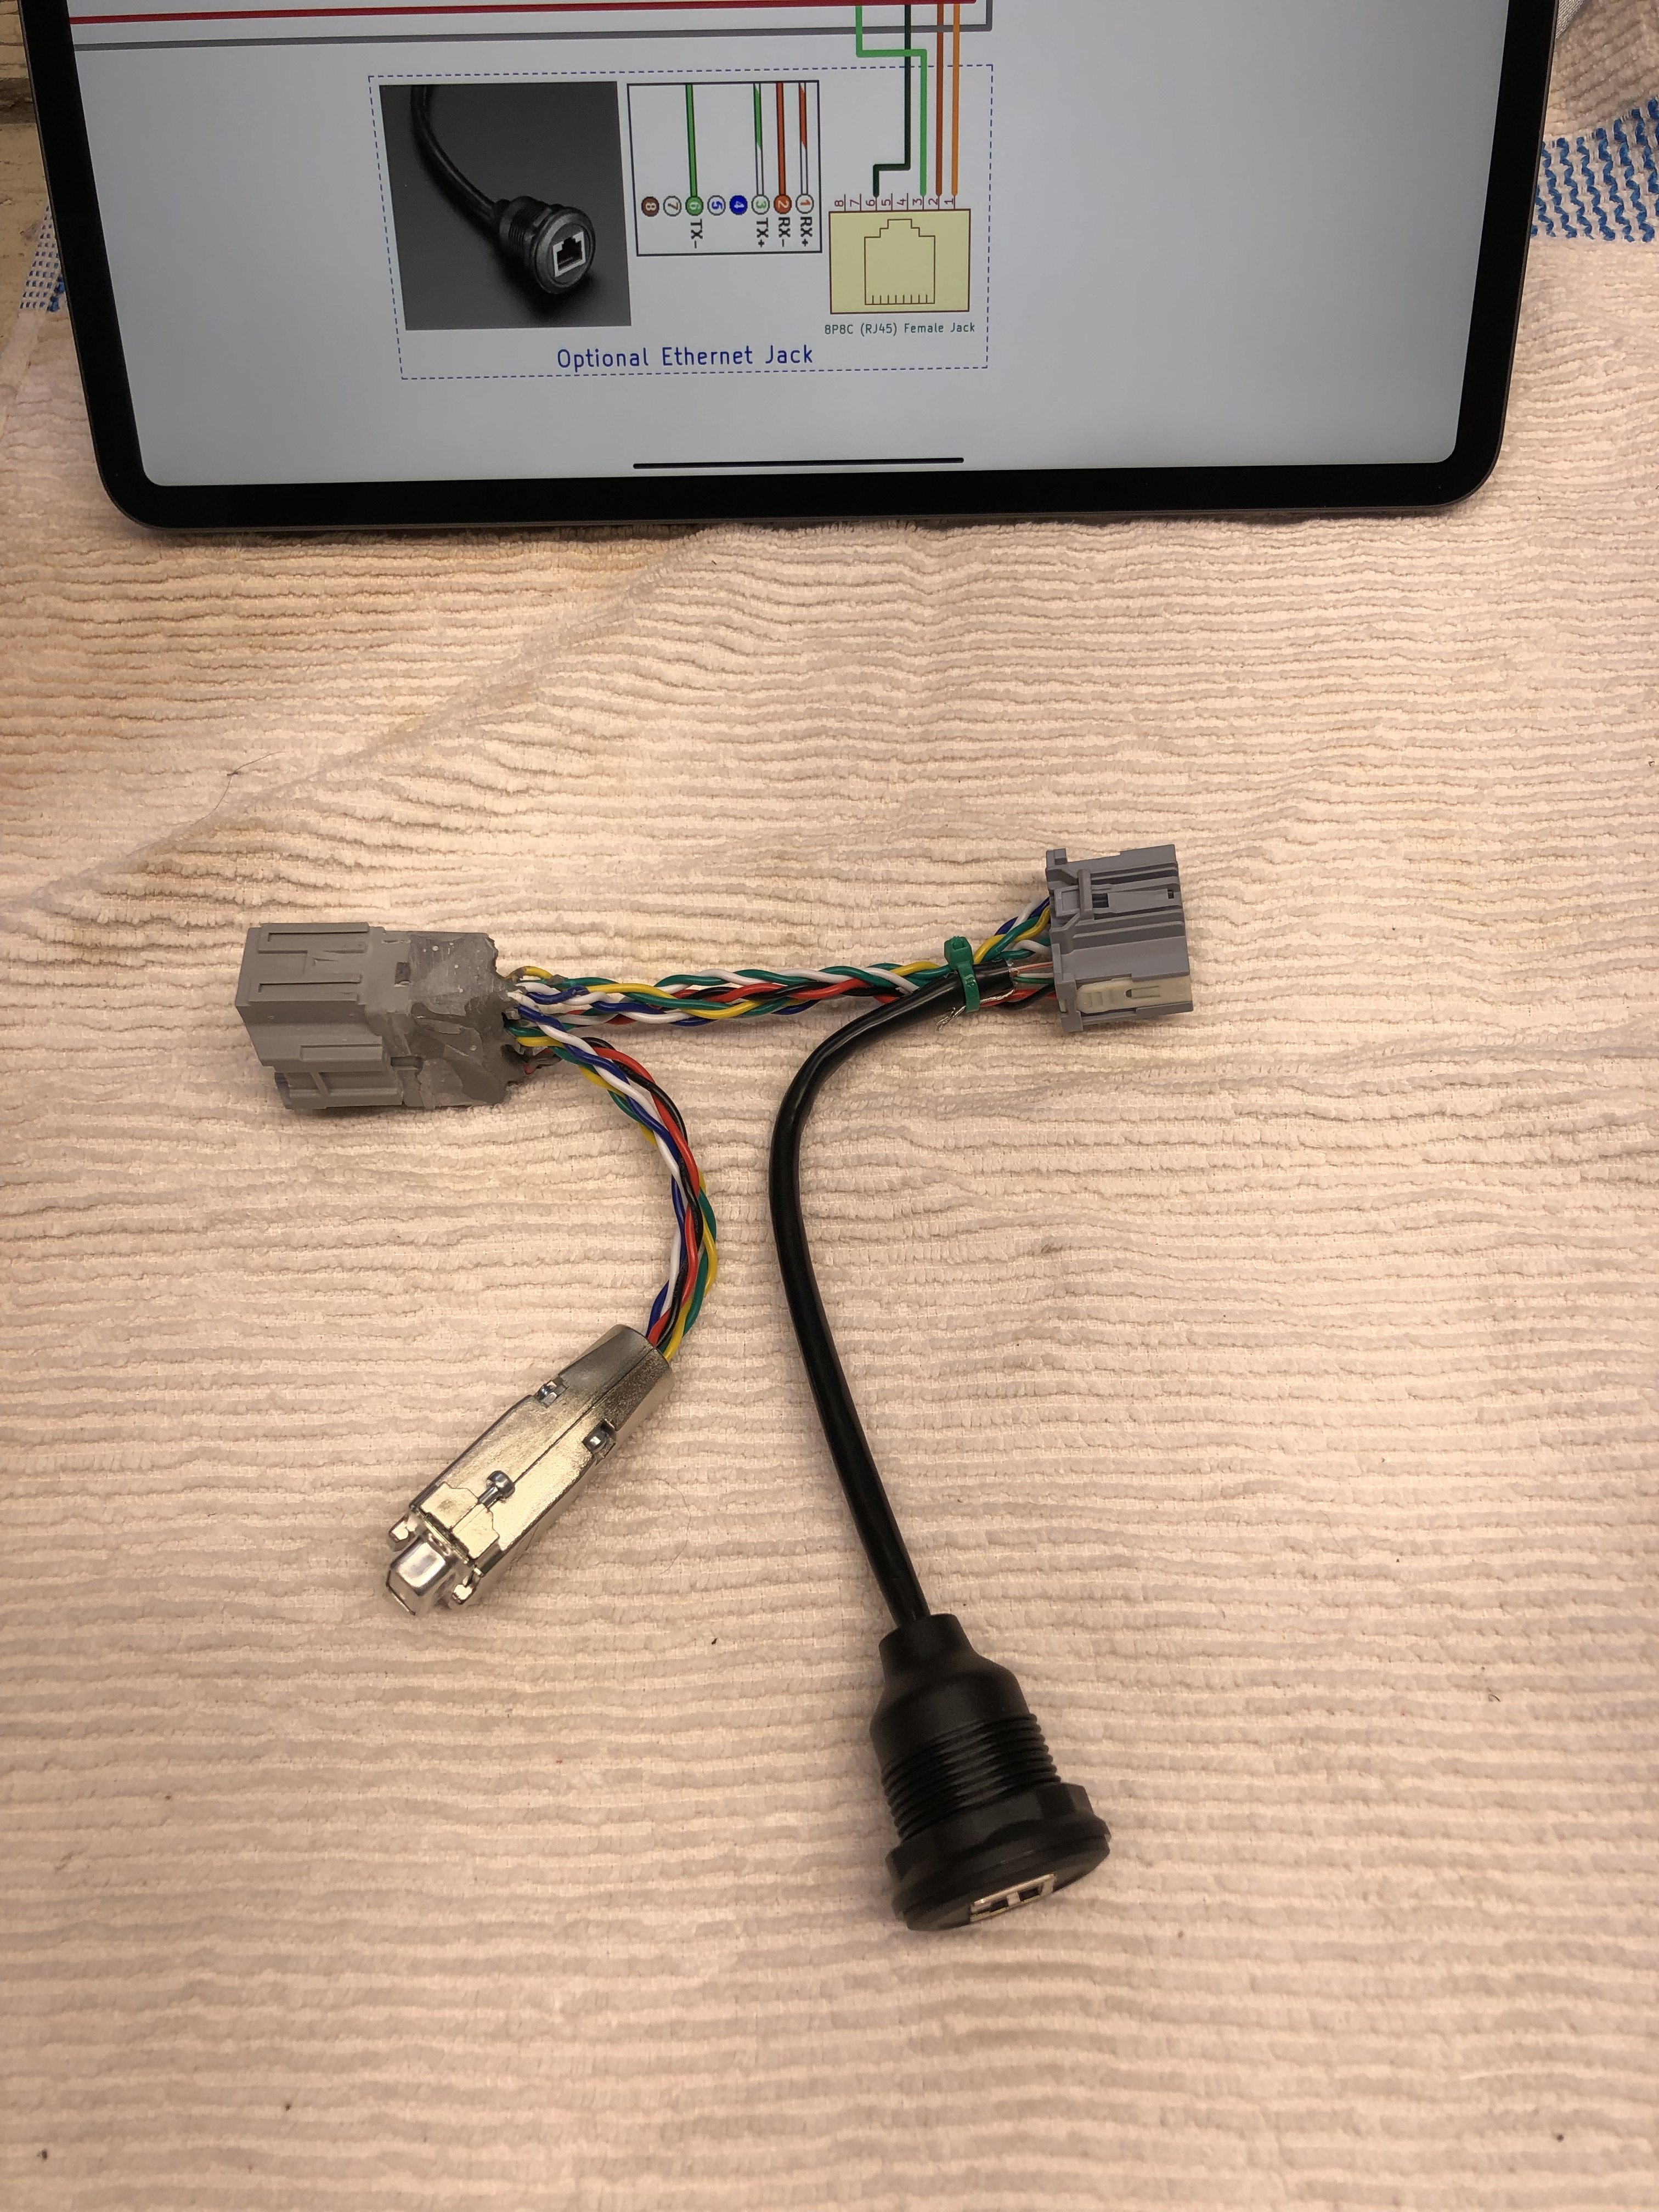
Mouser forwarded to me a notice that the DE9 shell that I used has been discontinued by TE Conn. :( shame, it's nice. I'll have to find a sub if I need another one someday. I used to buy metal shells like this by the bucketload . . . 25 years ago.

When you gonna draw up proper adapter boards? :) 
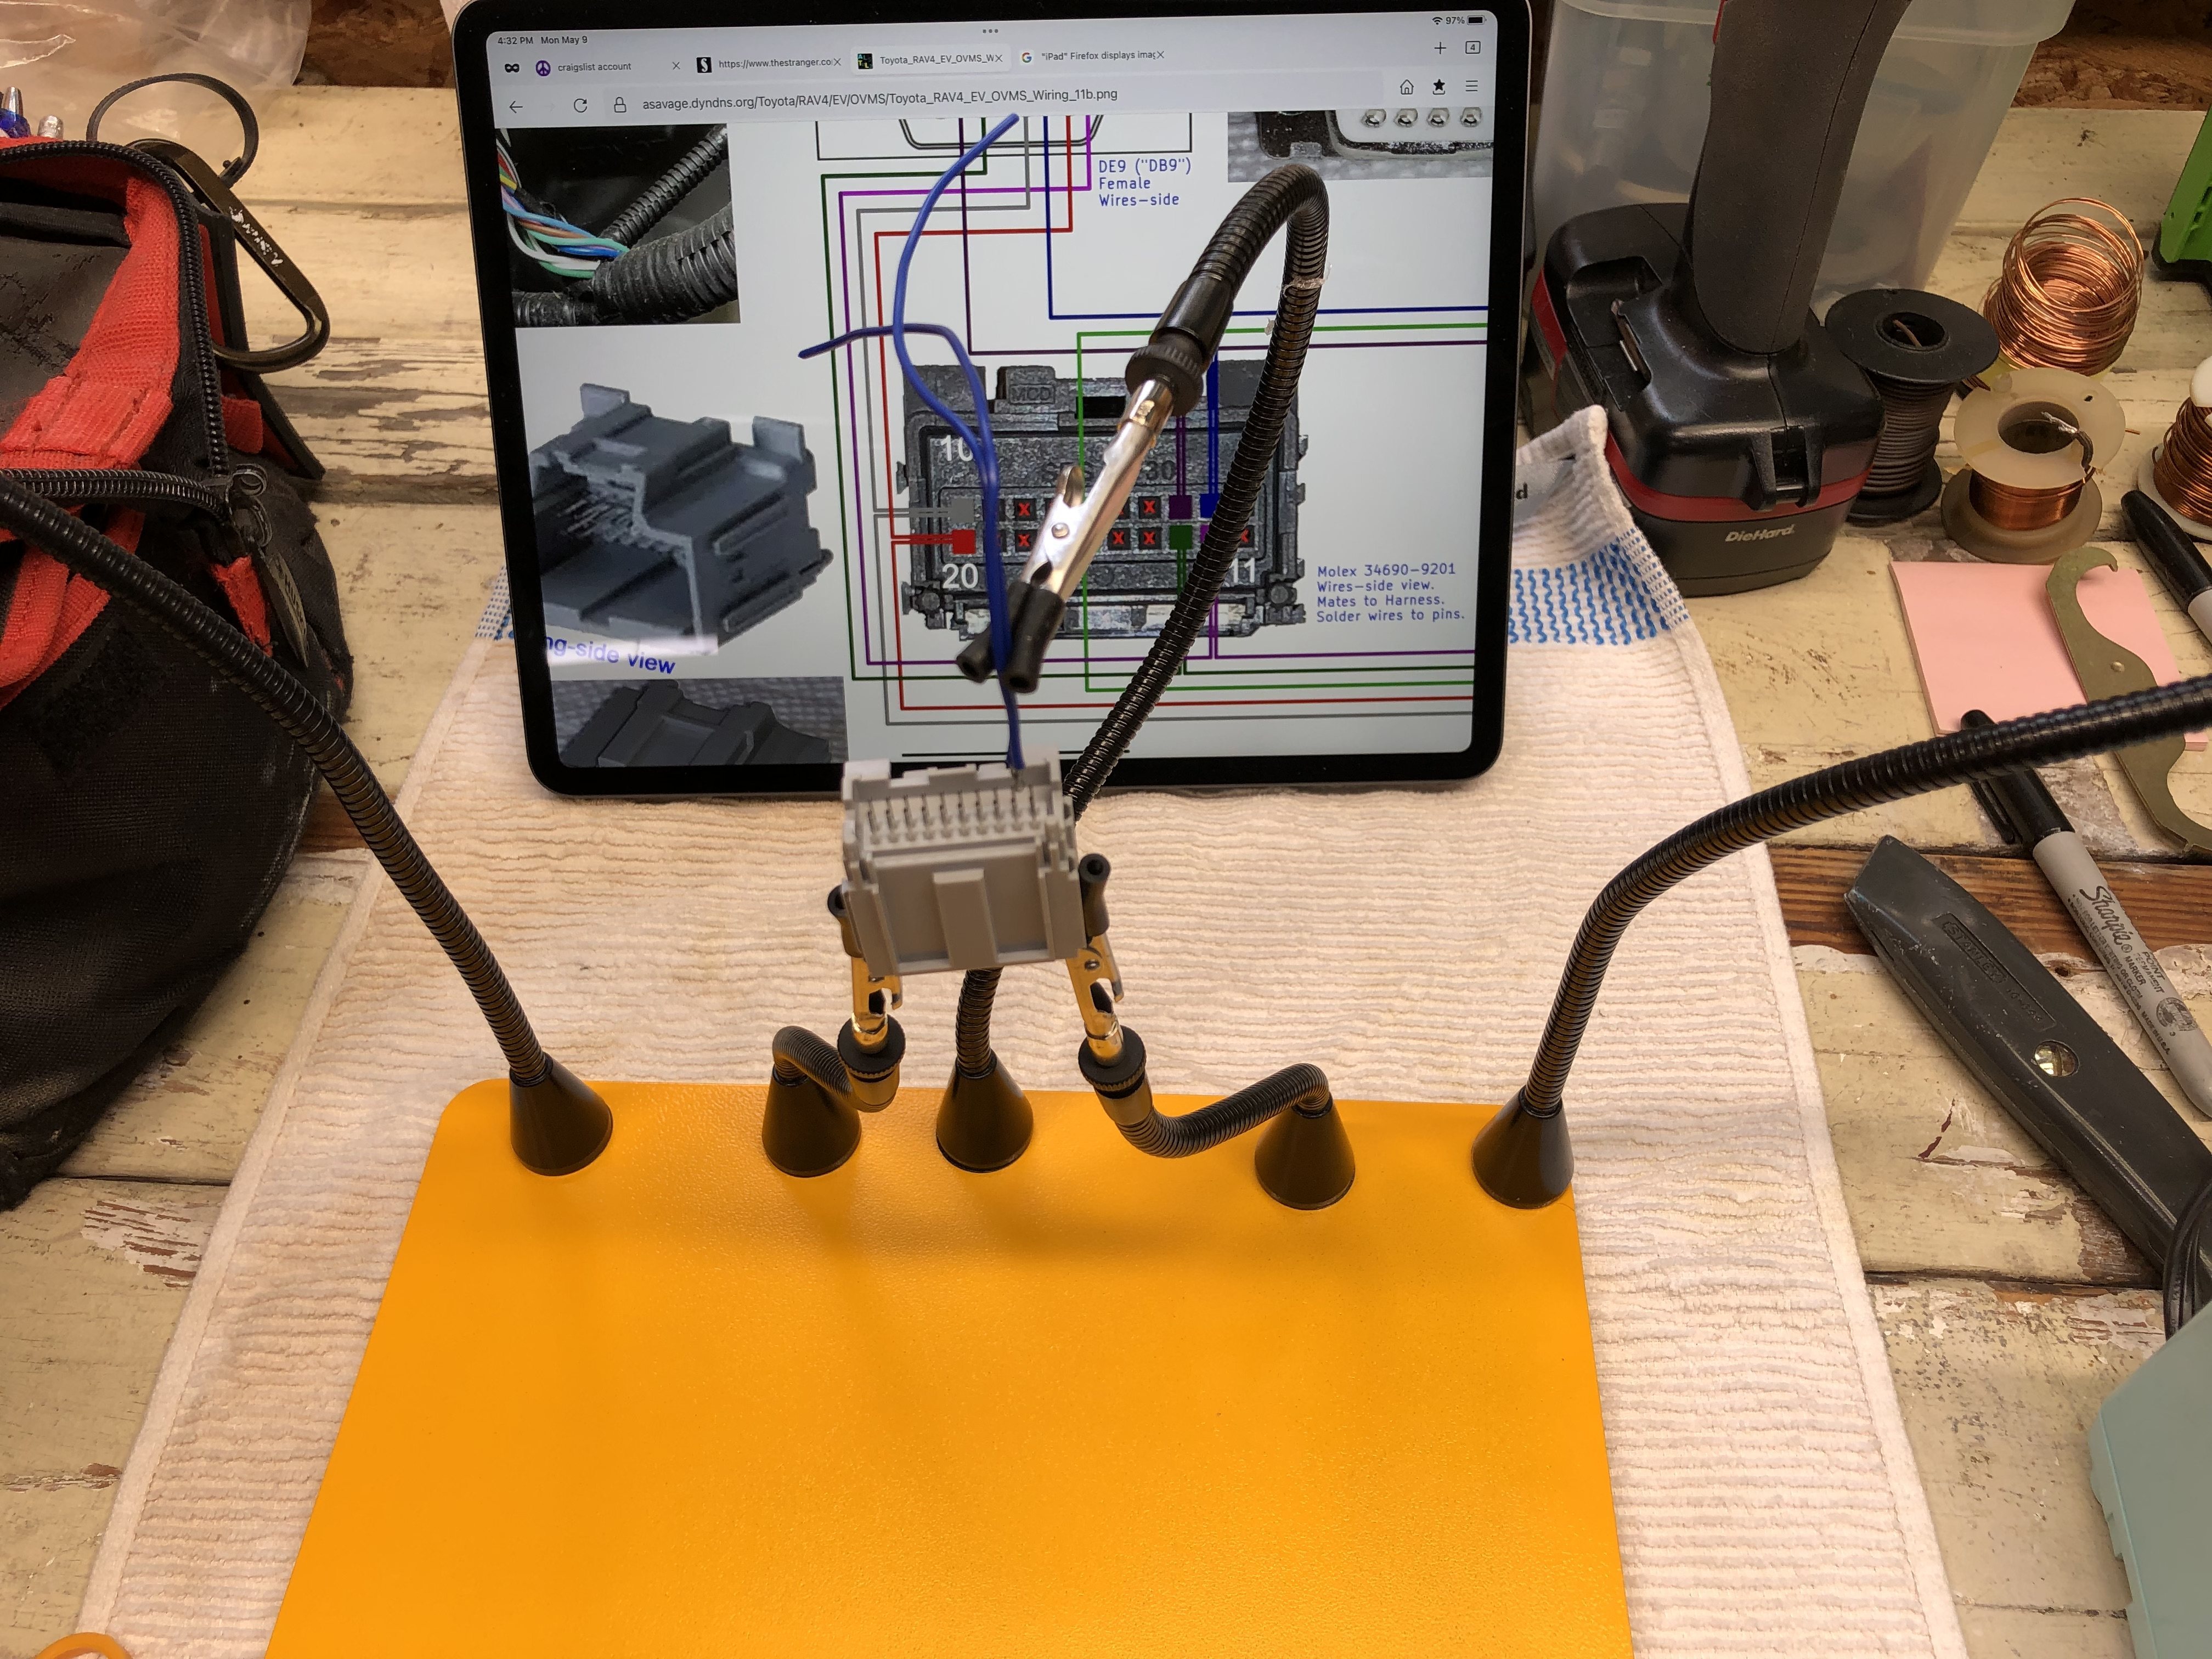
No actives or passive, should be easy for someone versed in this. I had so much trouble drawing a gen-purpose wiring diagram using KiCad that I gave up and went back to gen-purpose drawing tools: PhotoShop circa 2007, and SnagIt! Editor circa 2016. I thought KiCad would be an appropriate tool, but it's not for what I wanted to do. Then I found actual bugs in the UI and got sent down the usual rabbit hole of free software: bug reports, which will likely sit unhandled for years until all the principals have moved on and the the code's been refactored so many times that nobody knows where to start anymore.
Regards,
Al Savage
2014 Rav4 EV, Shoreline Blue Pearl, #2609, first use 04Jun2014, 49k miles (Aug2017), OpenEV-SE 40A. First DU replacement May2018 59k.
2018 Model 3 LR AWD, blue. 9.6kw solar
http://nissandiesel.dyndns.org

Return to “Modifications & Accessories”