How I fixed my RAV4 EV On-Board Charger

Toyota Rav4 EV Forum

Help Support Toyota Rav4 EV Forum:

This site may earn a commission from merchant affiliate links, including eBay, Amazon, and others.
fred_dot_u said:
An update on the wife's vehicle troubles.
...
I'm hoping the local mechanic is current with Toyota's tech pages and can get everything he needs.

Updates as warranted.

Thanks for your post!

Note. Anyone can legally/lawfully buy access* to all technical materials related to the maintenance, diagnostics, checking and repair of this model and all others.
For example,
subscription_aug22.png


*
Although this Toyota site recently stole $247 from me,
https://techinfo.snapon.com/TIS/Register.aspx
 
alflash said:
jfletter said:
fred_dot_u said:
The vehicle does charge after two to four engage/disengage cycles with the handle at the charging port. I would have expected if there is a problem with the fuses that it would be a consistent failure to charge. Of course, that makes it more likely to be a charger failure, doesn't it?

fred_dot_u, confirm this with others, but many have had the same problem that you seem to have, charger cycles for several seconds and then fails to charge. In most cases it is just the fuses and not a faulty charger. Yes, the cost of a replacement charger is reasonable, $250-$350 is where we were, but it is $250 you may not need to spend. Of course taking out the charger, replacing the fuses, and putting back in, only to find out that it still does not work is incredibly frustrating.
...
I hope these thoughts help.
Update
As note.
I want to draw your attention to the fact that at the beginning (for example, at the first attempt and at 2nd and at 3nd), on fred_dot_u vehicle charging DOES NOT START.
However, charging does not start instantly and in the absence of a malfunction.
The process ALWAYS begins with a system health check. If some kind of malfunction is detected, then several more attempts are made to check and, if they also detect / confirm a malfunction, then the system is turned off.
After each of these attempts is unsuccessful, then after each time a fault code is recorded.
After the last failed attempt, the charger gets the Faulty status, and the contactors is disabled.
Depending on the cause / symptom of the malfunction, different codes may be recorded in the system. And the fuse fault code has a different cause than the "overcurrent" series codes...
And at the same time. If the Tesla software is inconsistent, the system determines the corresponding fault codes*.
And, if the problem is with charger hardware ID, then the RAV4EV charger can be reprogrammed*.
*
update_f056.png
 
fred_dot_u said:
Vlad, can the Tesla software re-program the charger?
Unambiguously/accurately and responsibly, I can answer this question only after the program reports the Software Configuration values ​​​​after installing the donor-charger and trying to actually reprogram.
Successful reprogramming after replacing bad RAV4EV PCB in Tesla charger assembly show in
https://youtu.be/85oQ5CRNq0U

There are also failures when a newer version is installed in the ECU and the program cannot "roll back" / return to the previous older versions.
For example,
file.php

bad_reflash.png
 
fred_dot_u said:
That video was encouraging, thank you for posting it.

For the second image, indicating a failure, what makes the solution?

Unfortunately, for the second and third cases, I don't have a solution.
Although Jim's example ( https://1drv.ms/b/s!AtSKKmN-5msBg_oYXNH9E1vYZ_8bDA ) shows that sometimes you can use the native control board and the "components" (all other elements) of the donor unit.
 
fred_dot_u said:
I suppose there's little choice but to move onward and hope for the best.

Now the vehicle is charging from the 3rd - 4th attempt.
Just a question. Why not continue to be / "put up" with such a situation?
Replacing a Charger is a technically complex and time-consuming task / work, in addition, the serviceability and adequacy of the purchased used Charger is unknown ...
Best Regards,
 
I have also considered to continue to use the vehicle in current condition, for exactly the reason you suggest.

It is very easy to connect/disconnect two to six time than it is to remove and install charger.

The charger I have purchased will be available when it is required and will not have problems if time passes.
 
fred_dot_u said:
I have also considered to continue to use the vehicle in current condition, for exactly the reason you suggest.

It is very easy to connect/disconnect two to six time than it is to remove and install charger.

The charger I have purchased will be available when it is required and will not have problems if time passes.
I agree.
And at any convenient time, we can again do remote diagnostics (free for charge) to find out that a new one has appeared in the Tesla system...
 
jfletter said:
Here is a parts list to build the high voltage and data cable for a test bed.

https://1drv.ms/b/s!AtSKKmN-5msBg_o7uNXyRN4SCKtDjA?e=2UCEXC
The list you put together is very helpful; thanks for that effort!

[20Mar2023: I've been editing below as I discover information, so I've removed the questions I had here.]

(click on images for larger)


I acquired a GEN1 Rear HVJB and determined the center connectors' function: to drive the AC charging bypass contactors. The OBC can close those contactors to allow DCFC to bypass the OBC, connecting the Charge Port cables directly to the leads running to the battery pack.

As our RAV4 EV is not factory equipped for DCFC, these connectors are unpopulated here.


The center-most of the connectors has a loopback, part of the HVIL circuit (Tesla Model S through ~Sep2013, with optional Dual OBCs also use this same loopback on the Slave OBC only).

The HVJB that the OBC mates to in the early Model S does have connectors/wiring for those three center connectors . . .


. . . though only on the Master OBC side. When an optional 40A Slave OBC is installed, it resides on the "other" side of the HVJB, and does not have wiring for those three center connectors.


---

On the Tesla Model S, AFAICT the GEN1 OBC was only in use from around Apr2012 to around Sep2013**.

I've procured the "Tesla Model S Service Manual 2012" (via torrent) and while it documents the Logic Connector X042 (12-pin) well, it has zero information on any of the five connectors on the Power I/O side -- actually, it has no info on ANY of the HV wiring, only the LV + HVIL circuit is documented.

Because I've not found hardly any public information* about the GEN1 OBC, other than the usual fuse(s) replacement, I've started a Wiki entry for it over on OpenInverter. I procured the parts you've documented to build an "OBC Test Harness". And, I've got a Tesla GEN1 OBC on the way to me, via eBay.

* = There's plenty of private reverse-engineering info, but AFAIK nobody is sharing :( I welcome any informed contributions, either to me or on that Wiki.

** = An original owner of a 10/2013 Model S has dual GEN2 OBCs: https://teslamotorsclub.com/tmc/posts/6516611 plus https://teslamotorsclub.com/tmc/posts/3042384
 
asavage said:
...

It looks as if the center-most of the connectors has a loopback? Do you have any other pics of that area?

...
Yes, a jumper is used that shorts the extreme contacts of this 3-pin charger connector:

charger_loopback1.jpg


p.s. Which indication of the assignment of contacts is correct?
q.png
 
Ah, you've found an error in my markup, thanks. I've corrected it in my post above.

The 4P connector on the left cannot accommodate 3-phase input (typical in the EU, for example). This GEN1 OBC was never able to use three separate phases of AC input. The GEN2 version (Oct-2013-onward) could.

---

The Tesla Model S (2012) Service Manual appears to show two HVIL connections to the OBC: one loop through the X042 Logic Connector (the 12-pin) pins 3 & 9, and on @ "HV1" pins 3 & 4.

.

Electrically, that makes sense, but those pin numbers don't :( I'm probably mis-reading something.

I've found an image of the Tesla version of the this HVIL loopback:


I'm going to assume that that OBC was from a Tesla that was configured for dual OBCs (optional for a few years), and that HVIL loopback is for the Slave OBC only, as the HVJB for a single OBC has a longer connection that routes internally:


[removed guesswork about a possible thermal fuse in the HVJB and/or OBC]

.


---

Notice how the HVJB's AC mating connector does not have the center position populated? Likewise, with the DC mating connector's two inside positions.

 
IMO. HVIL LINE hav't thermal fuse, only 60 ohm resistors (for example, see Tesla SB-10052449-4313) . In Tesla Jumper used inside HVJB (60 ohm) when no slave charger.

hvil_1.png
,
reed_switch.png


And, for example, read checking potential causes of RAV4EV alert BMS_f008 and/or BMS_036 (f008_f036).

Which notation is correct?
q.png


This notation is correct for RAV4EV
Tesla_Model_S_Rear_HVJB_04b.jpg
,
Tesla_Model_S_GEN1_OBC_004-1b.jpg

This black three-pin connector is DC output???

1/2 OFF.
hvil_data.png
 
alflash said:
This black three-pin connector is DC output???

No, I was mistaken. The 3-pin black connector is AC Input. I received my eBay GEN1 OBC today, removed the lid and ring enclosure, and traced the black 3P connector over the an "Chaarger AC Inlet PCBA", where both legs connect to the expensive 50A fuses.


I also found the Lid Reed Switch:


I had an OBC AC fuse blow on my RAV4 EV, a month ago. It was sitting at a body shop, awaiting a replacement bumper, repair LF fender, and a door ding -- yet another idiot turned into me. The idiot's insurance paid for all repairs, but the body shop called me and said they could not charge it using the OEM L1 EVSE. By the time I got to it, the 12v battery was completely, totally flat (and it's a $340 spiral AGM battery, ugh).

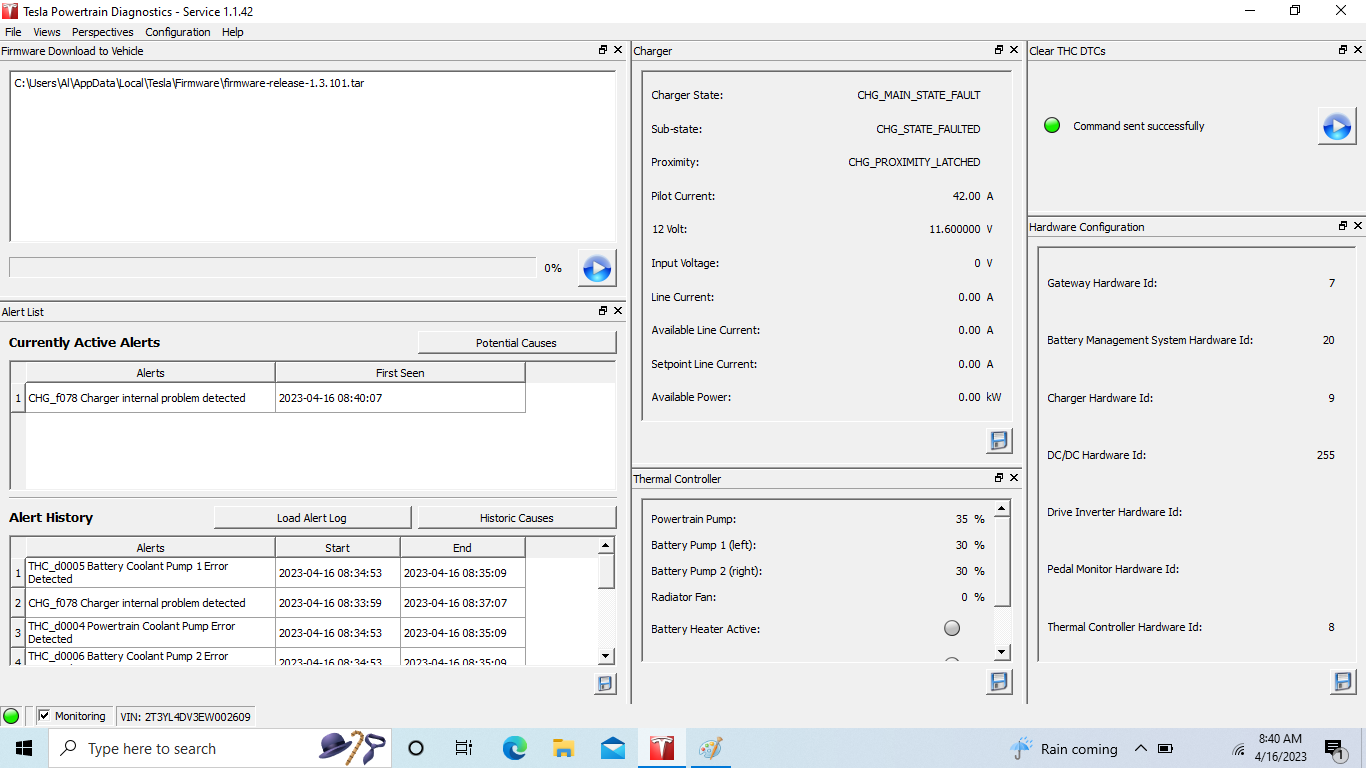
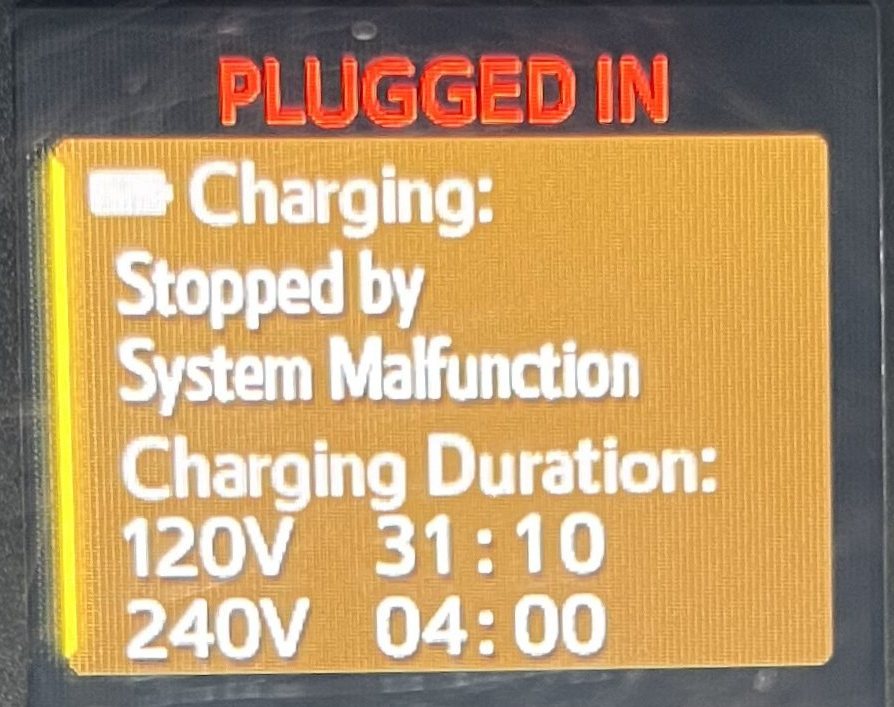
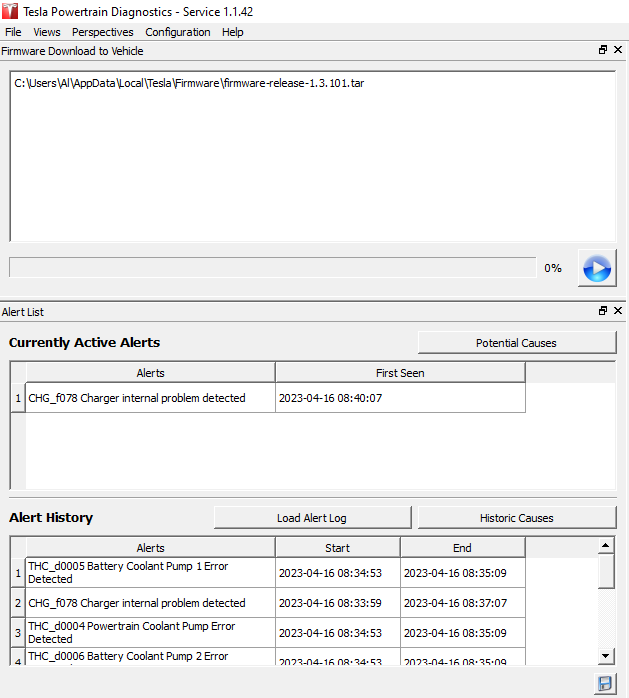
After applying 12v, the instrument cluster read, "Charging: Stopped by System Malfunction"


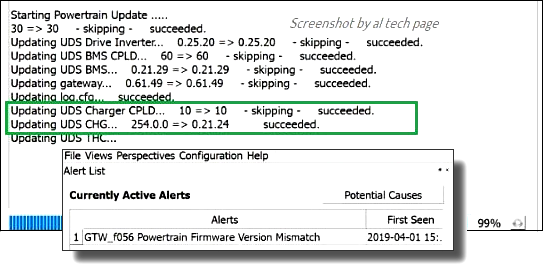
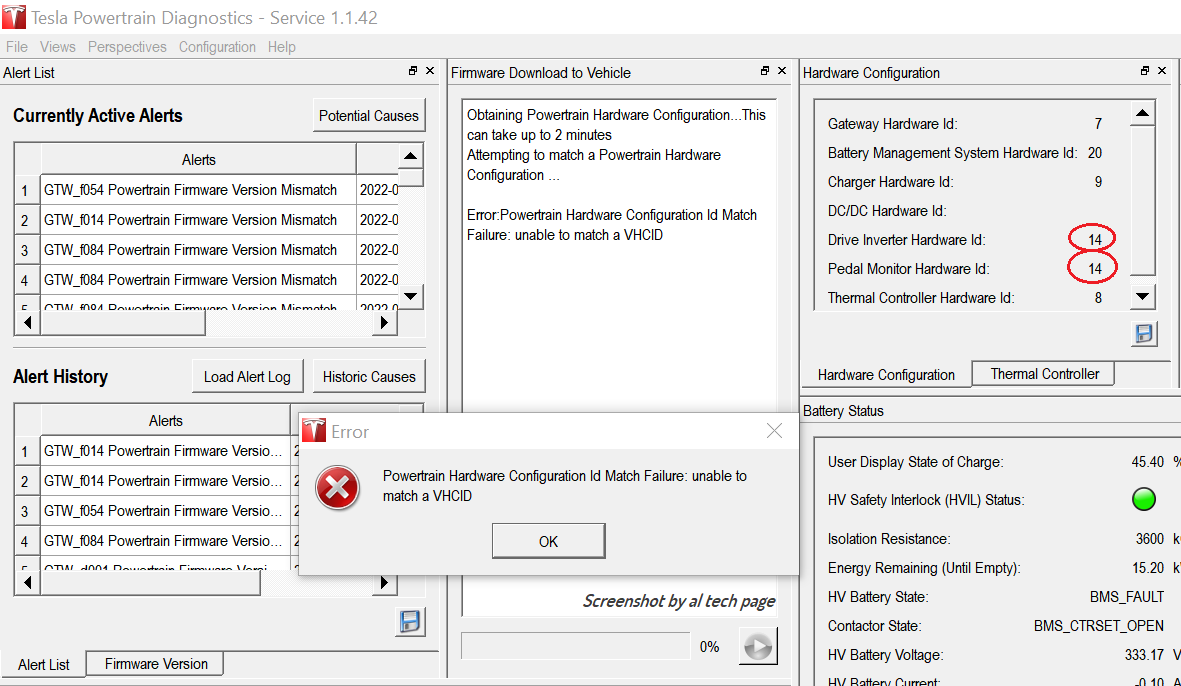
I had it towed home, where Tesla Powertrain Diagnostics showed the dreaded "CHG_f078 Charger internal problem detected".


Here's a 21-second video that shows my EVSE complaining, four tries to connect to the OBC.

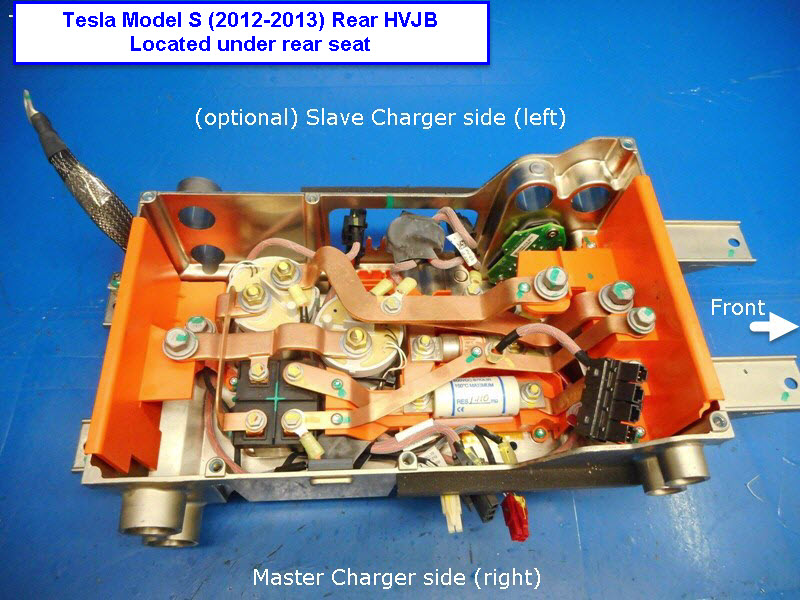
I removed the OBC, found the upper fuse open, replaced both fuses, reinstalled, and it's back in service. I would estimate the total time involved to be around twelve man-hours, same as quoted elsewhere. The HVJB that's bolted to the right side (left, as facing from front) of the OBC is no fun at all to work with, and it's quite fussy to disconnect/reconnect. Yes, a mirror is absolutely required.

A few notes . . .

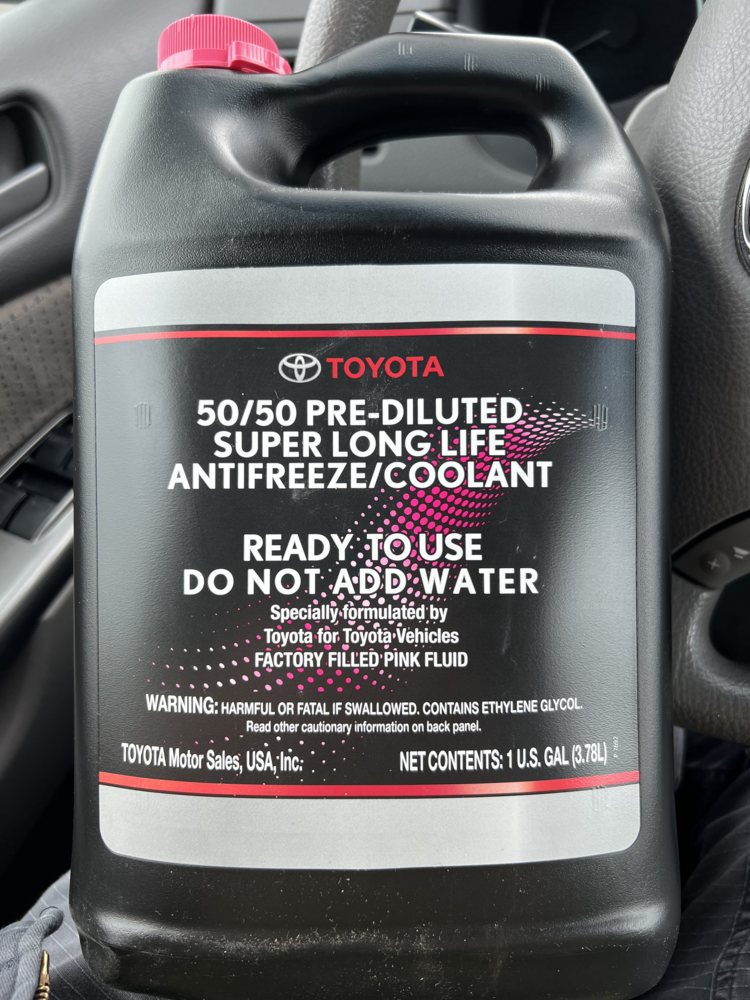
I pulled coolant hoses and reservoirs and dumped whatever coolant that escaped; upon reassembly, I replaced (topped up) with fresh. The cabin heater loop wants the PINK Toyota Super Long Life Coolant SLLC2, not the merely Long Life Coolant SLLC1, which is RED. Where I am, at the Toyota dealer, it's $19/gallon for premix, and isn't available as concentrate. Oh, that price is only good if you order online for pickup at Will Call; if you walk in, they expect you to pay $38/gallon. Really.

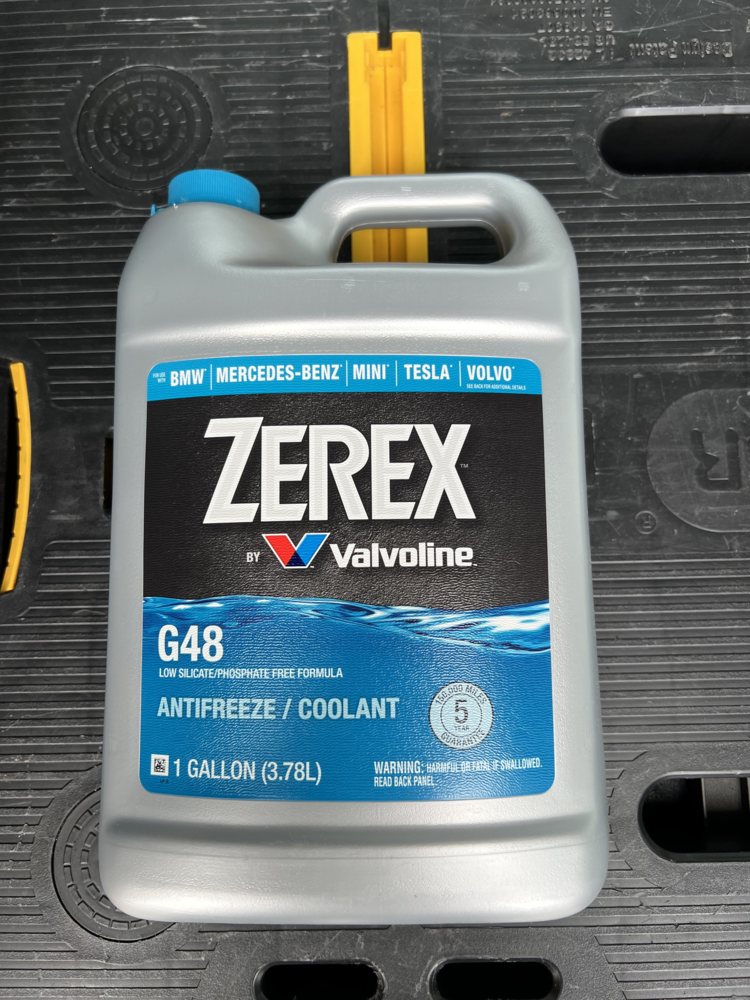
The Blue Zerex G48 is for the Tesla DU/OBC/DC-DC Converter loop, and is available as concentrate, but my local parts store does not have it in front; it's only available as concentrate "off the menu" and you have to ask for it; they then go on a hunt in back to try to find it. My store had three people running around at one point, looking for it. Price difference is $22 for premix vs $29 for concentrate. Why would I pay $22 for $11 of deionized water? Distilled water is $1.29/G here.

The battery coolant loop remained undisturbed in my fuse replacement repair.


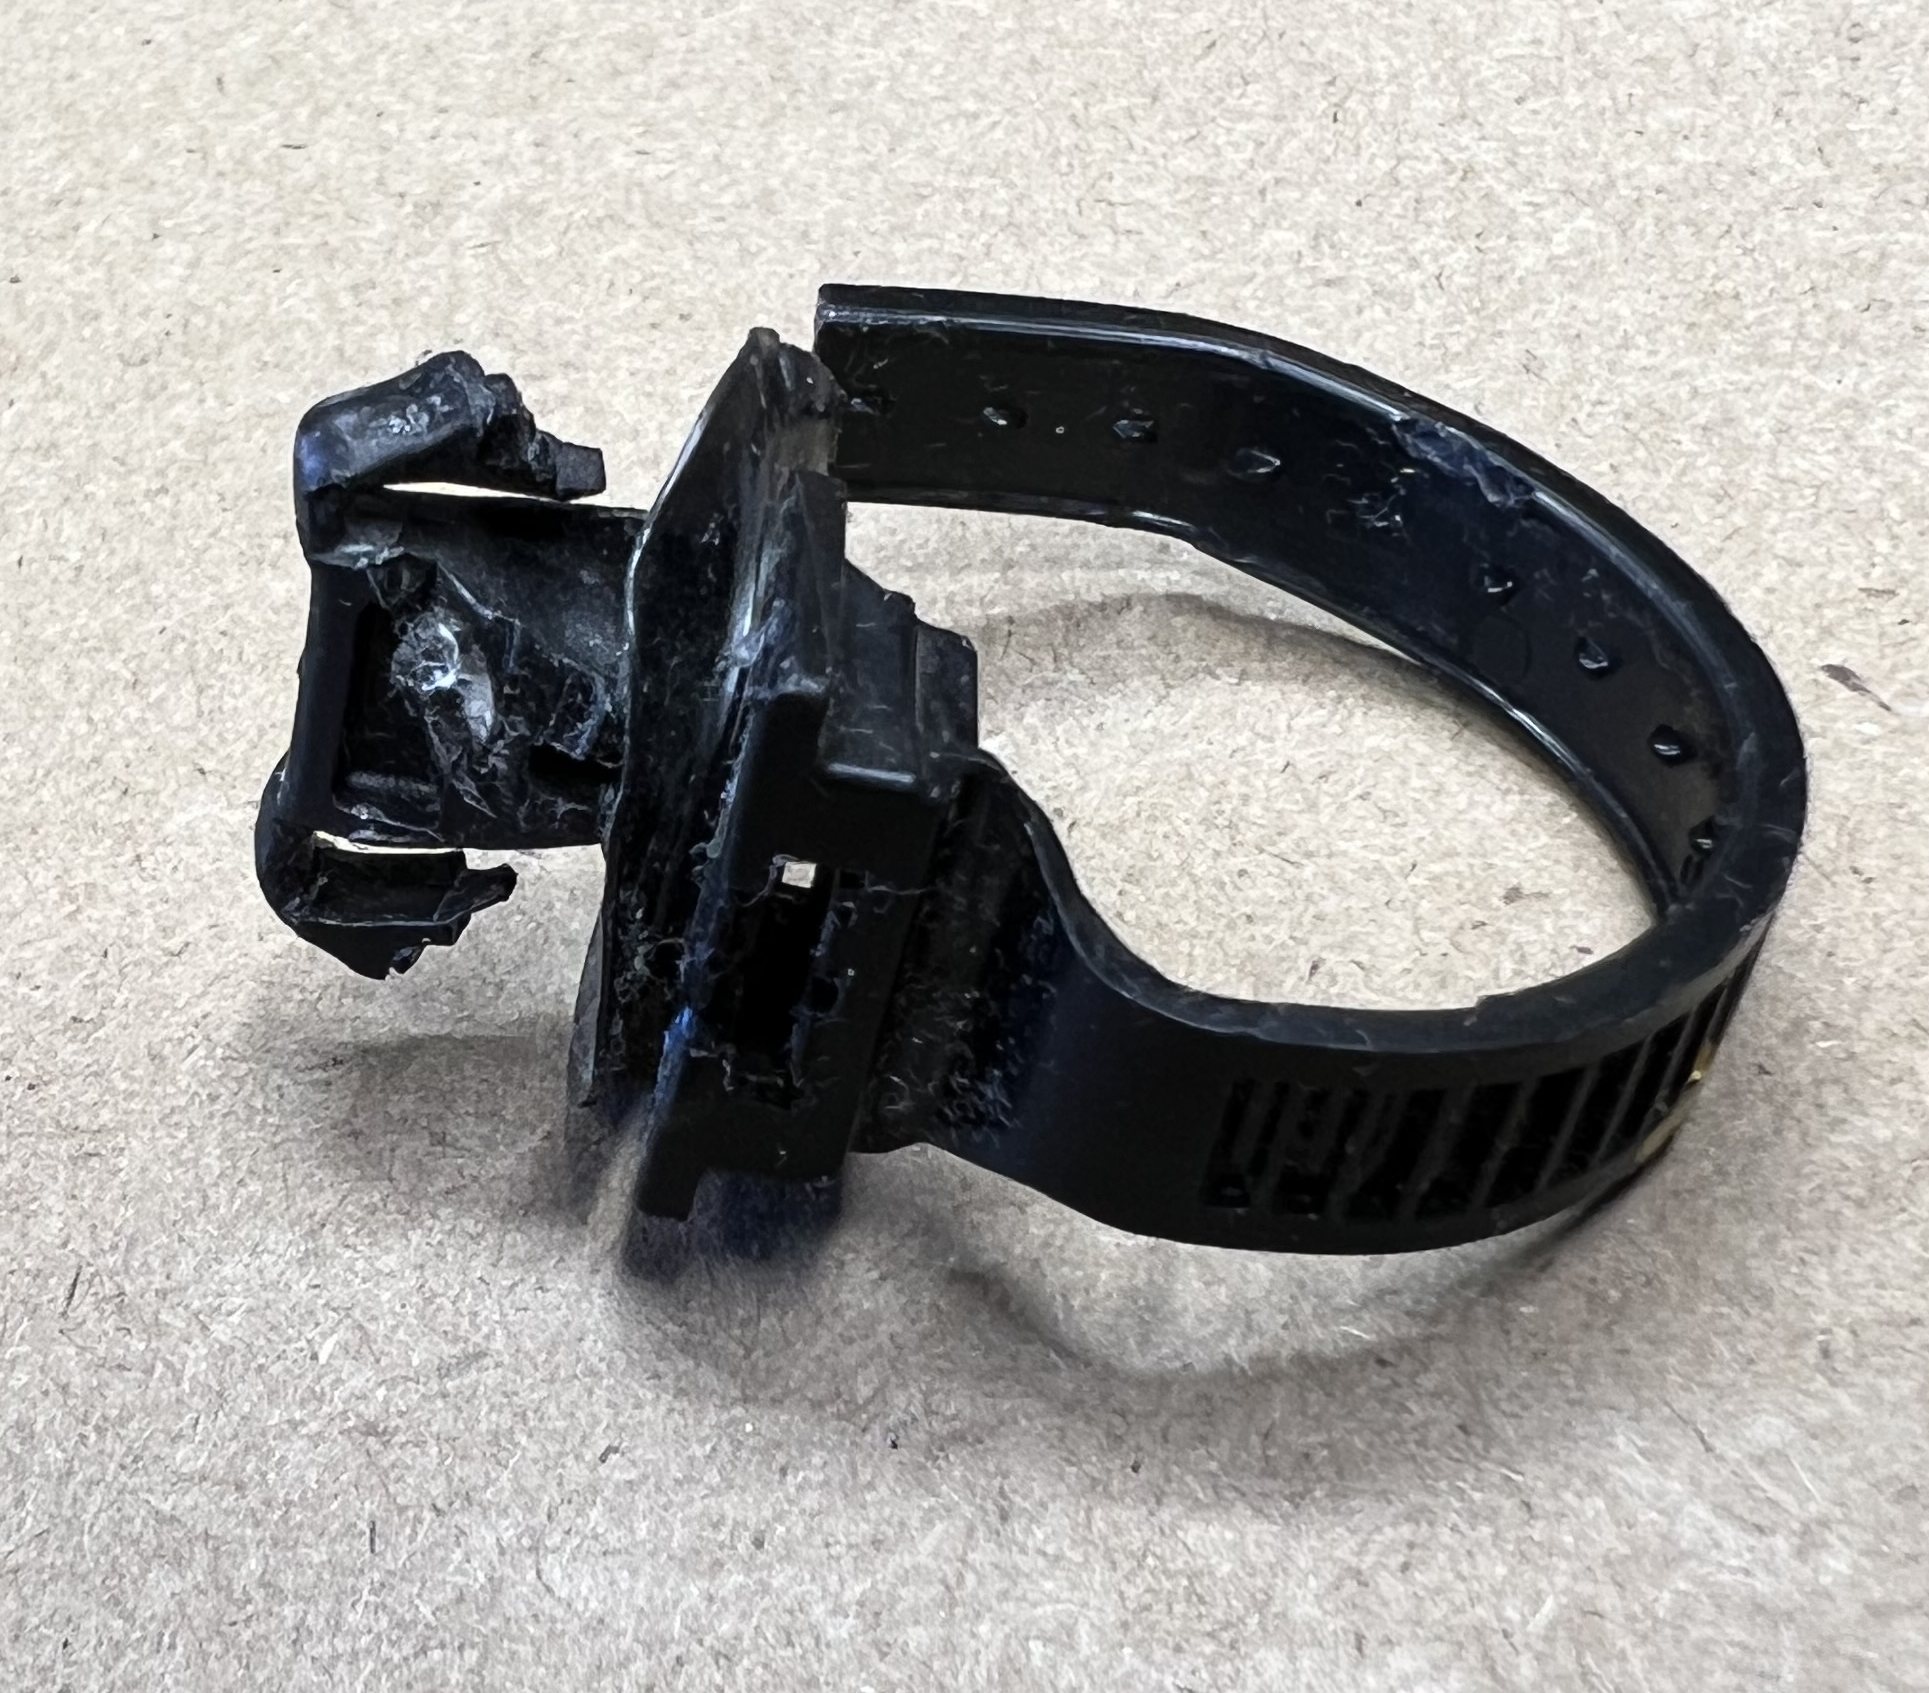
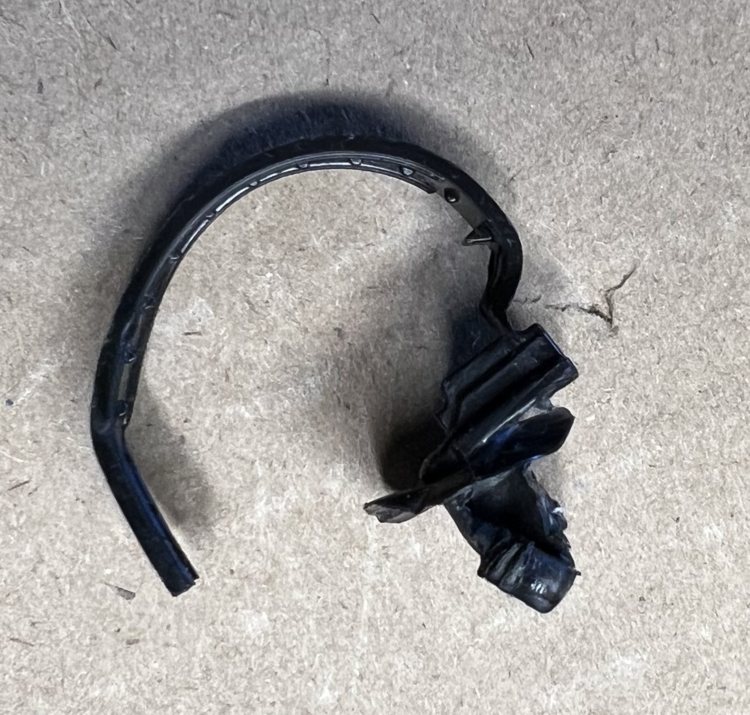
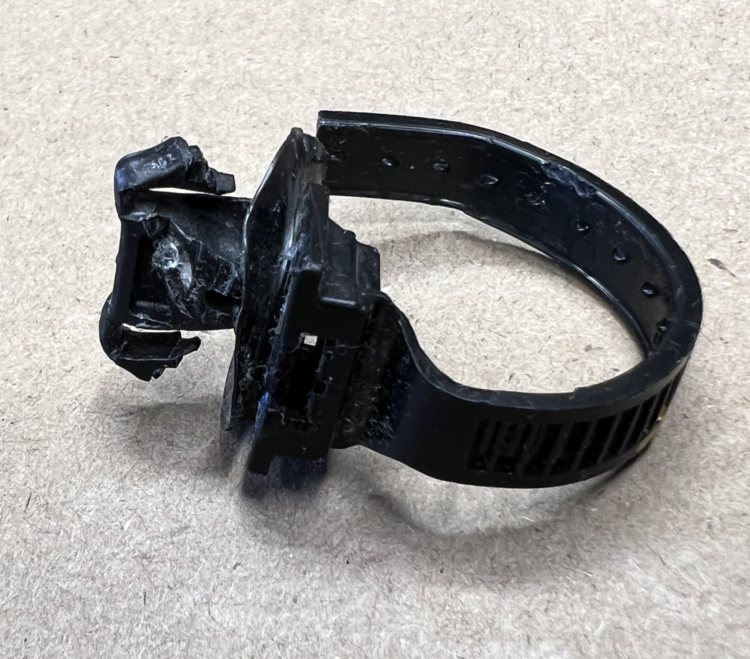
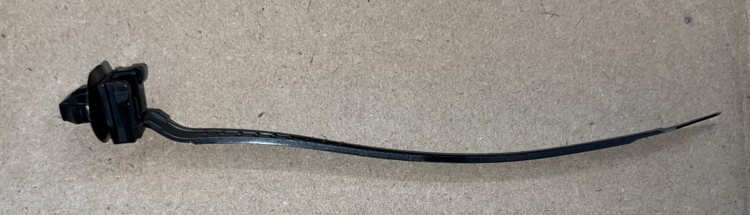
Many of the Tesla harnesses are retained using a clip that in many cases cannot be reasonably released without damage. I know this, because the Toyota dealers, during several previous repairs (OBC replaced, cabin heater replaced, DC-DC replaced: all under warranty) have kindly broken the clips and jammed them back into their respective mount holes, so it was easier for me to remove them the third time.

Striking out using Toyota's abysmal online parts catalogue (some of the worst line drawings you'll encounter from a manufacturer), I carried one of these harness clips into the dealer's parts department. The gentleman looked for a looong time (over 20 minutes), went in back and conferred with others, and eventually conceded that he had no idea how to obtain them. The consensus of the minds was that they must be furnished with the harnesses. Oh, boy.

I was forced to reassemble using the same broken clips in several places, but I've obtained generic aftermarket versions via Amazon, to try to use next time I'm working with those harnesses.
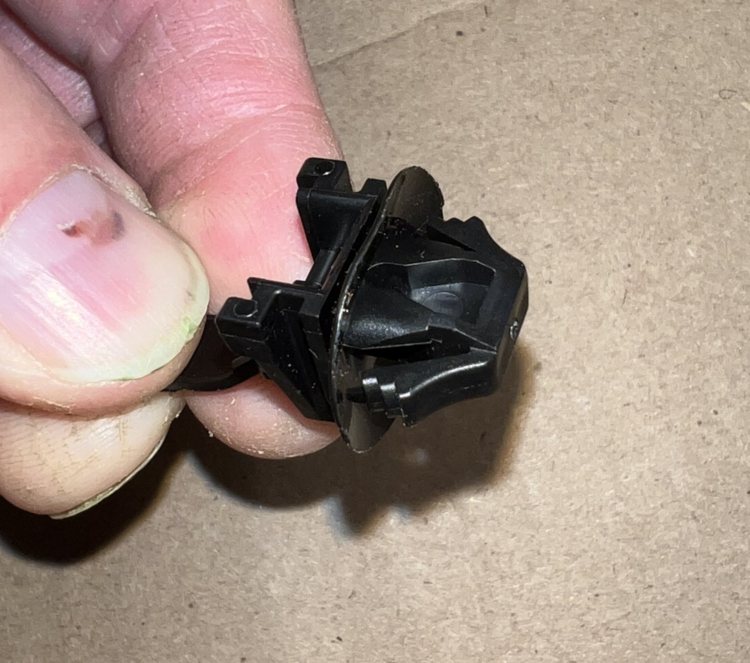
Broken sample:


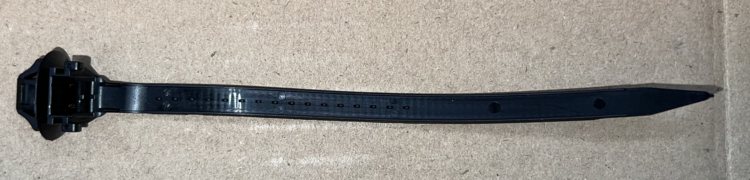
Generic replacements:


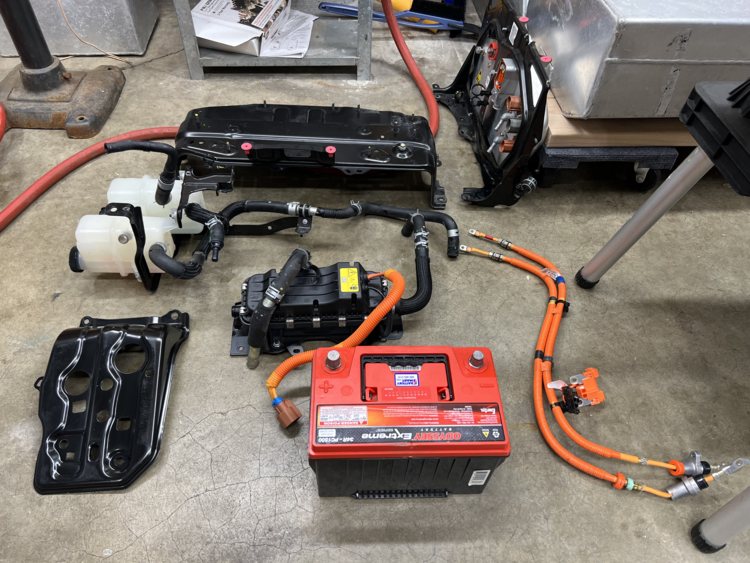
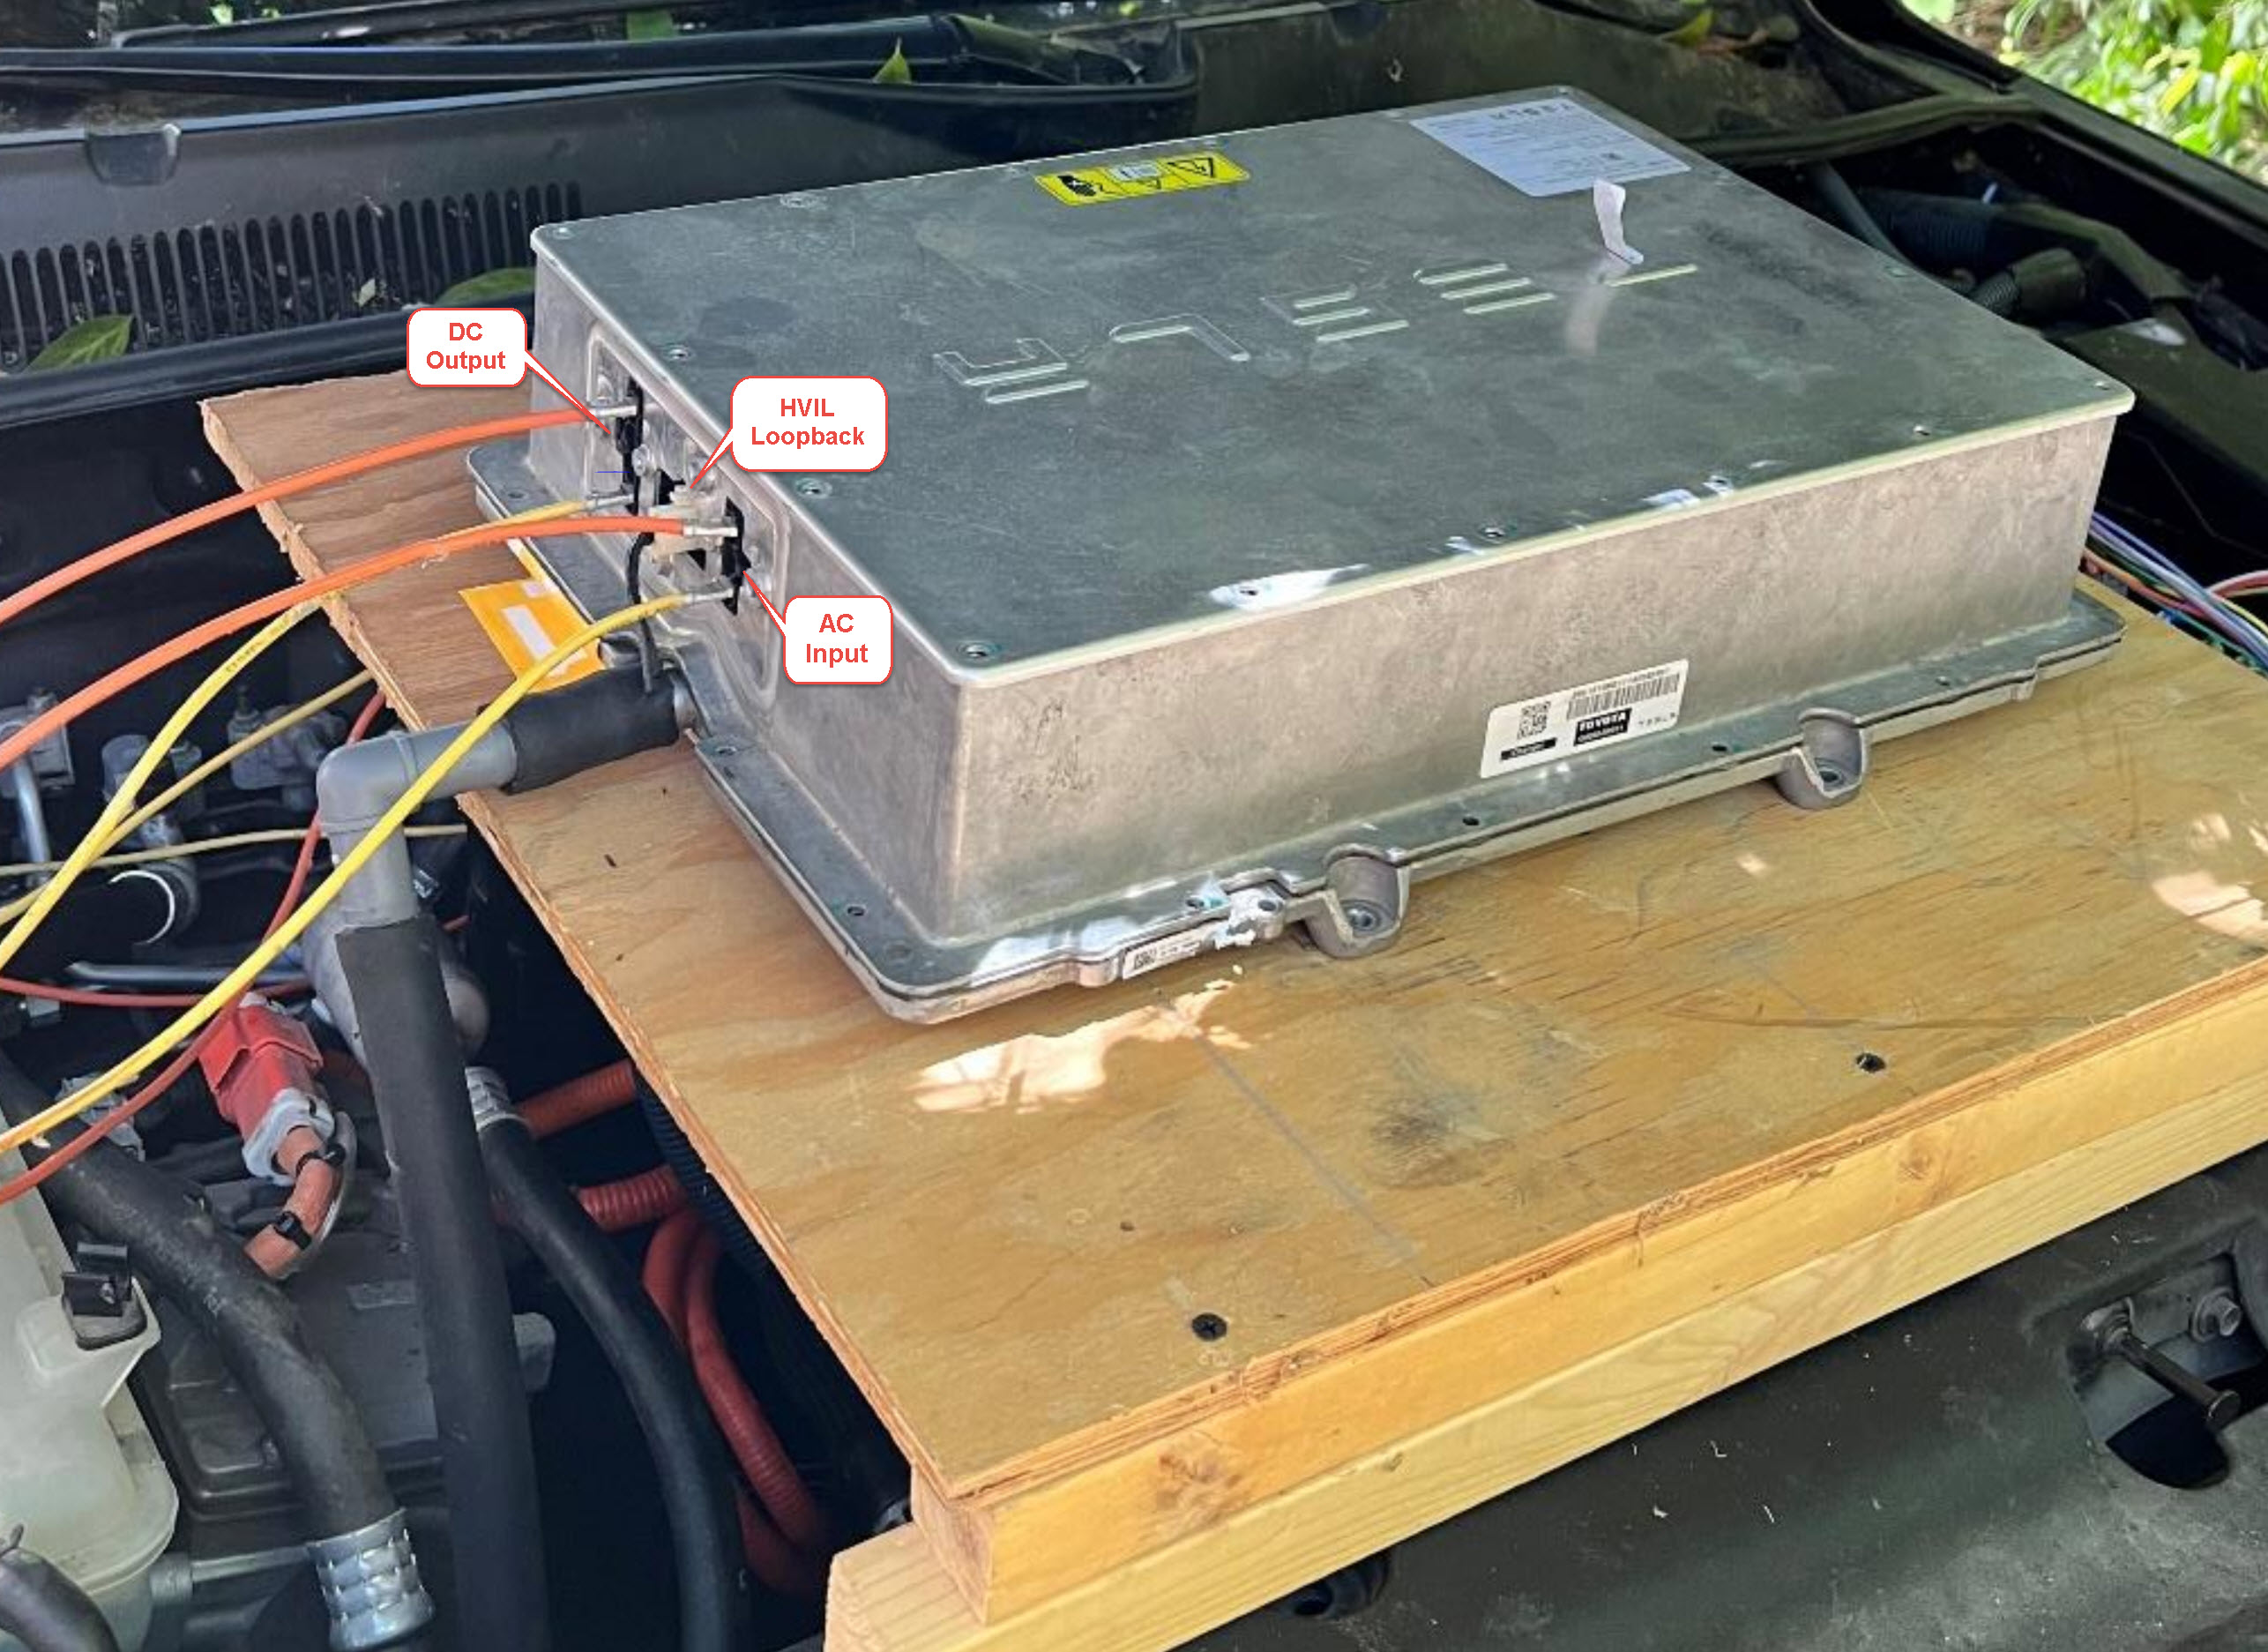
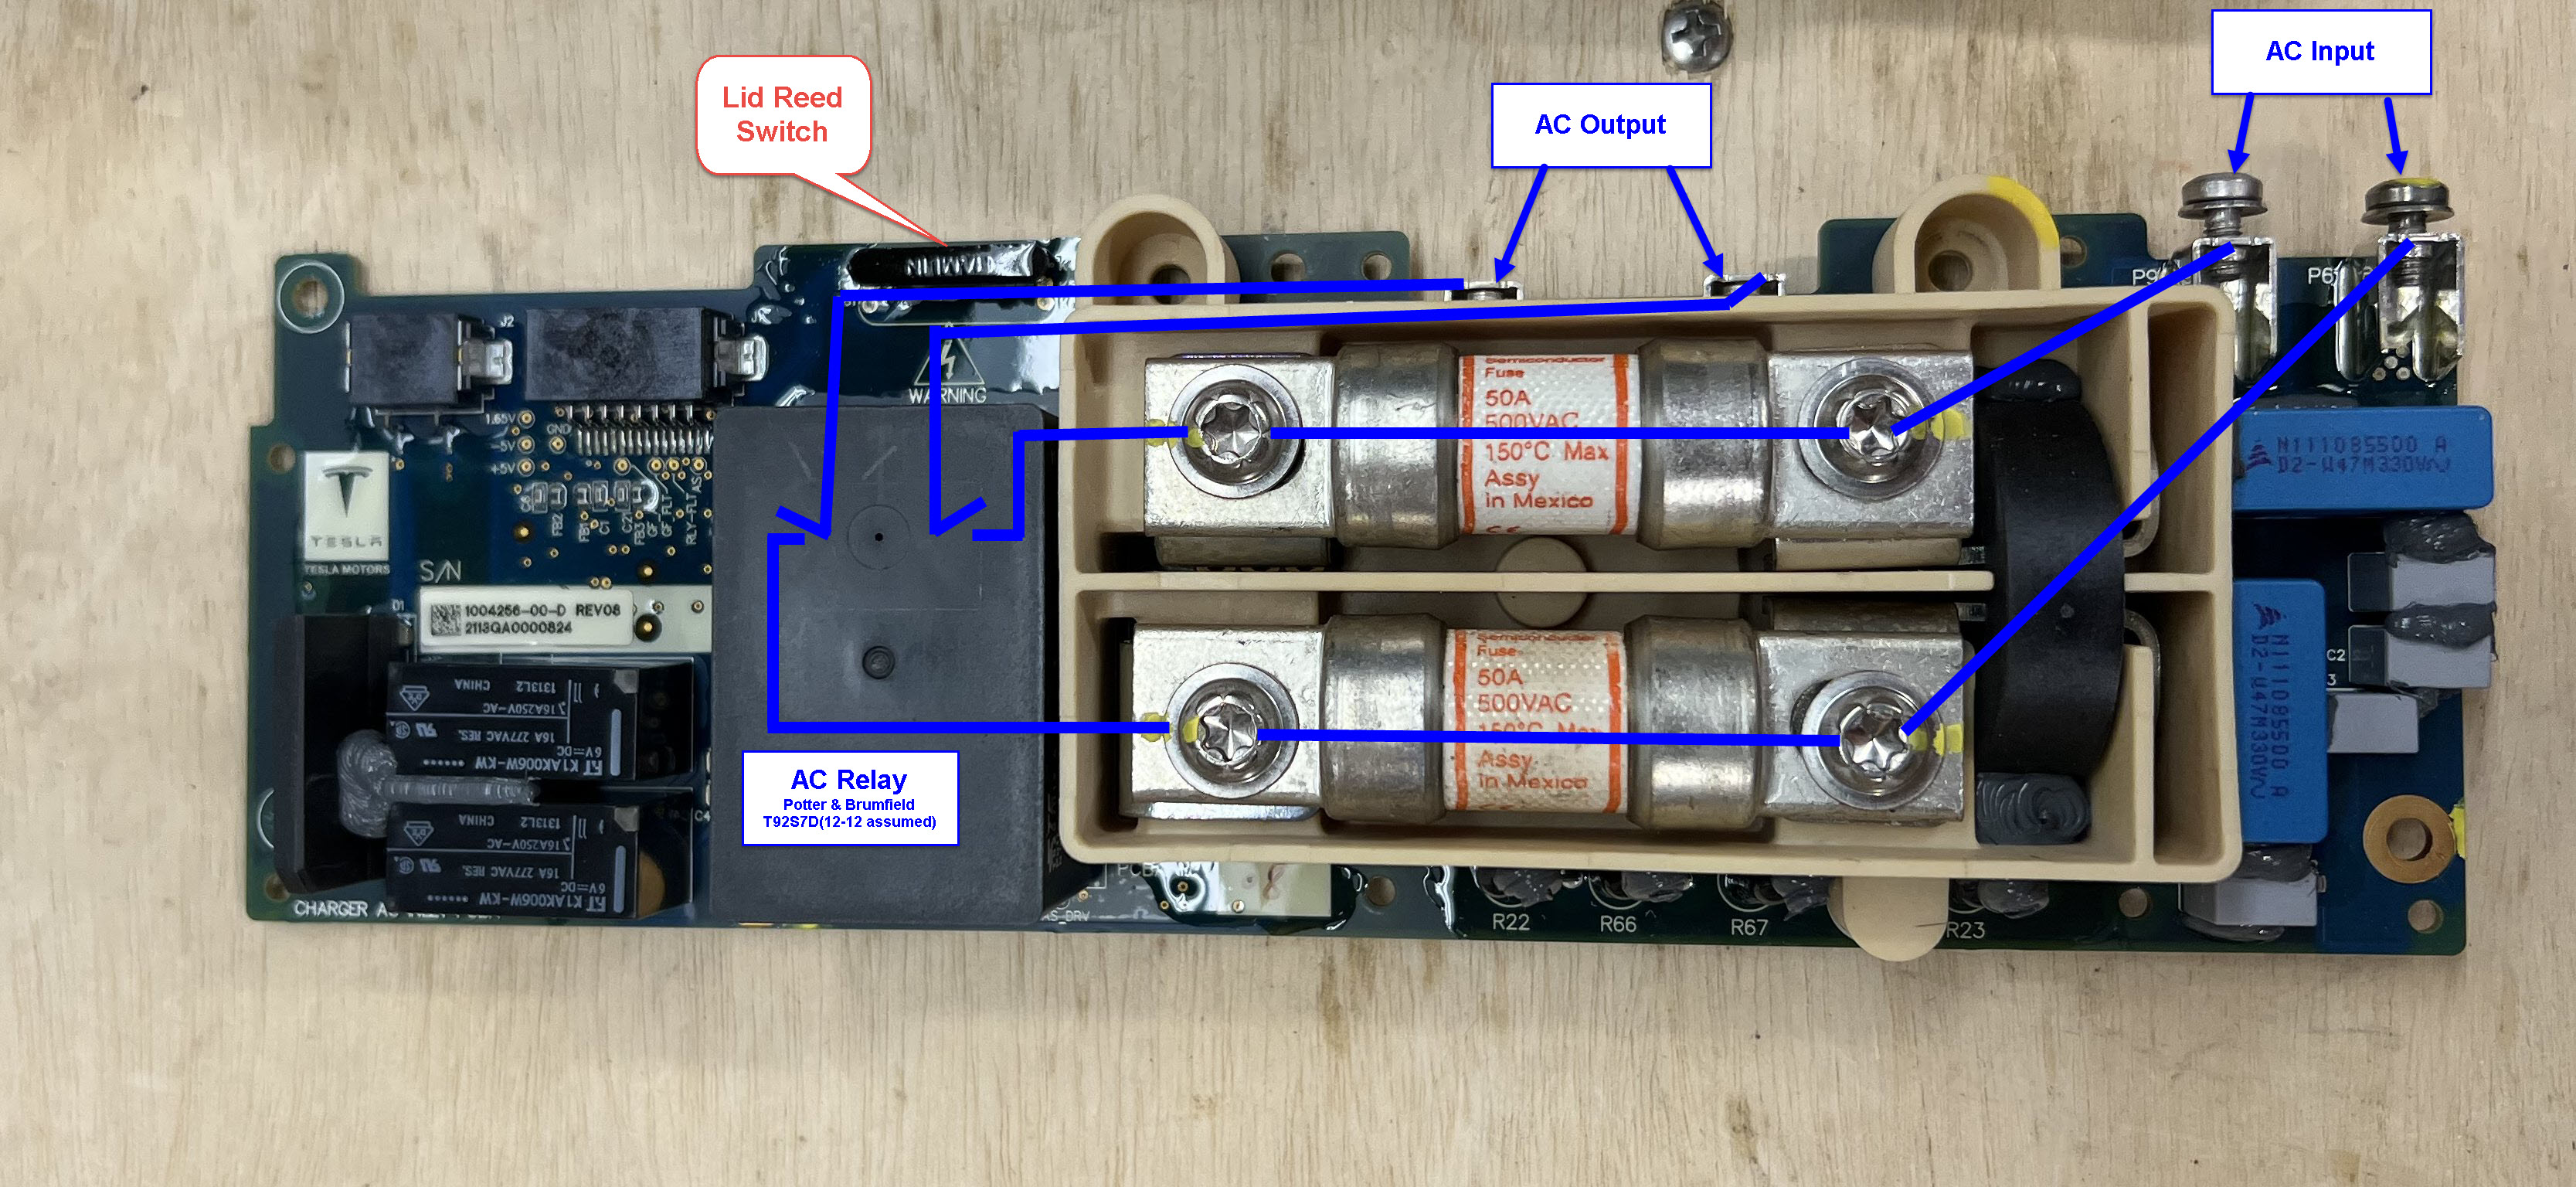
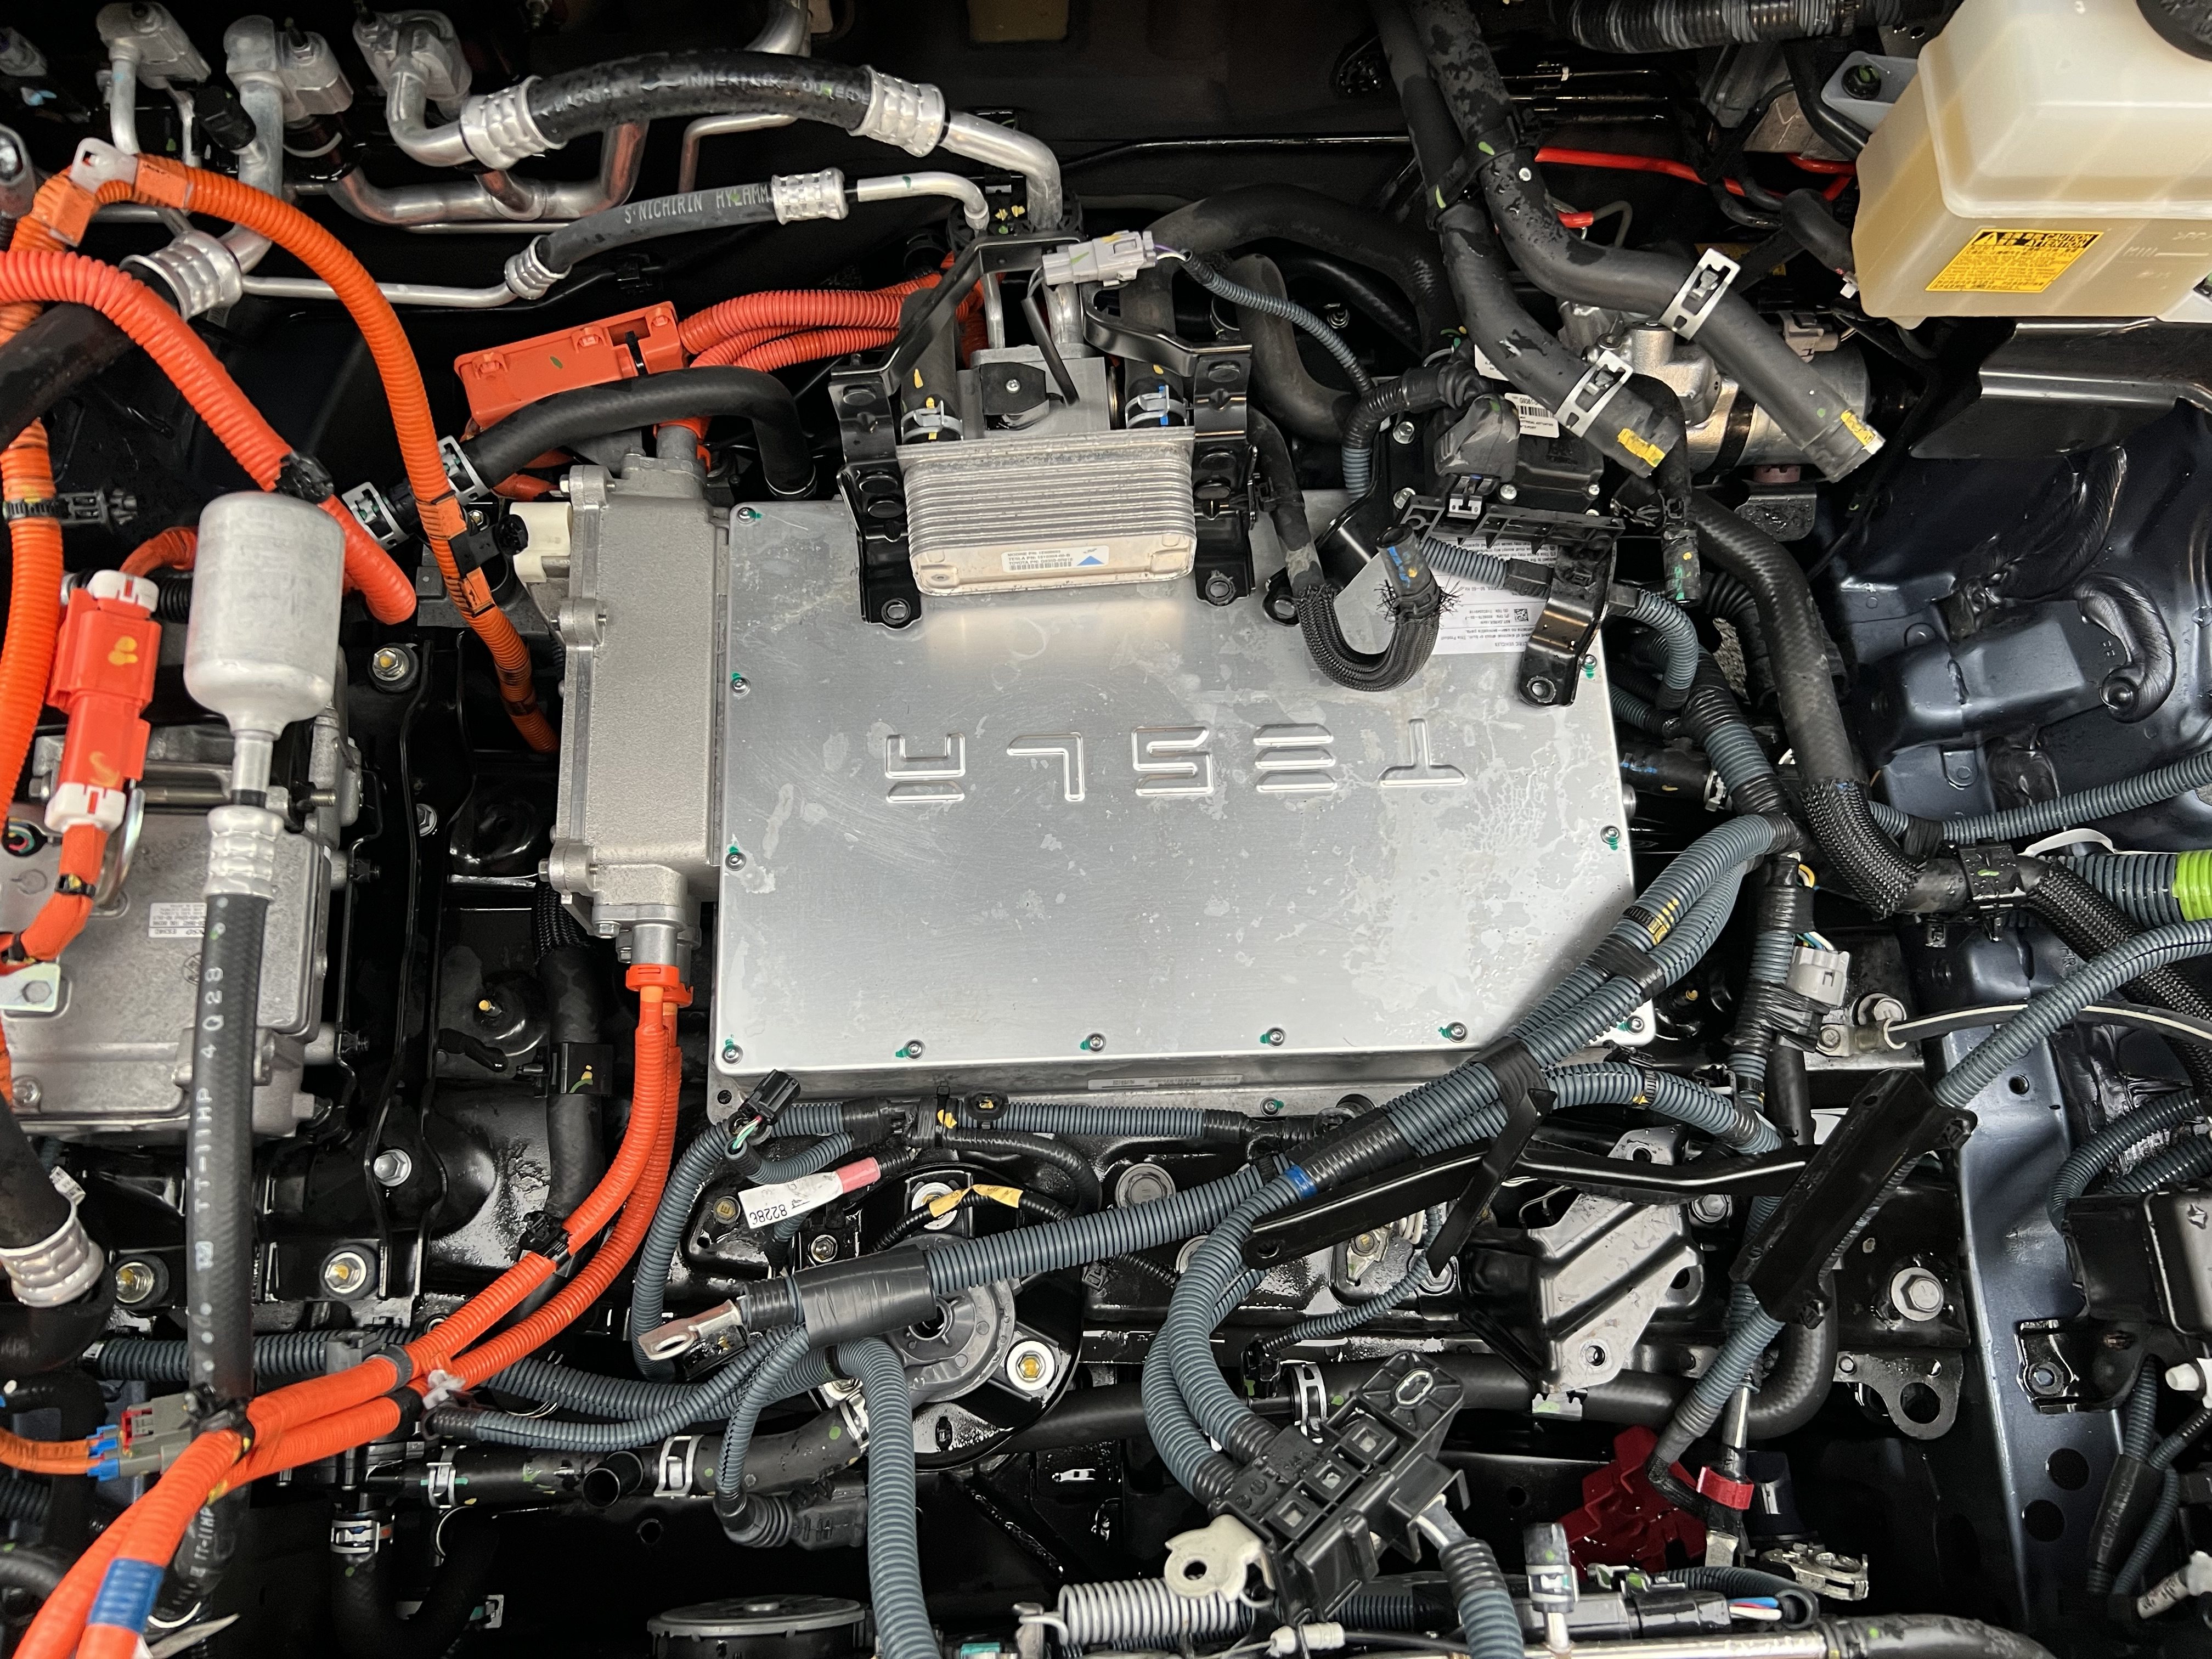
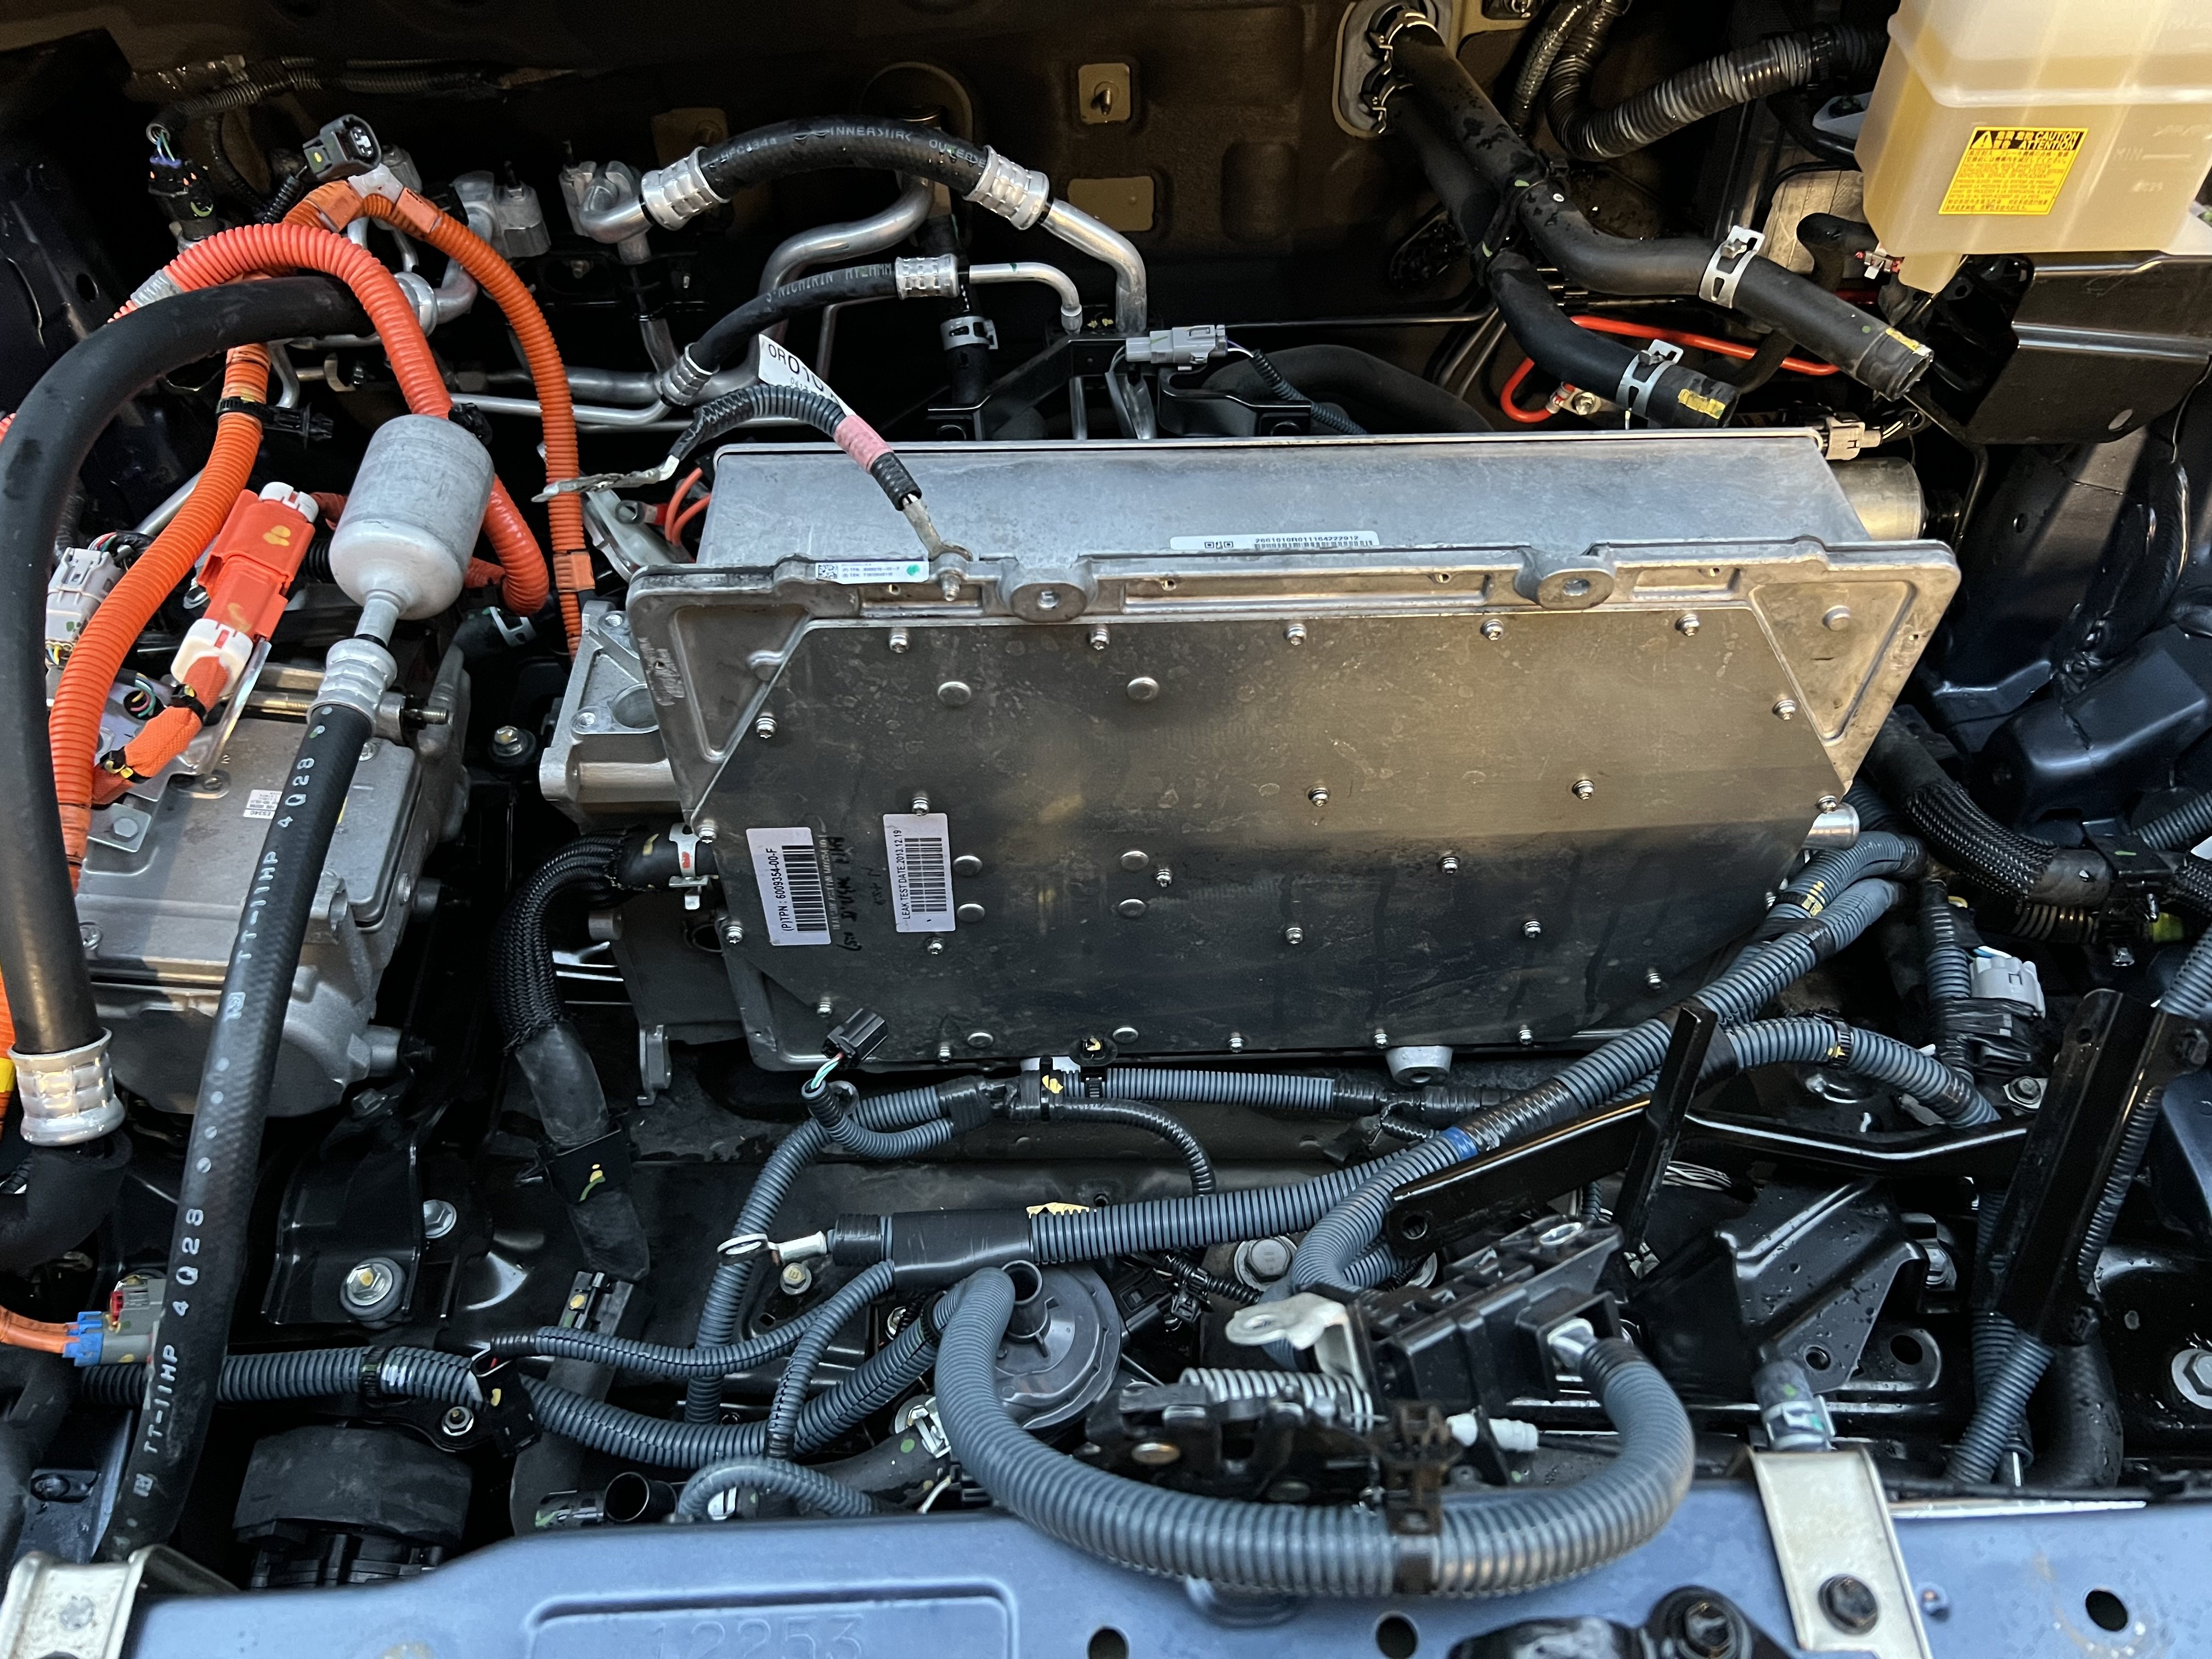
With the driver's side reservoirs removed, the heater & DC-DC removed, and the large baseplate that they're sitting on is removed, you can finally see the OBC (HVJB bolted to the left side of it in this pic):


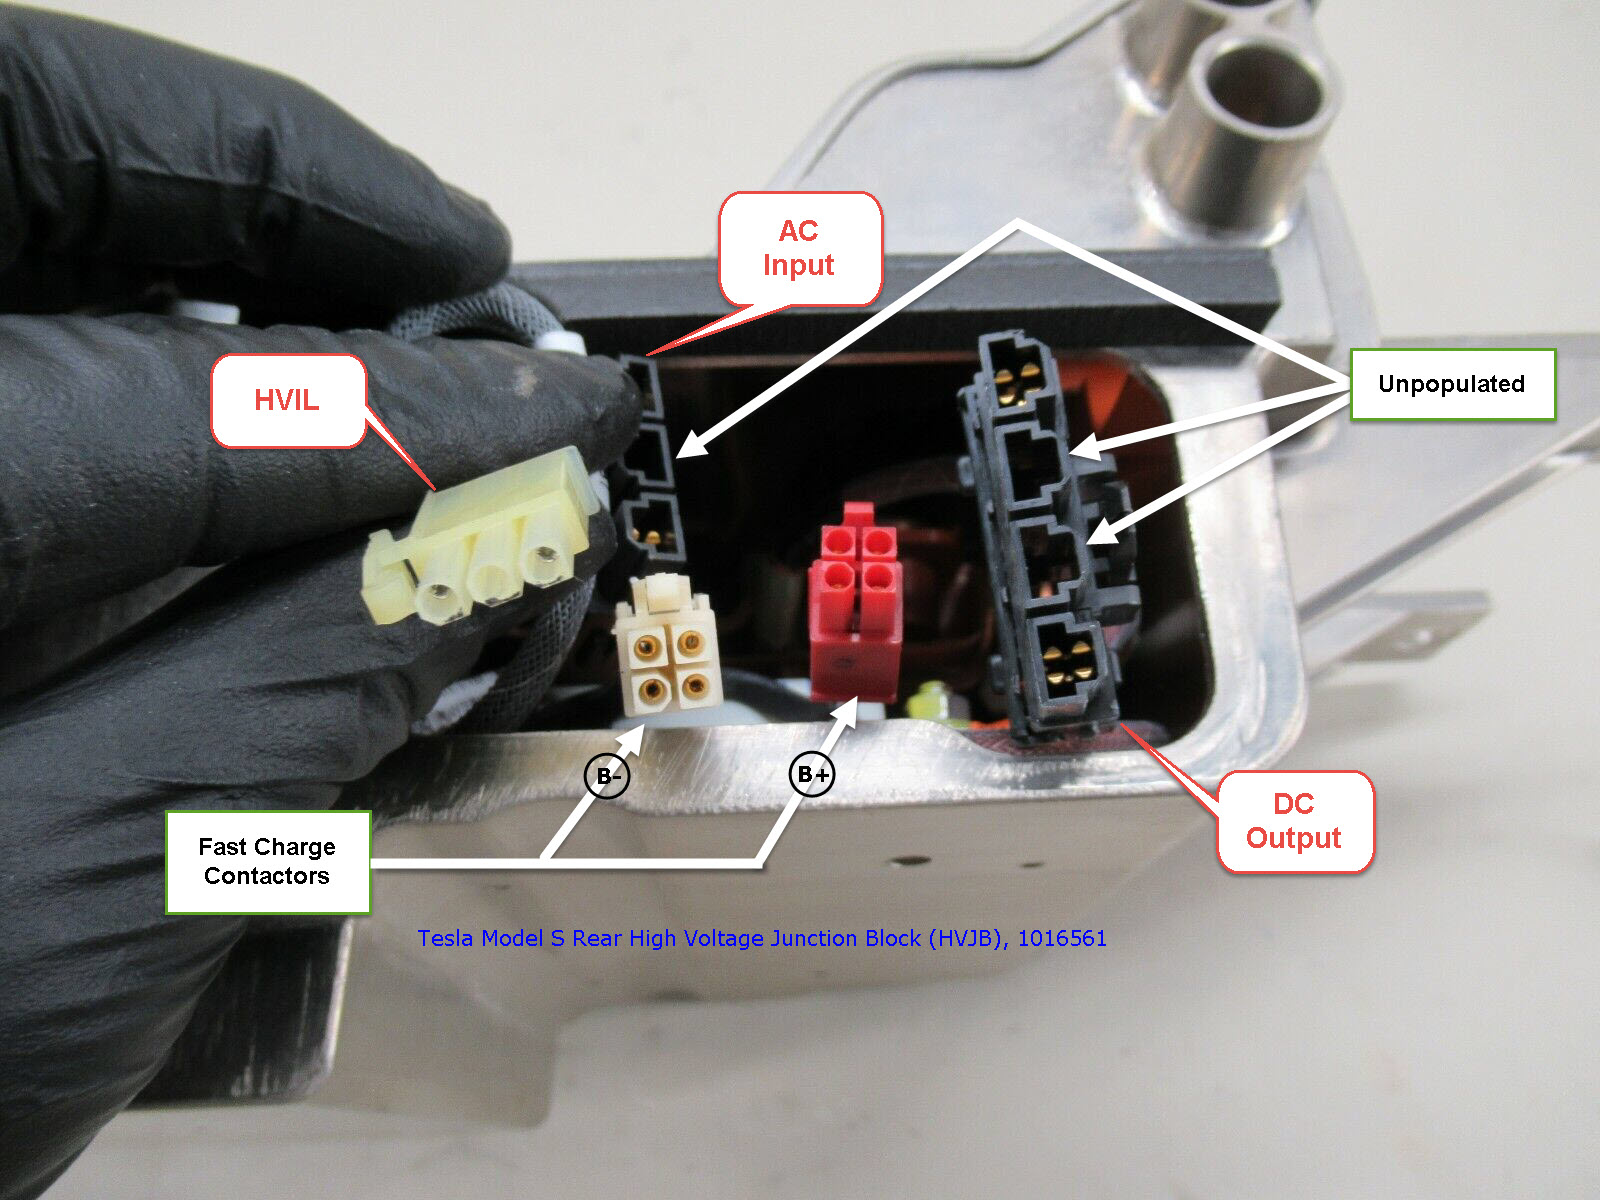
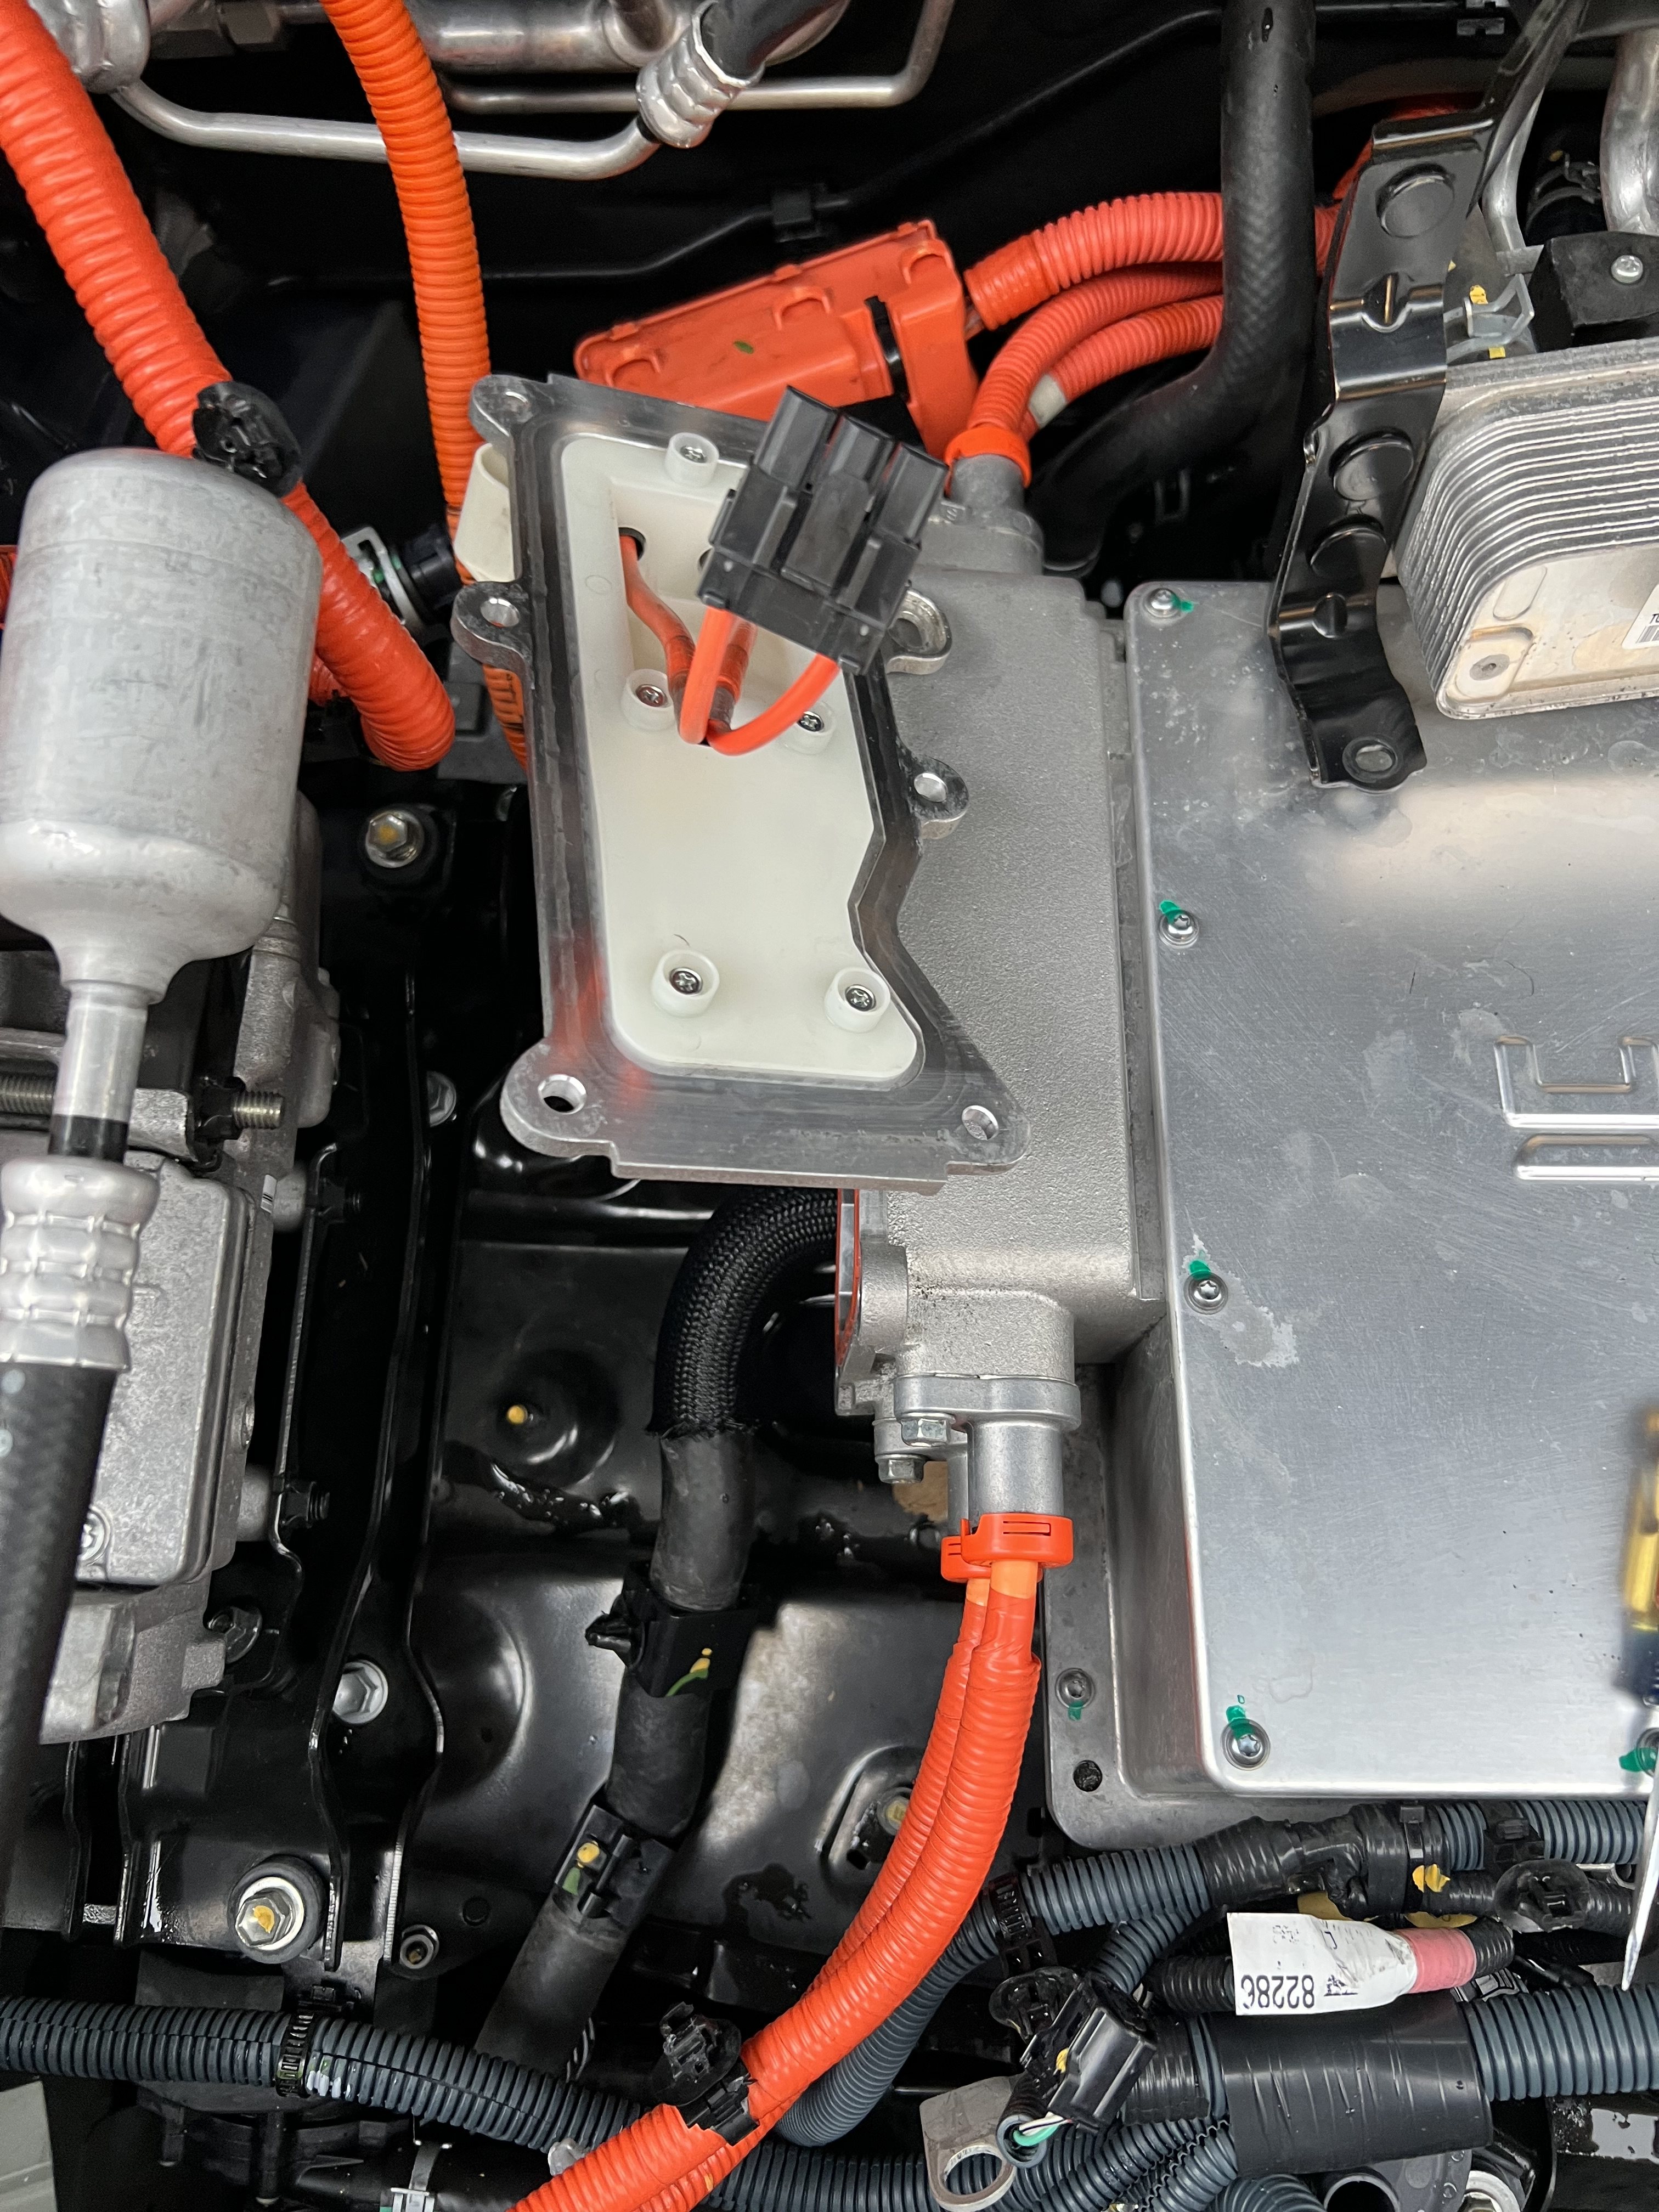
When you start fiddling with the HVJB, don't bother taking this white plastic cover off (two screws), it gains you nothing. Even cutting the zip-ties doens't gain anything. The leads are the AC input lines from the Charge Port, and you're best off just leaving the white cover where it is, you can't obtain any more working clearance by touching it.


After removing the driver's side coolant line to the bottom of the OBC, and the four bolts holding the OBC down, it can be shifted a couple of inches to the driver's side, which provides enough room to remove the HVJB cover and begin working on the many, many bolted connections plus the two AC & DC connectors.

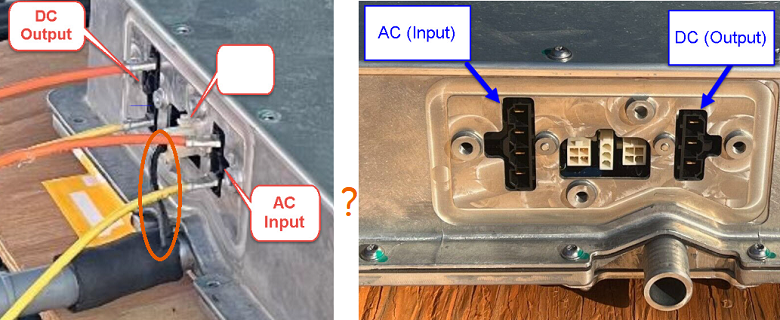
Releasing the tab on this AC input connector is especially not fun, as you are working with a mirror to place a tool on the tab to depress it. And you can't depress the tab and pull the harness at the same time, no room for two hands. Hemostat-like pliers helped a little.


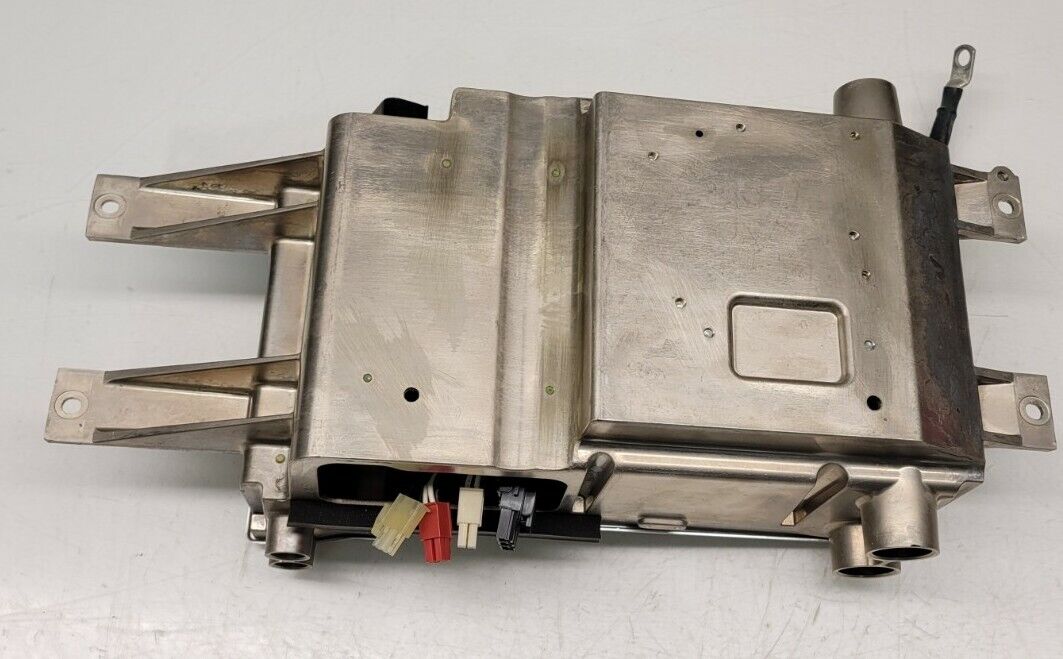
When you get all the many, many connections disconnected from the HVJB, you can disconnect the final OBC coolant hose from the passenger side of the OBC. As shown below, I flipped the OBC up on edge and used water pump pliers, but this will not work for reassembly, as the hose would have to be twisted to preload it.


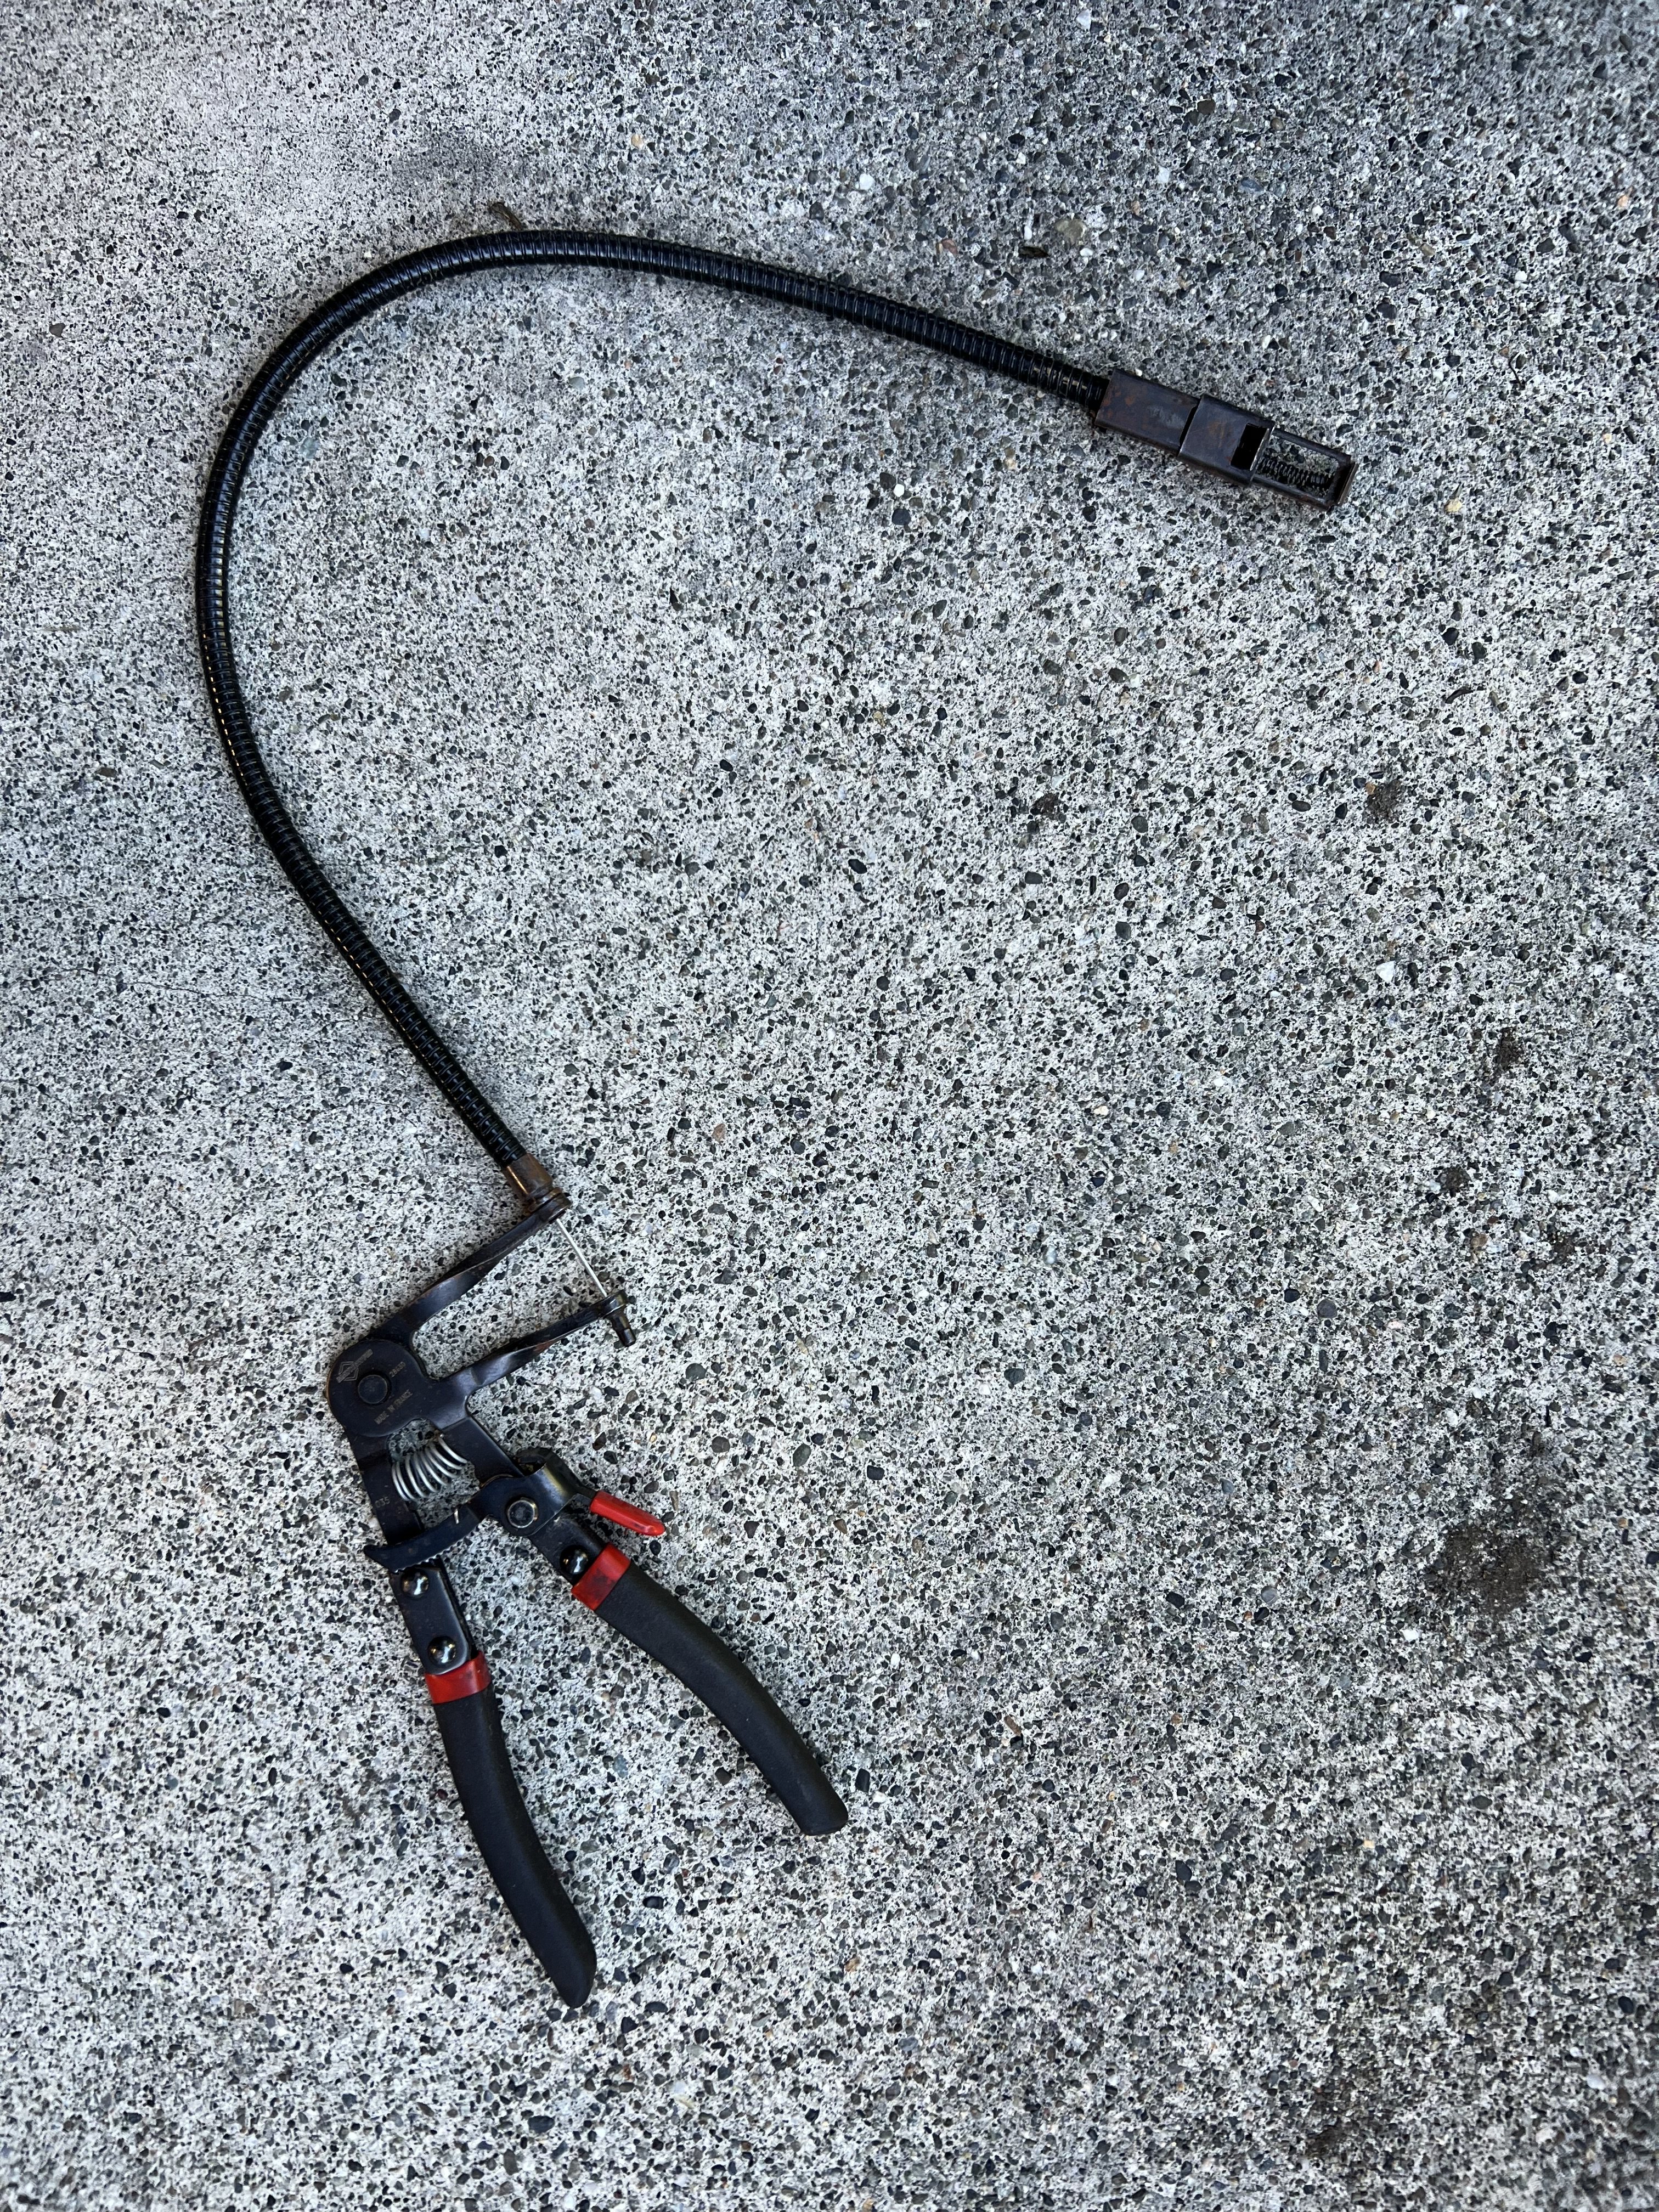
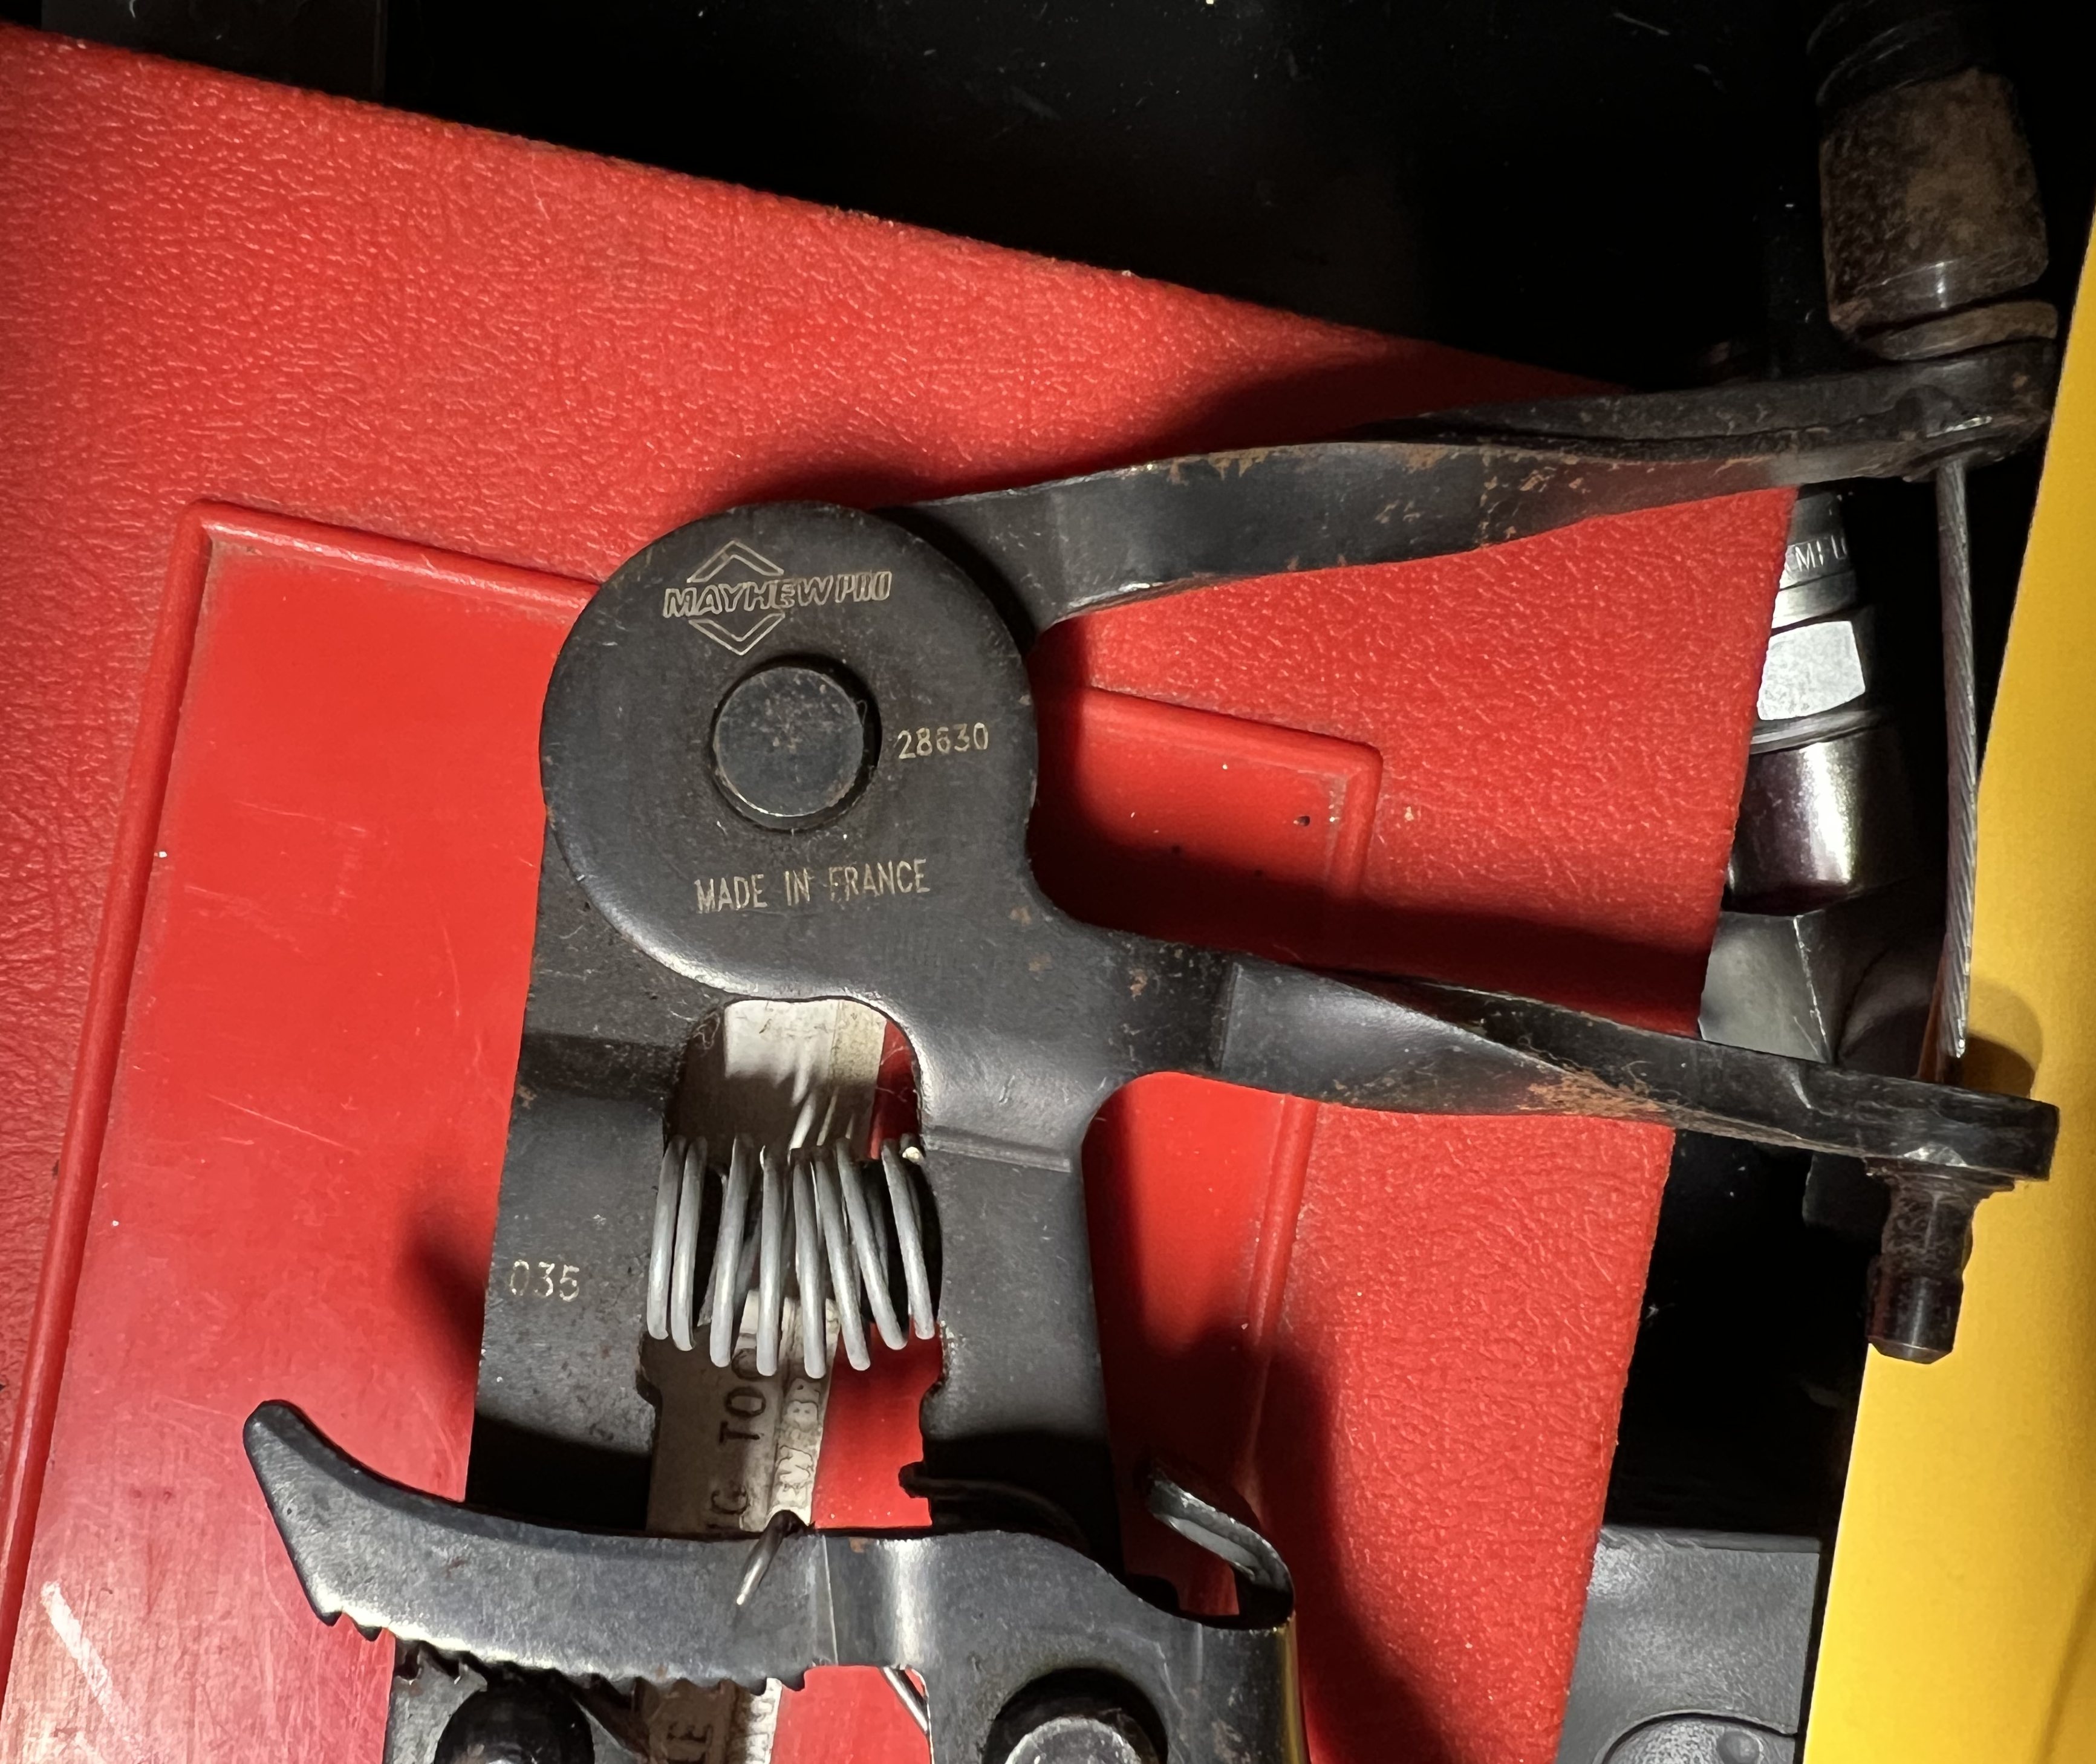
For assembly, for this hose clamp, and one other, I used a remote clamp tool I happen to have, a Mayhew Pro Rigiflex Hose Clamp Plier Model 28630 :


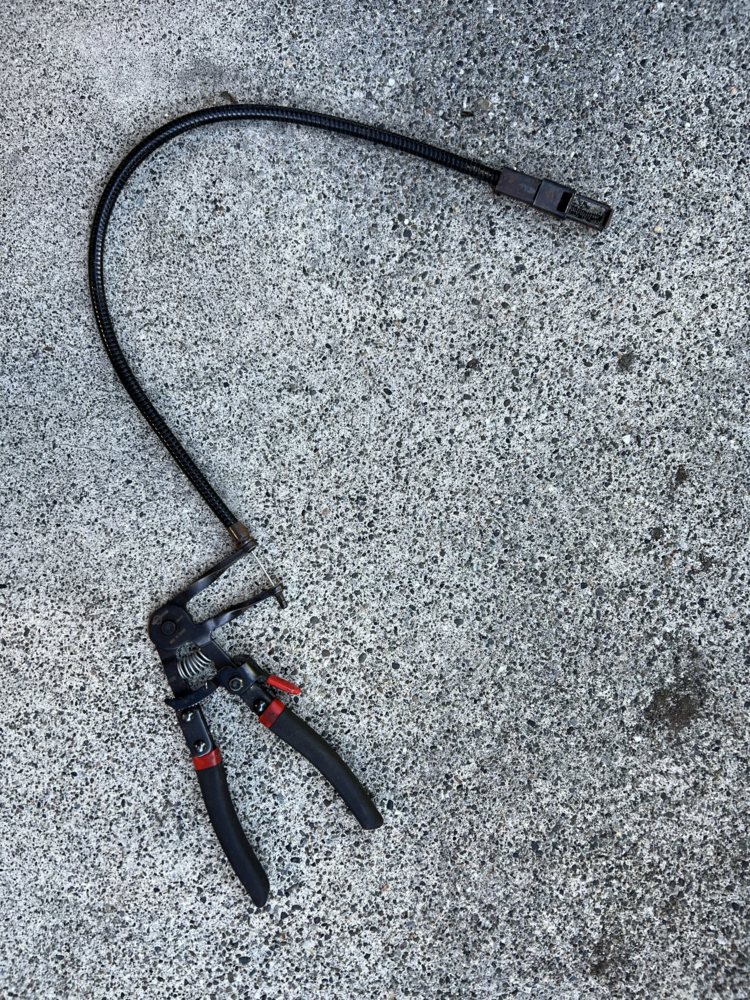
These are the cat's meow for these kinds of spring hose clamps, but for casual use you can get a cheap set via Amazon for around $15. They will make you cry, but you can get the job done. I tossed one of those cheap ones years ago, about the third time I used it. Here's a canned search for cheap remote hose clamp pliers


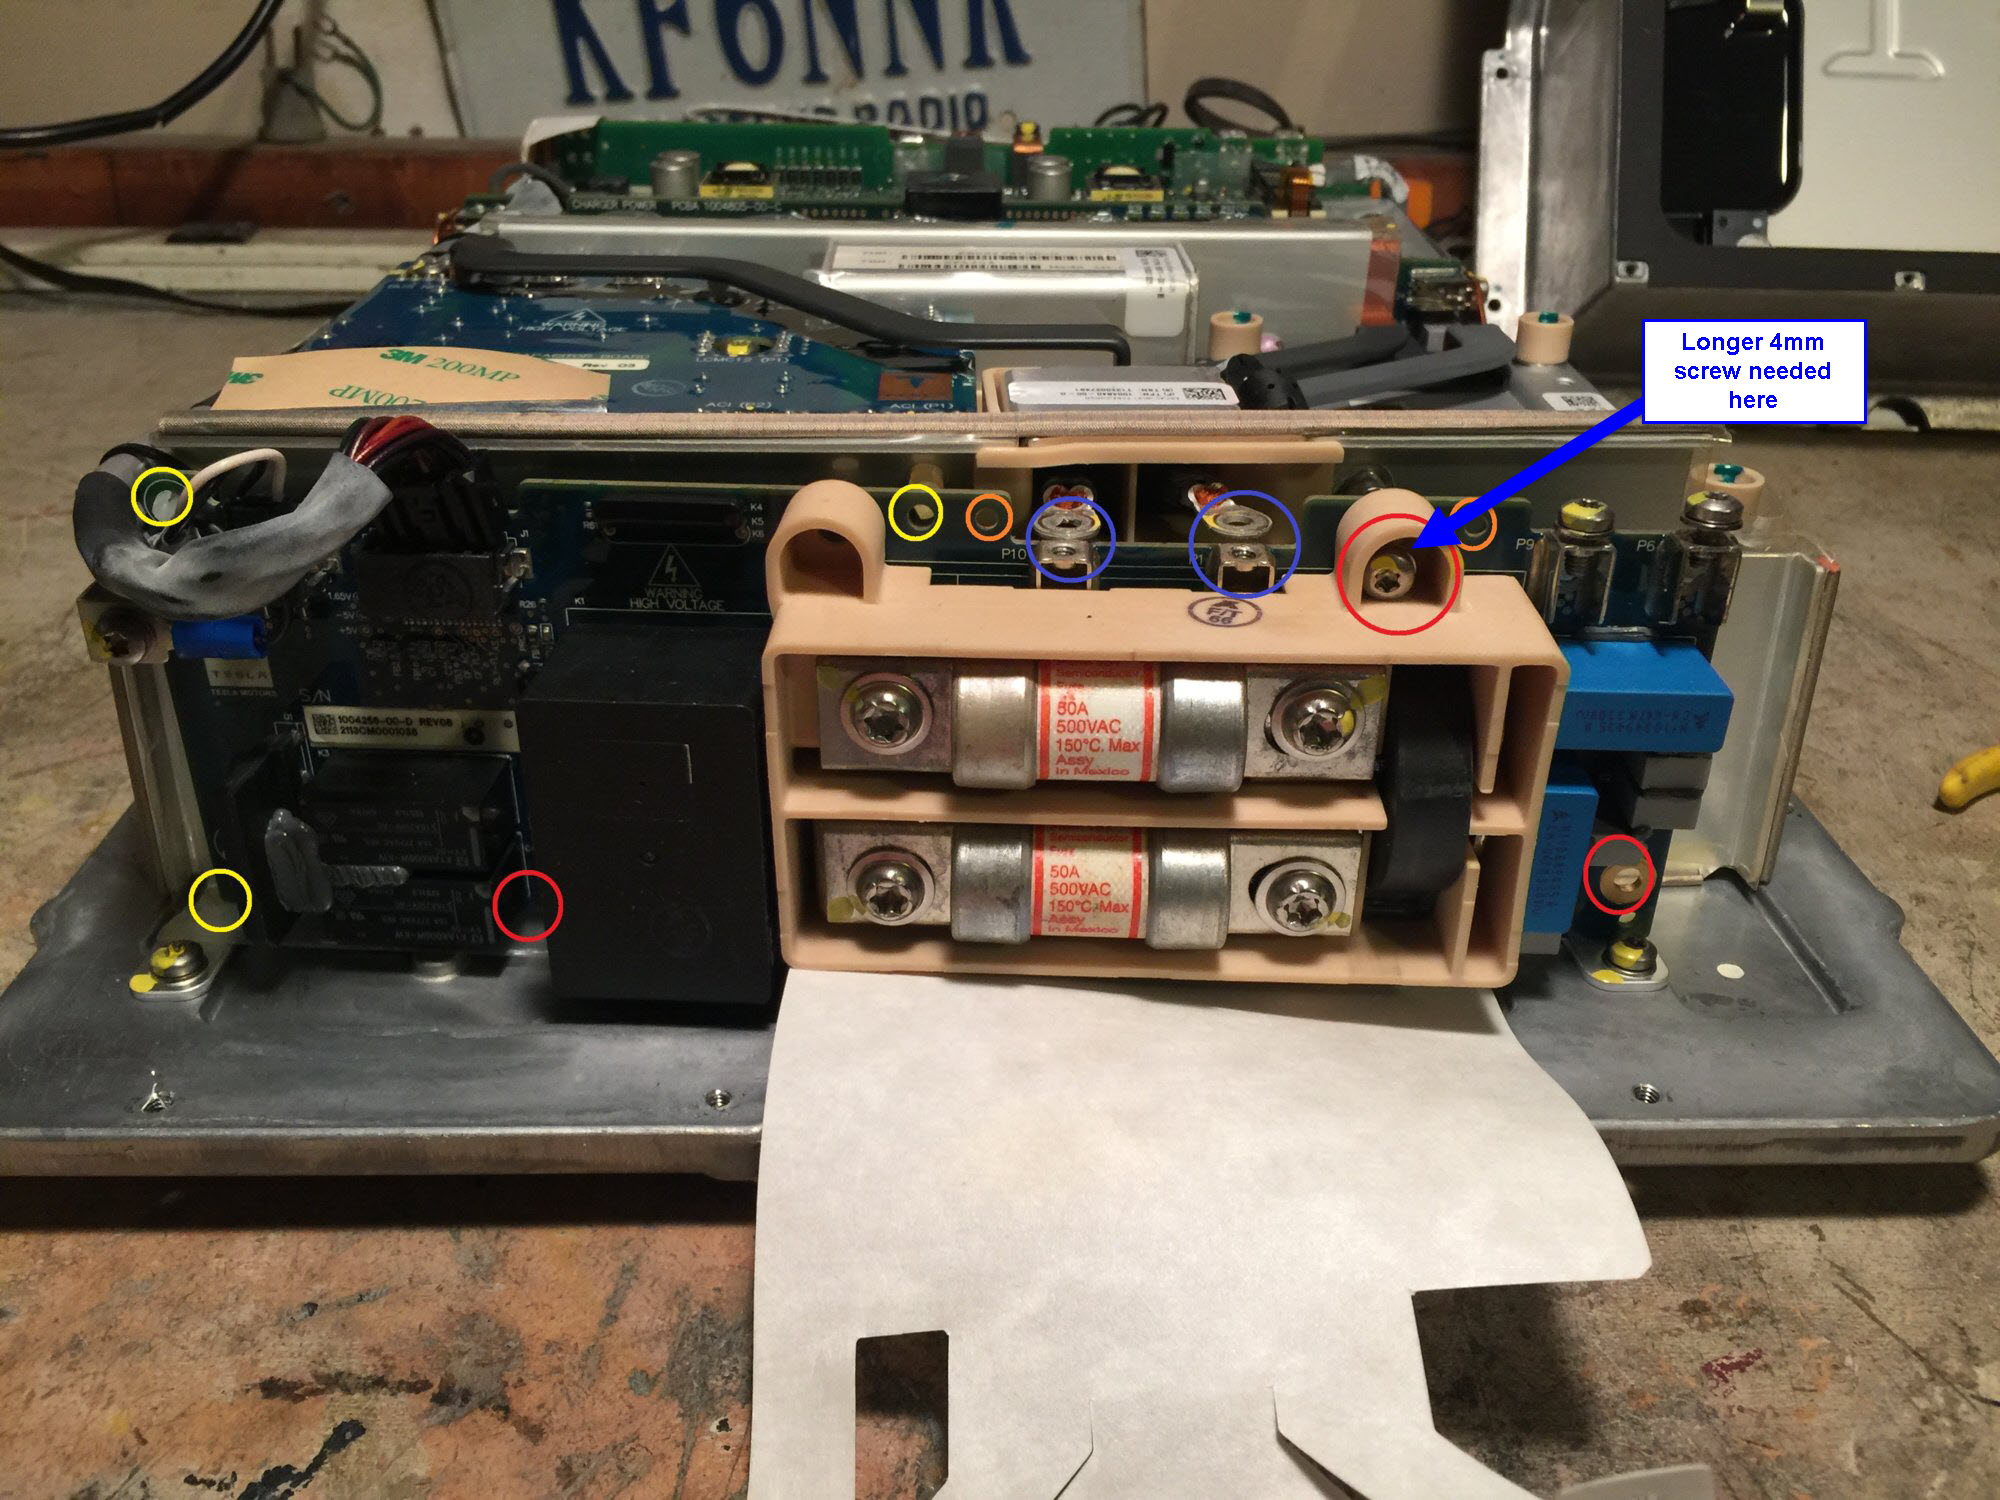
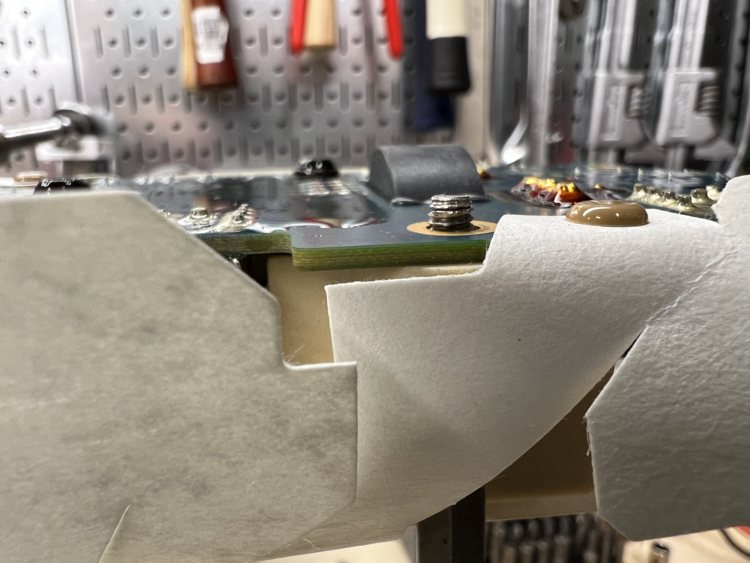
When replacing the fuses (best practice is to replace them both), if you remove the PCB in order to release the insulating paper without cutting it, I have found that sometimes there is one screw that should be replaced with a longer version.


Because that screw goes through not only the PCB but also the fuseholder plastic, it needs to be a bit longer. Here's how mine stripped when reassembling it using only moderate torque:


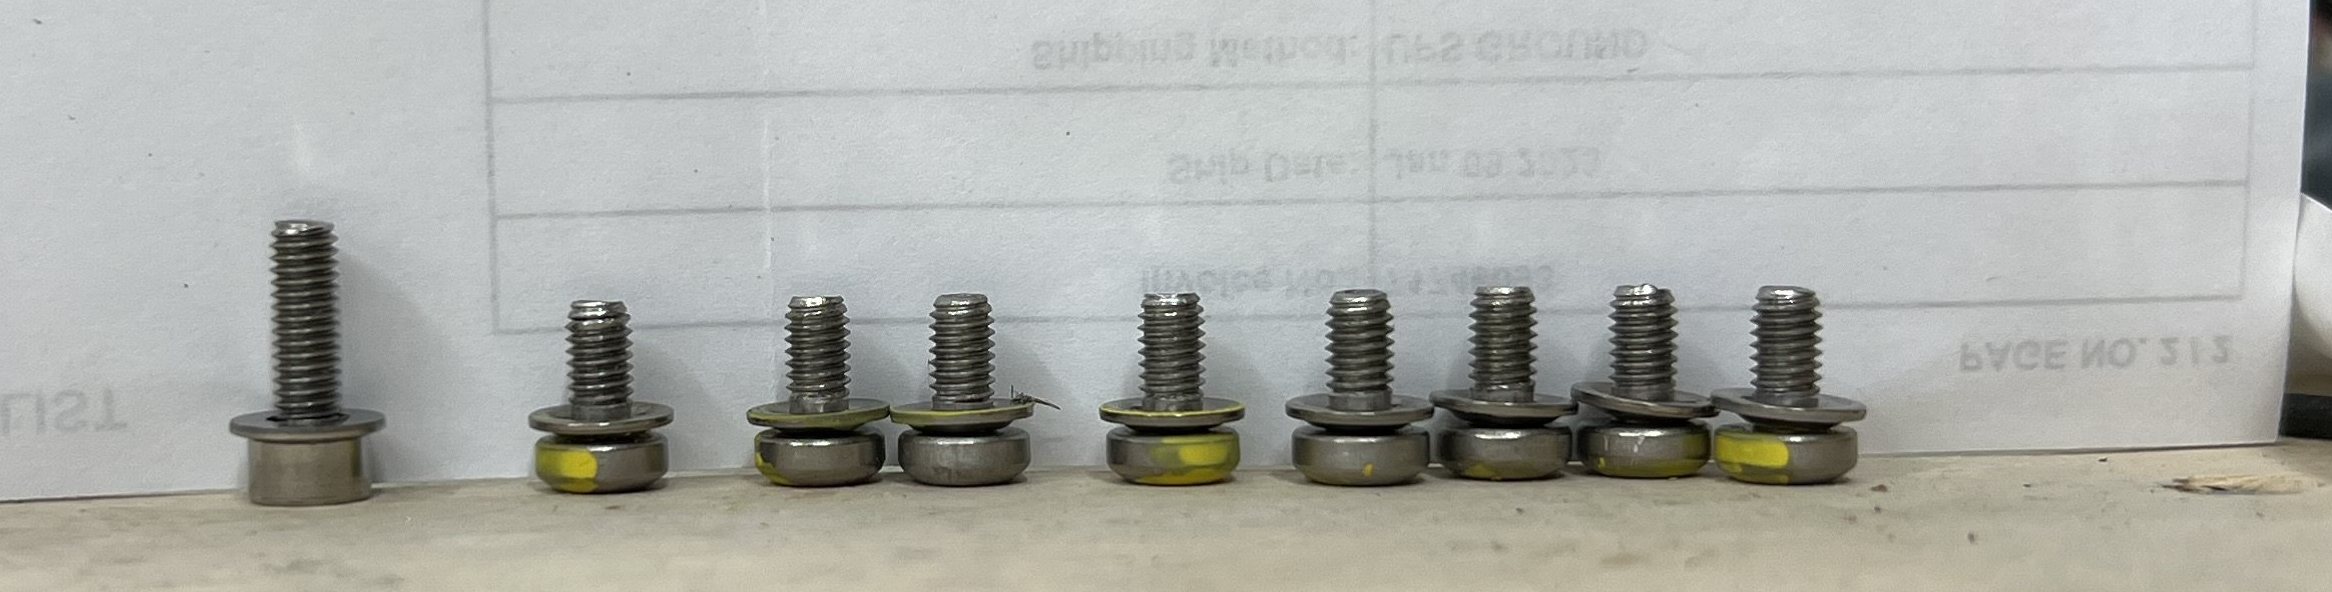
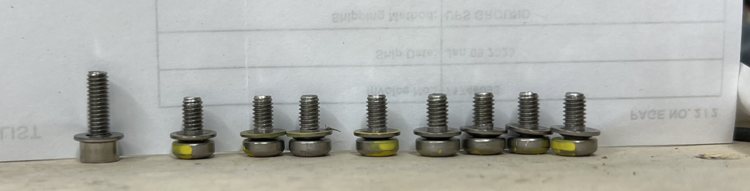
A comparison of the longer screw I acquired to replace it, vs the OEM screws:


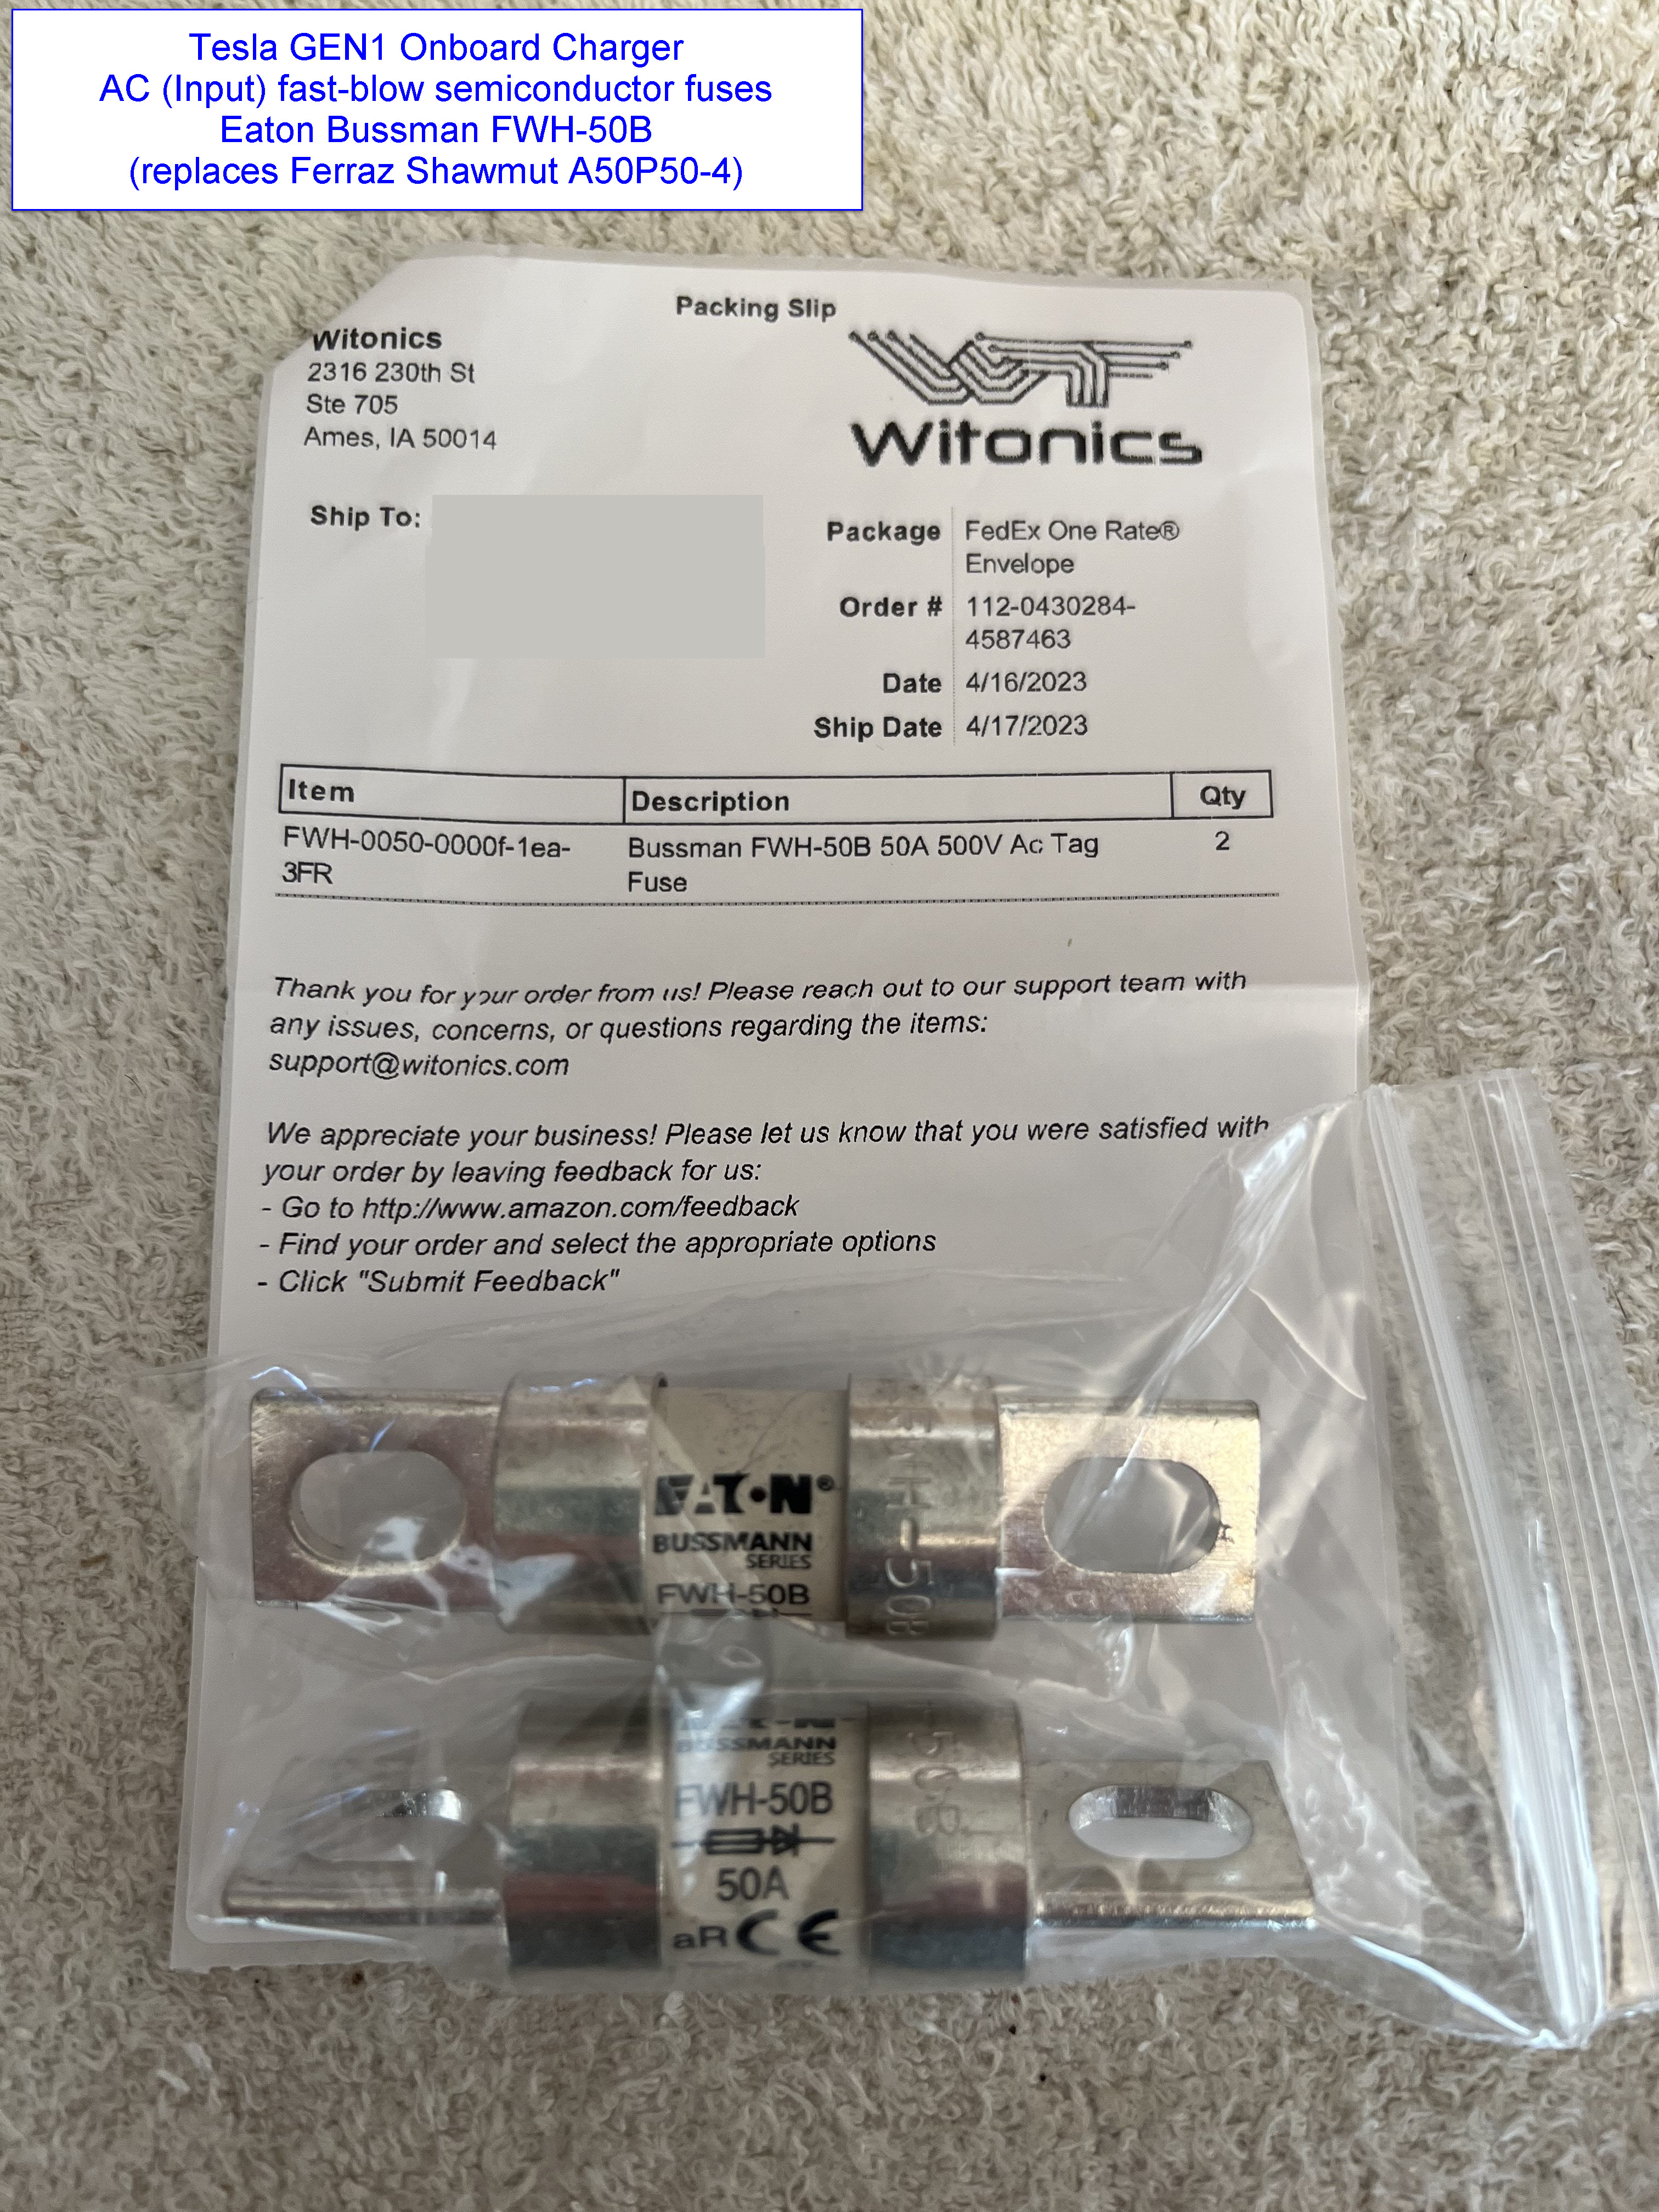
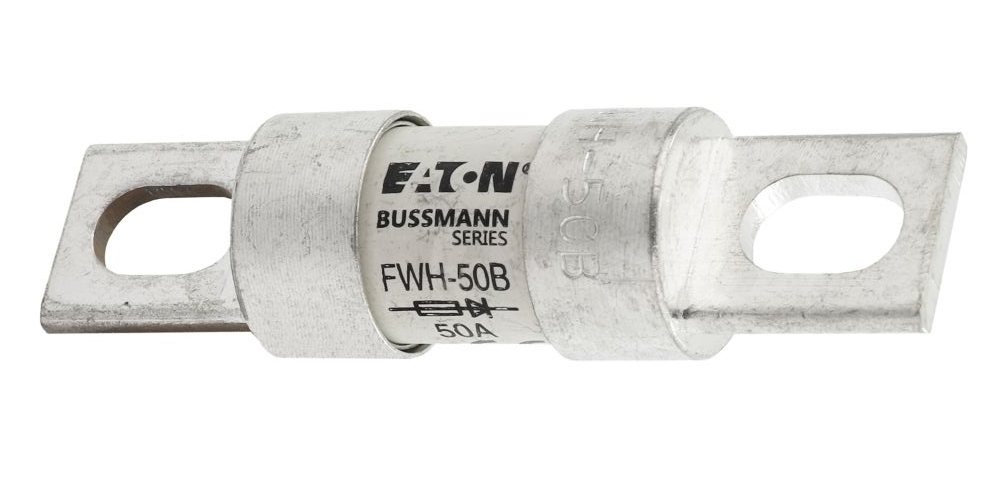
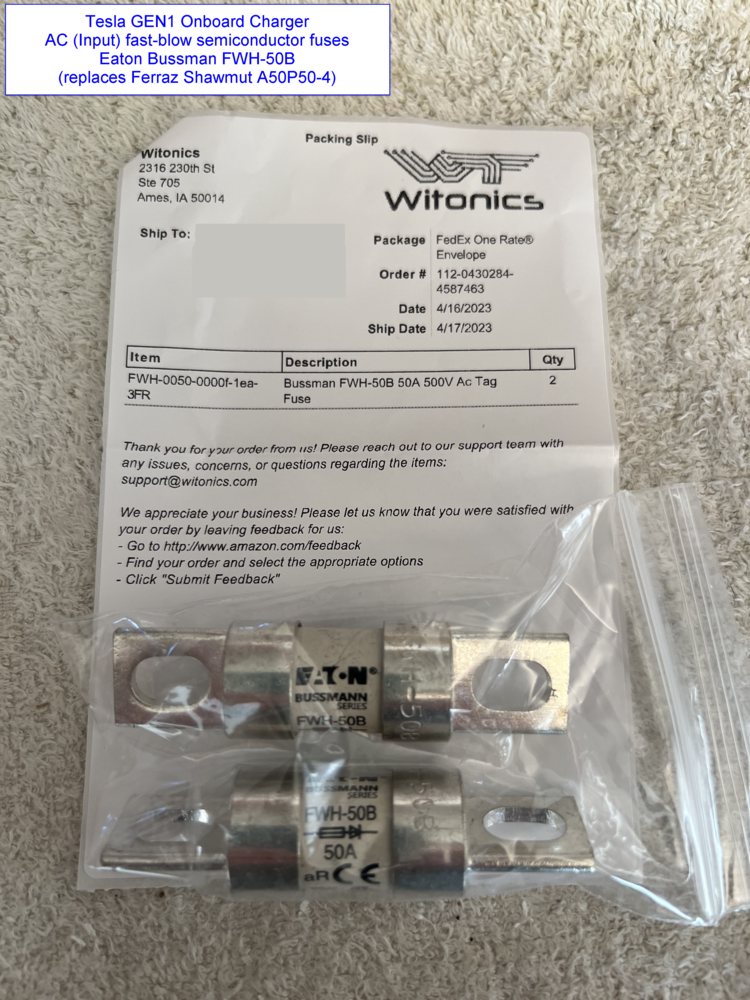
I replaced the OEM Ferraz Shamut (Mersen) fuses with Eaton Bussmann (Cooper) FWH-50B instead. See the Wiki:fuses for more info.


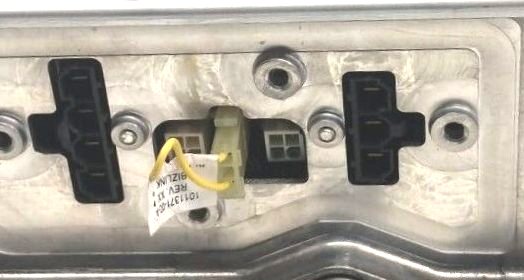
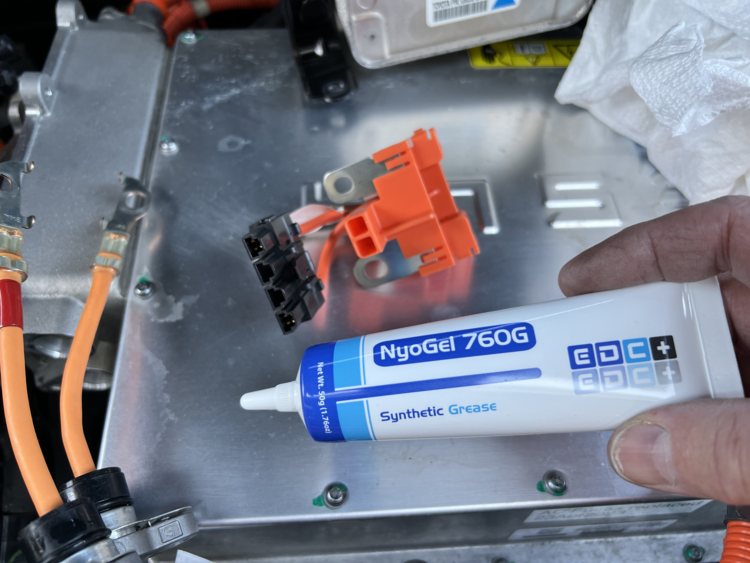
When assembling the connections to the HVJB, the black AC & DC Molex connectors should be lubricated using Nylogel 760G dielectric grease on these terminals "if it will be exposed to vibration and/or thermal cycling", which describes this service. See the Wiki:DC Connector article for cites. Nylogel 760G is available at Amazon.


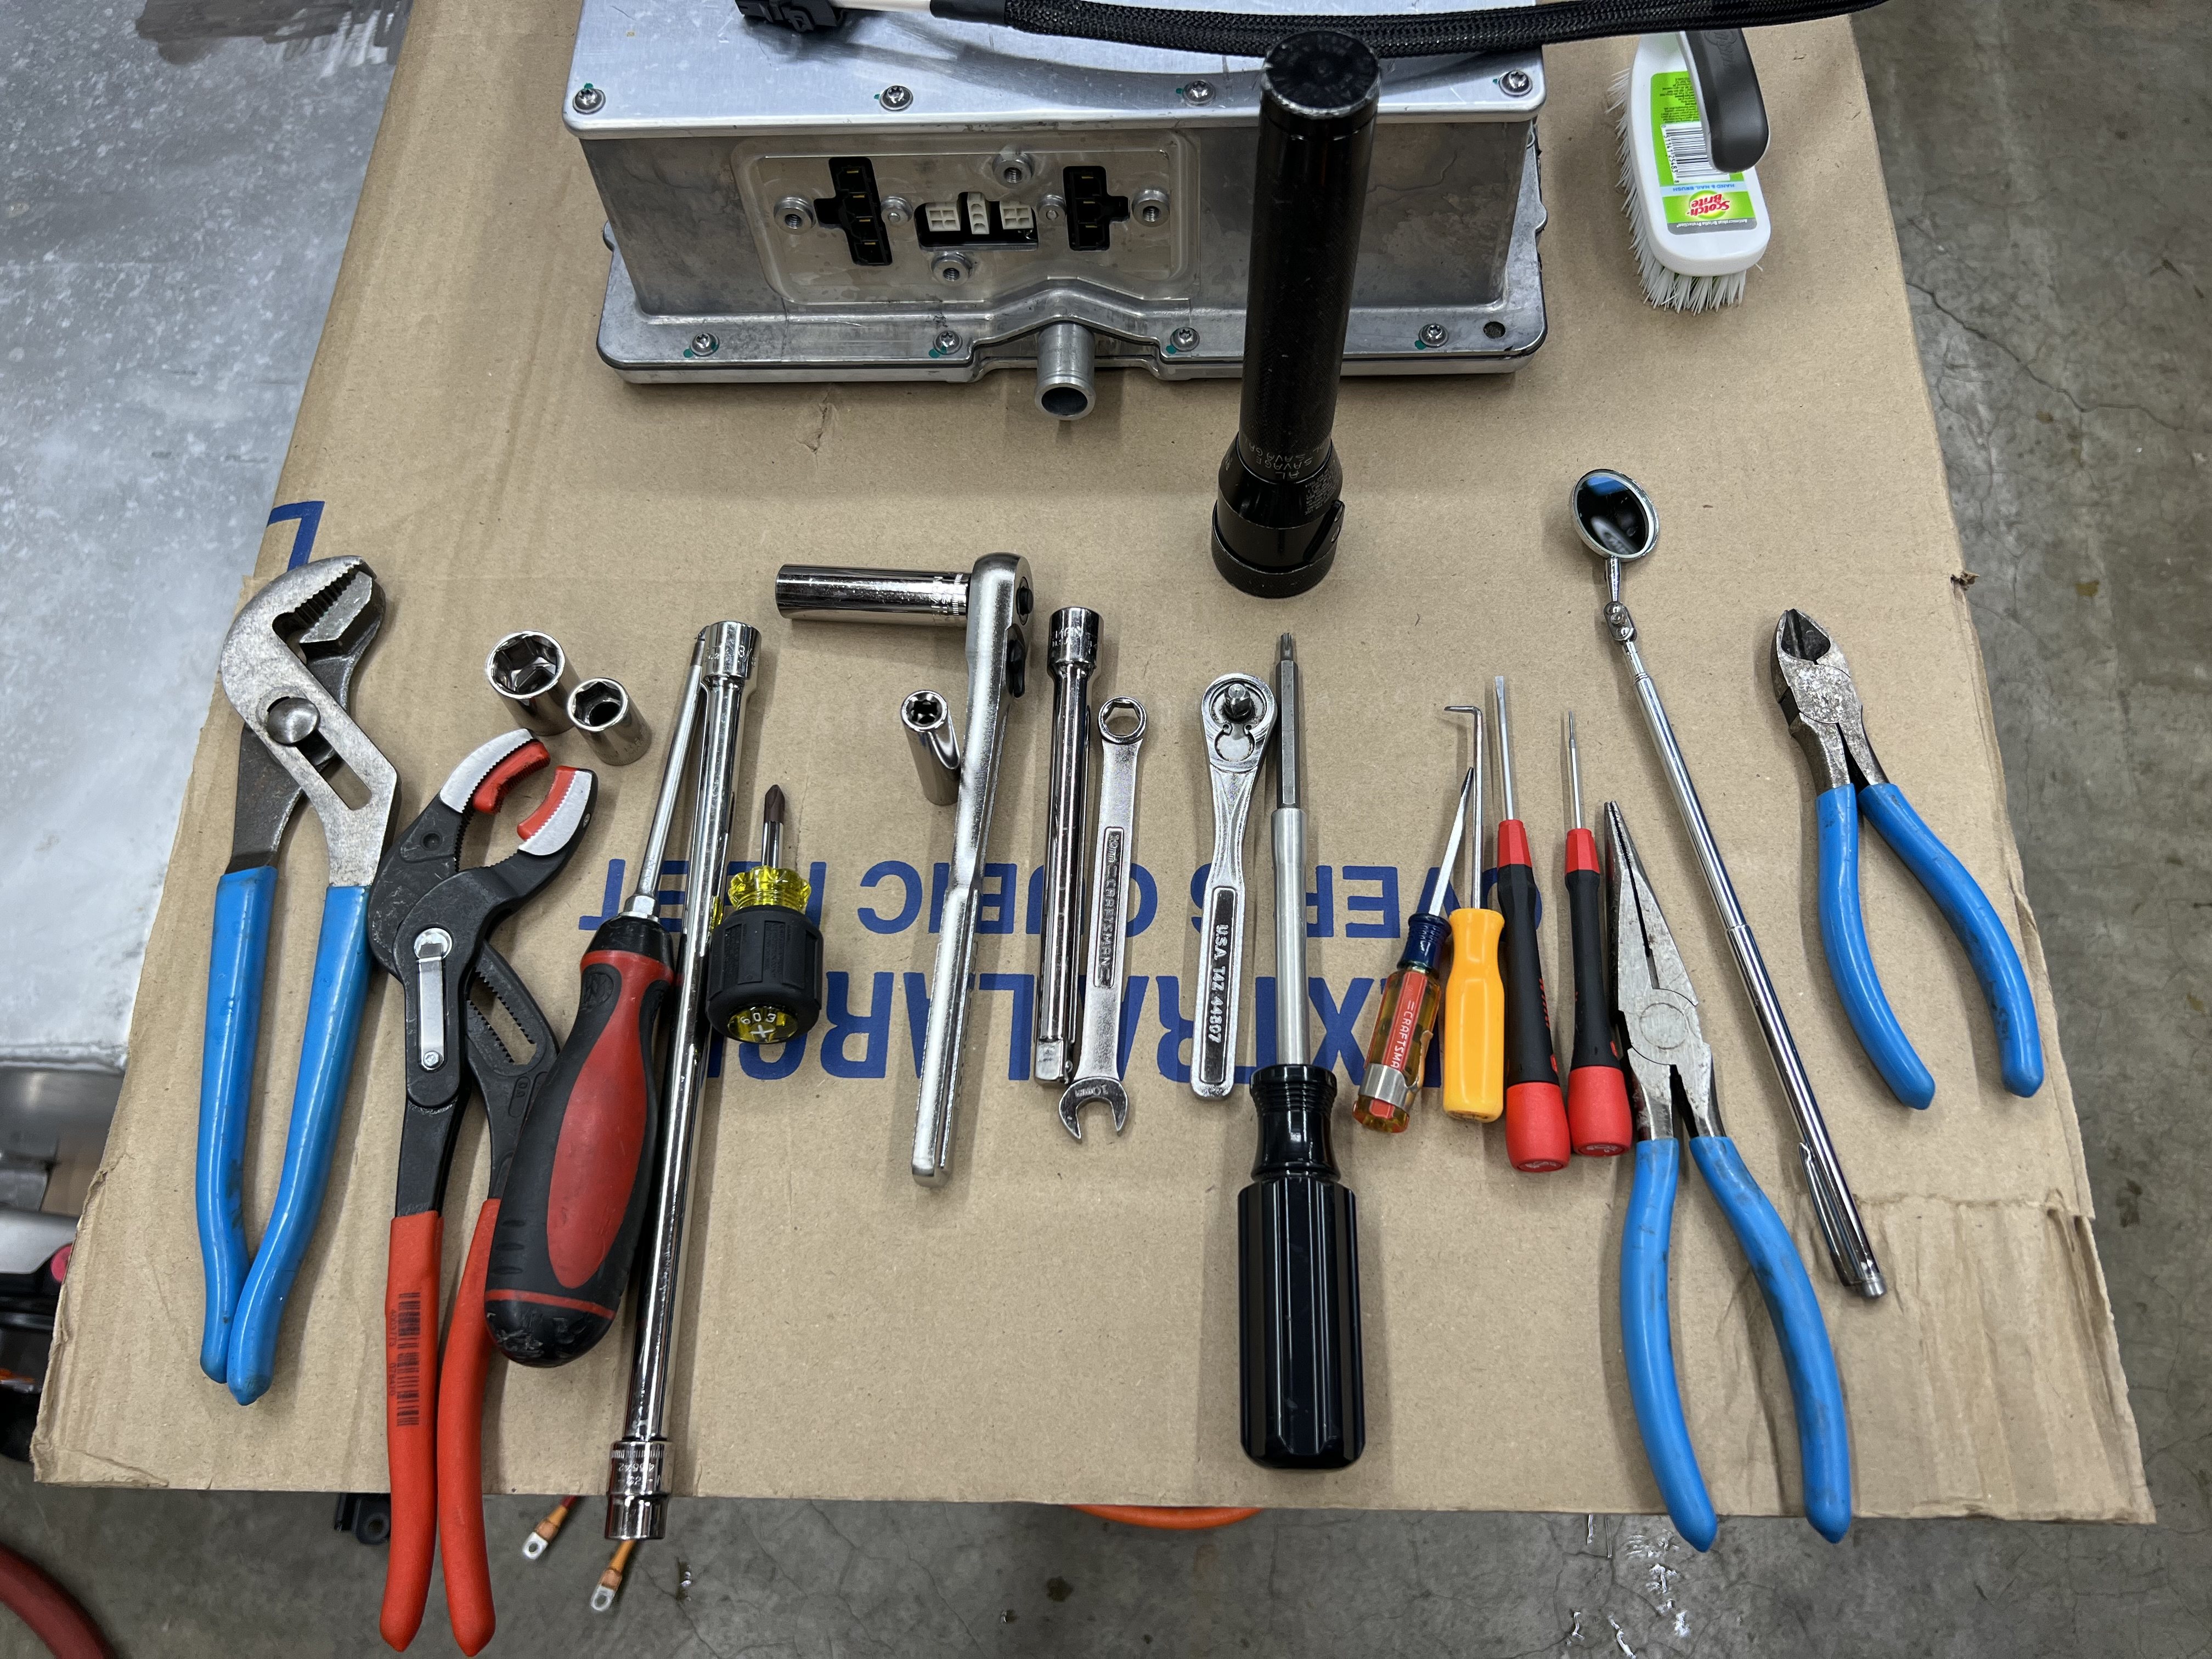
The only tools I used to perform this fuses replacement are these (plus the remote hose clamp pliers mentioned above):


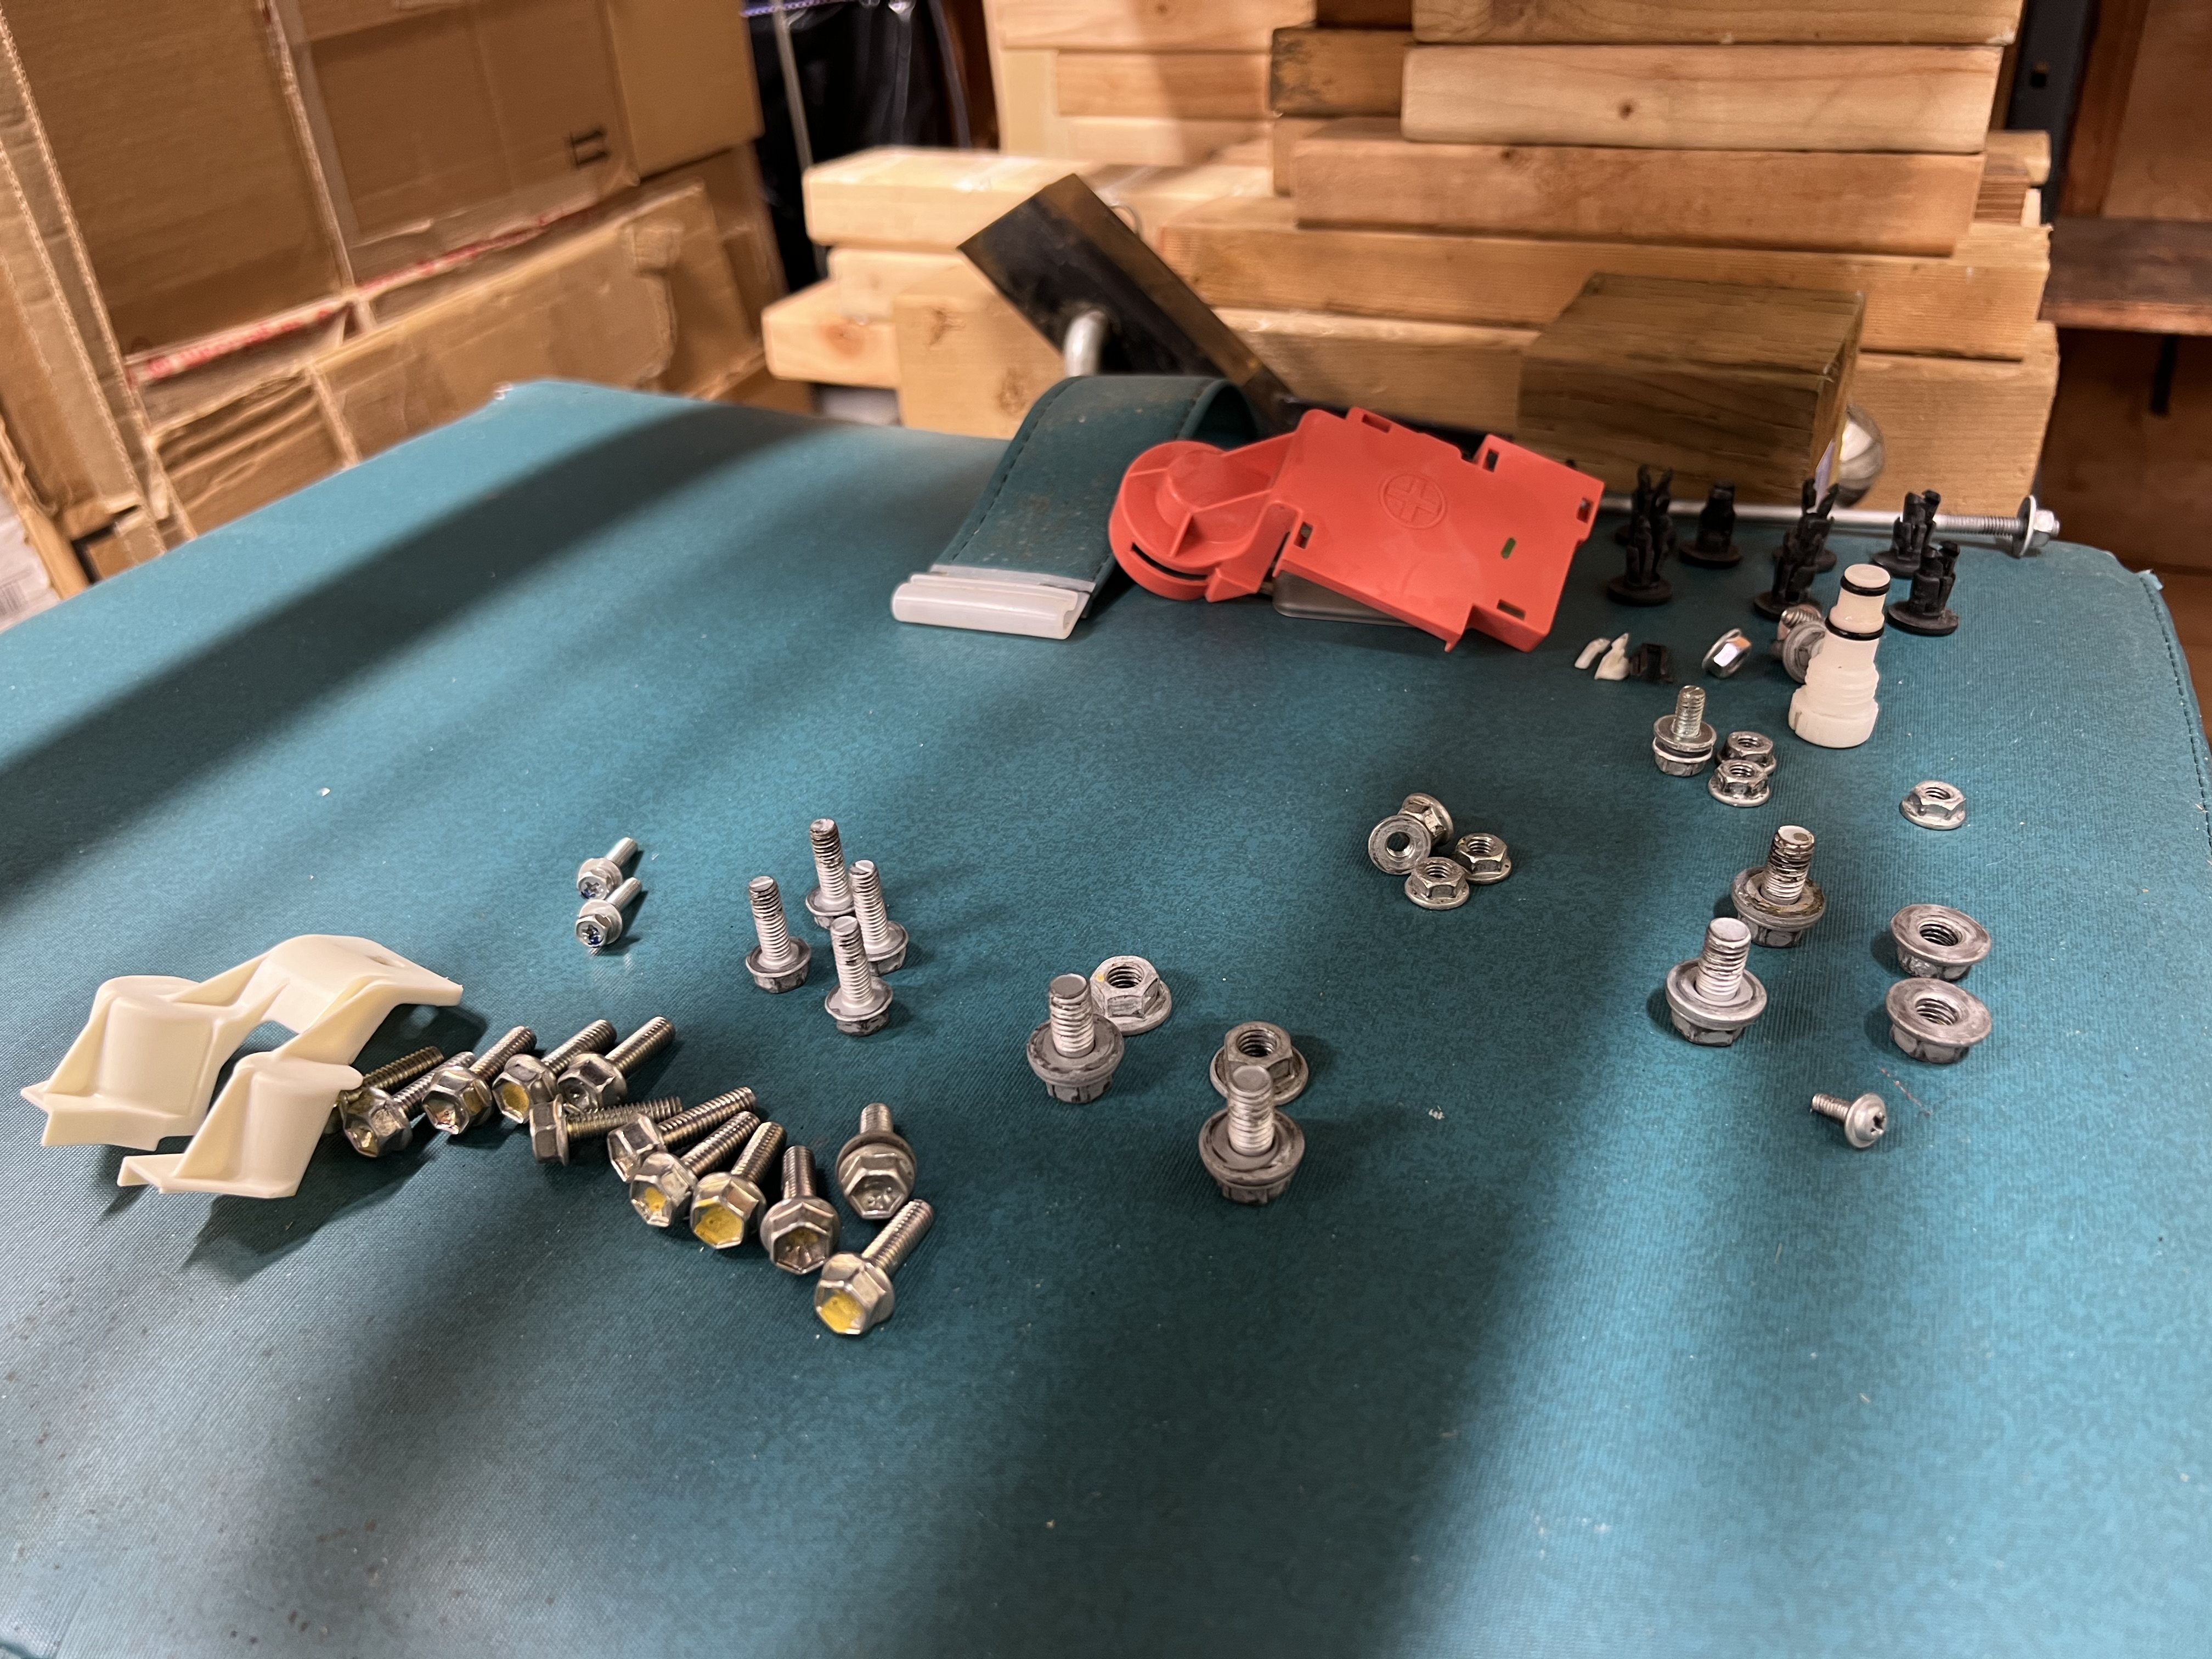
All the fasteners removed/replaced (other than the OBC's covers):


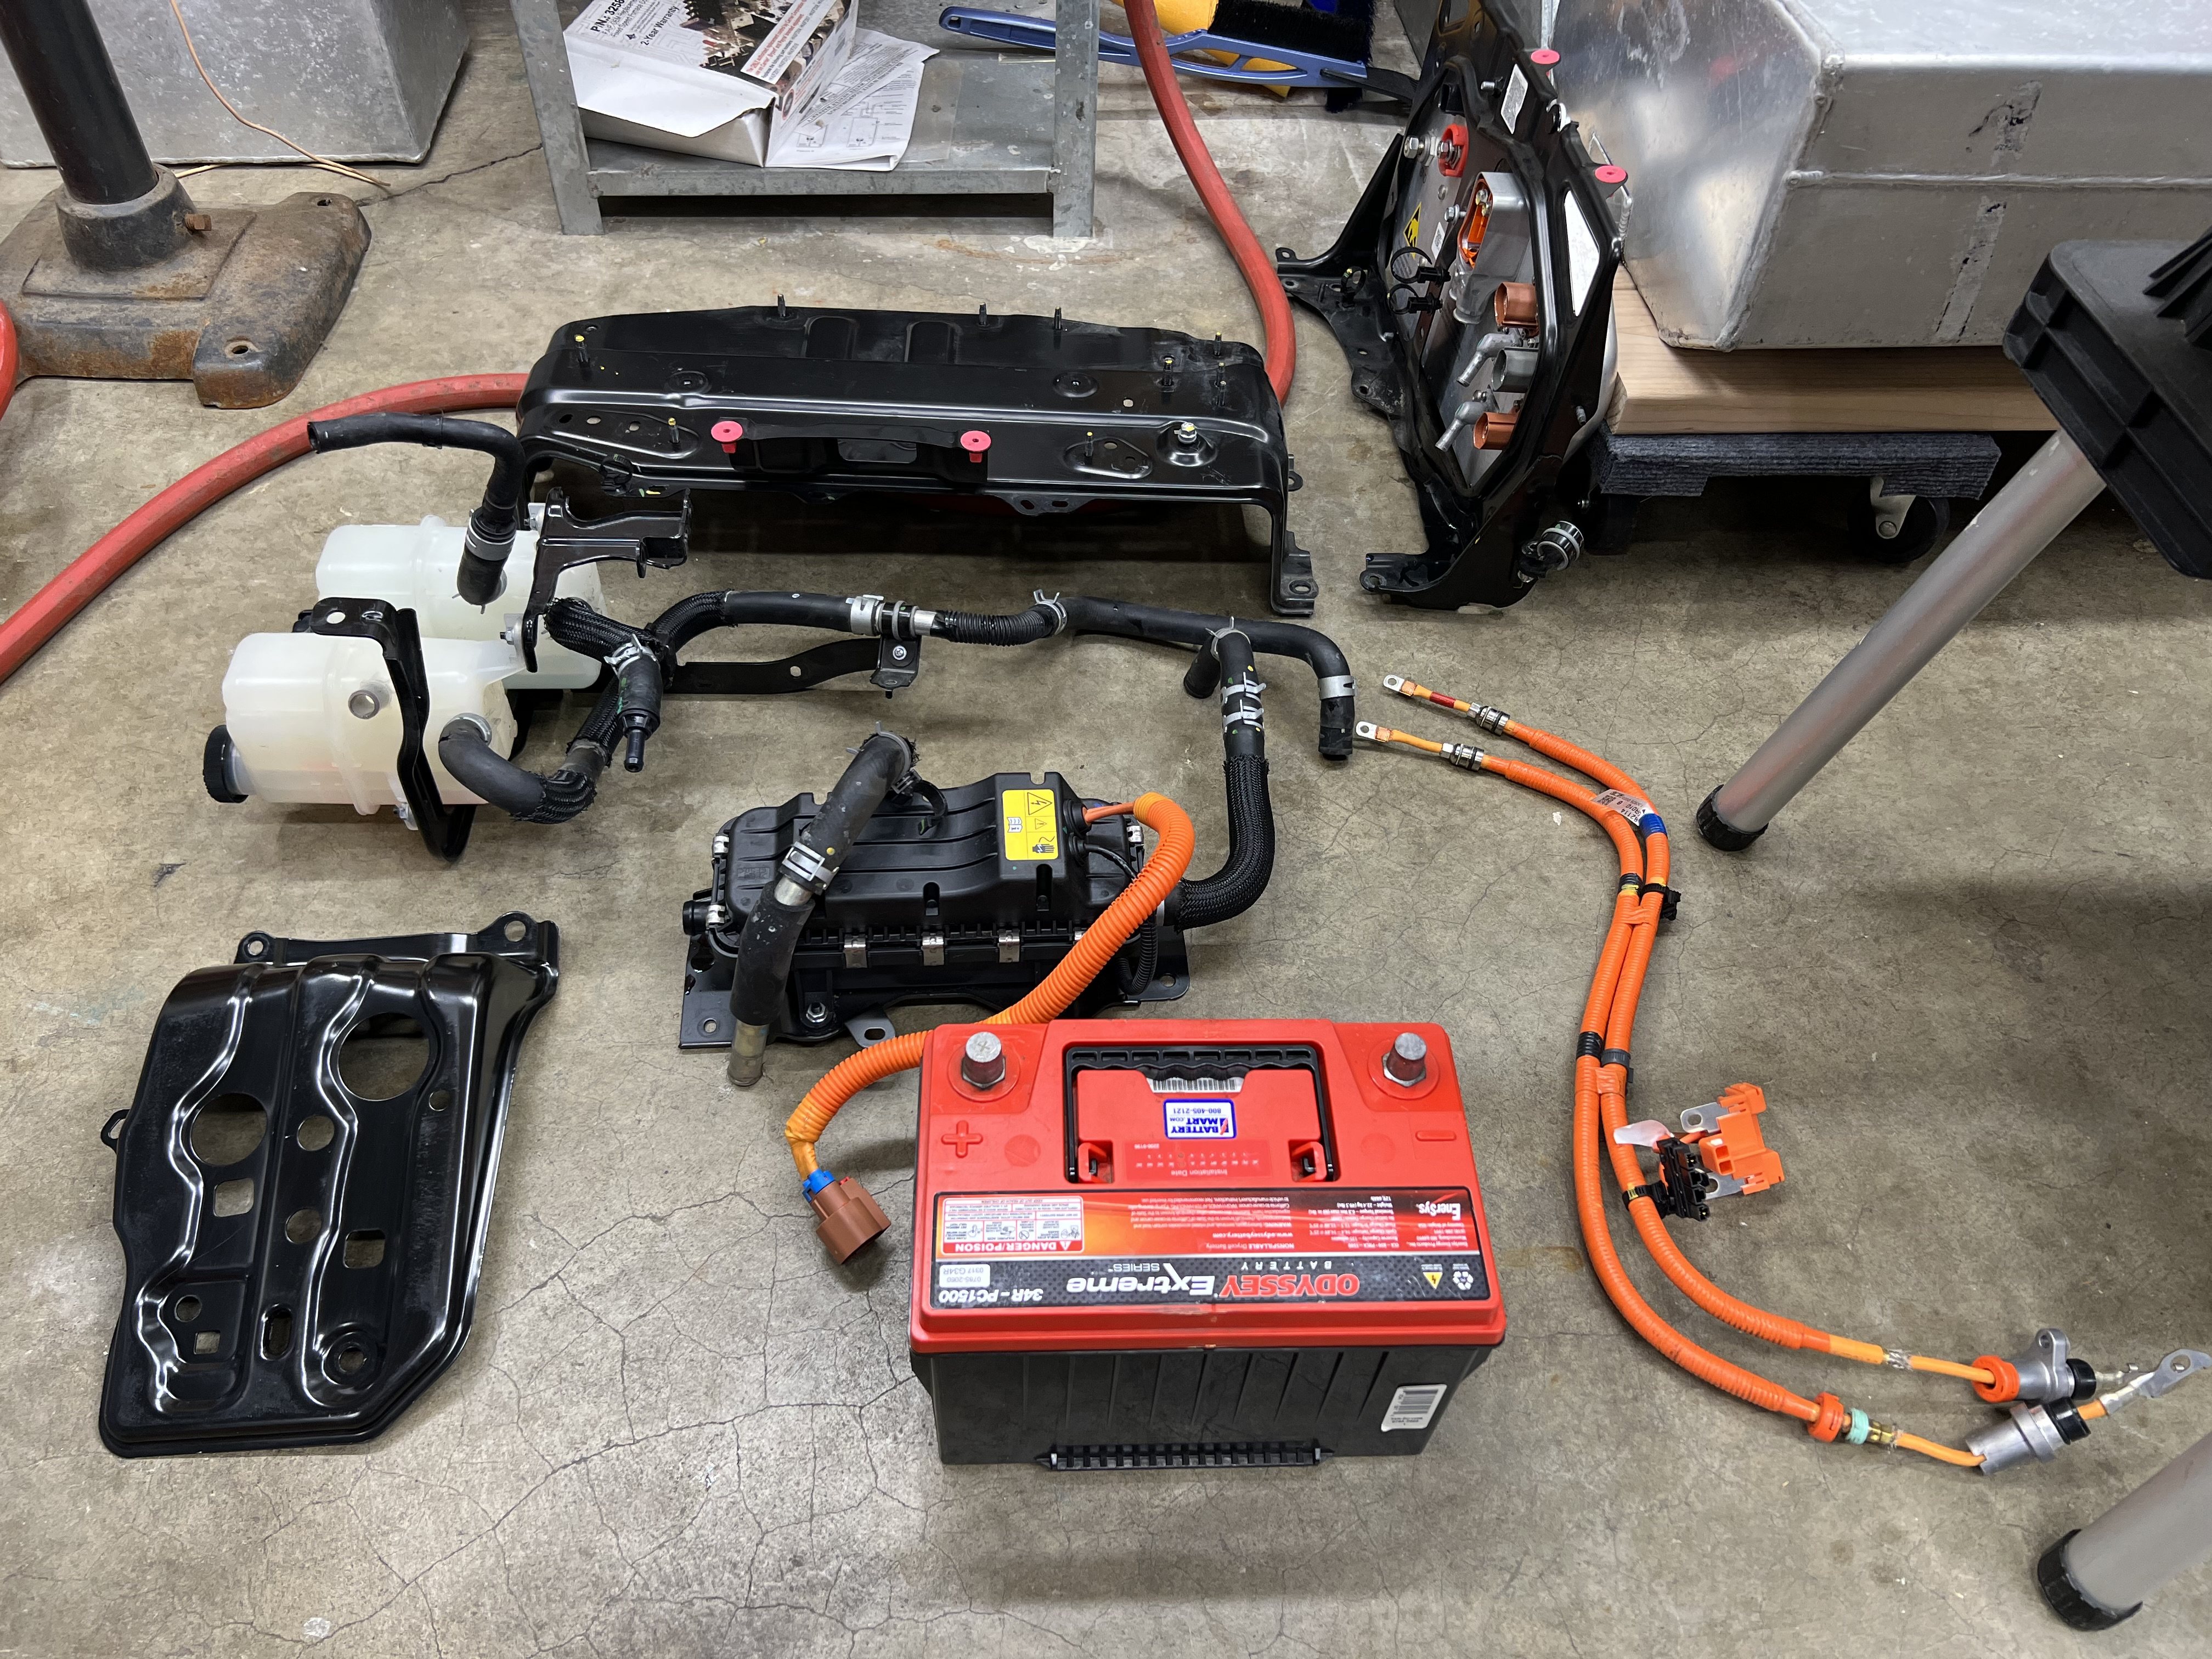
All the parts R&R'd:

 
asavage said:
I had an OBC AC fuse blow on my RAV4 EV, a month ago. It was sitting at a body shop, awaiting a replacement bumper, repair LF fender, and a door ding -- yet another idiot turned into me. The idiot's insurance paid for all repairs, but the body shop called me and said they could not charge it using the OEM L1 EVSE. By the time I got to it, the 12v battery was completely, totally flat (and it's a $340 battery, ugh).
...
Thanks for the detailed description!

Question. Does your Tesla software have such a limitation?
https://alflash.com.ua/2019/to_rav4ev/license_es.png
 
alflash said:
Question. Does your Tesla software have such a limitation?
https://alflash.com.ua/2019/to_rav4ev/license_es.png
Yes. I was led to believe that "everybody's" cracked TPD would expire in May2023.

I obtained mine from a Ukrainian who was helpful when I had trouble on setup, but who stopped responding before I could send payment. I assume they were a casualty of Putin's war. I donated $300 to a Ukraine support firm instead, since I cannot reach them.

At the time I obtained the installation, they mentioned that they were working on a further update to allow use beyond May2023. Meanwhile, I am hopeful that I can reset the laptop's date and turn off its internet access, to retain use.

[later]
I see they (or someone pretending to be them) have logged on yesterday, so I've sent a PM. Maybe I can pay them after all!

[two days later]
I was able to communicate with that person, who says they can generate a new licence string that will work after 29May2023, PLUS I was able to finally pay them.
 
hokiematt had some good advice for me:

Testing the circuit resistance of the AC input from the J1772 charge port end should also provide some differential numbers if a leg is open. I've traced the AC inputs internally on the OBC, and they're straight into those fuses.

Testing the Tesla OBC I have on the shelf, with good fuses:

  • Either AC input to chassis ground = ~2.6M Ω
  • AC-to-AC input = ~241k Ω

On my RAV4 EV with good fuses, these values are the same.

This should be a good first-pass diagnostic on a onboard chaarger with a bad fuse. Here are "good fuse numbers" on a diagram:


If one fuse is open, two of those numbers will be substantially higher.
 
Back
Top